The Dresden Plate quilt, with its captivating array of meticulously pieced flower-like shapes, has captivated quilters for generations. Its enduring popularity stems not only from its striking visual appeal but also from the satisfying process of creation. Vintage Dresden Plate quilts, in particular, offer a fascinating glimpse into the resourceful techniques employed by quilters of the past, often utilizing scraps and employing methods designed for maximum efficiency. These techniques, while sometimes seemingly simple, yield incredibly stunning results, showcasing the beauty of precision and the artistry of repetition.
This article delves into the heart of efficient vintage Dresden Plate quilting, exploring time-honored methods that will enable you to create your own breathtaking masterpiece. We'll guide you through a detailed, step-by-step process, revealing the secrets to crafting perfectly formed Dresden plates and assembling them into a stunning finished quilt, regardless of your skill level.
Safety Guidelines
- Always use sharp needles and rotary cutters to prevent fabric slippage and ensure clean cuts, minimizing the risk of injury.
- When using your sewing machine, be mindful of your fingers and keep them away from the needle plate and moving parts. Use a seam guide for consistent seam allowances.
- Handle vintage fabrics with care; they may be delicate and prone to damage. Pre-wash fabrics to prevent shrinkage and color bleeding before cutting and sewing.
Methods: Concentric Circles Quilting
Tools Needed
- plastic tablecloth
- duct tape
- quilting machine
Step-by-Step Instructions
Preparation
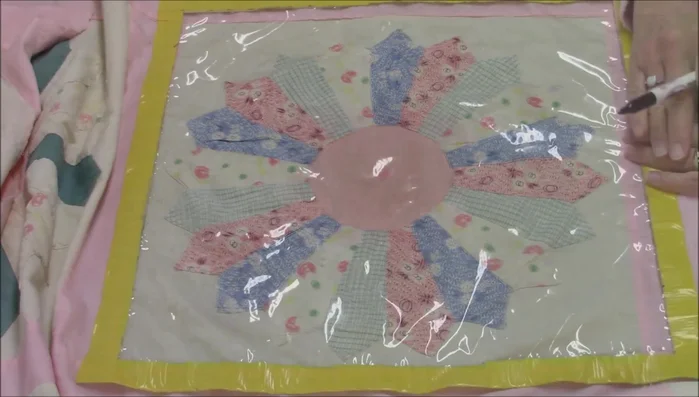
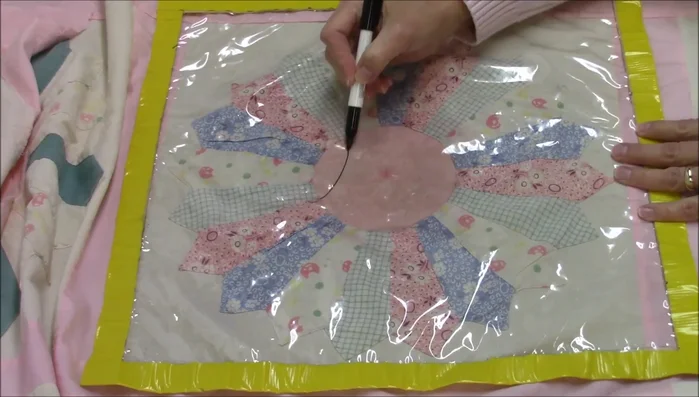
- Draw three concentric circles as a guideline on plastic tablecloth.

Preparation Quilting
- Use the guide to quilt three concentric circles on the Dresden plate center.
Quilting
Methods: Simple Cross-Hatching
Tools Needed
- plastic tablecloth
- duct tape
- quilting machine
Step-by-Step Instructions
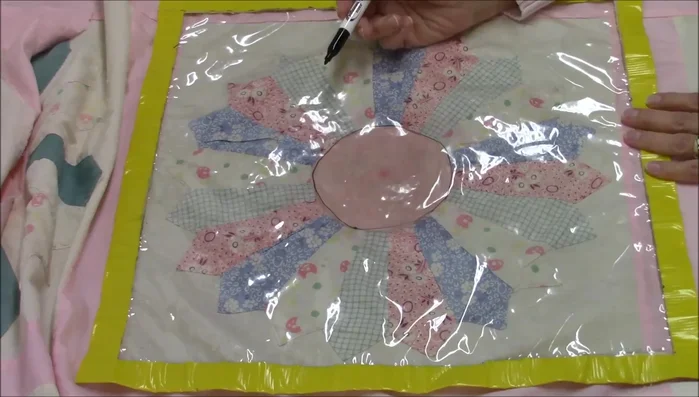
Prepare the template
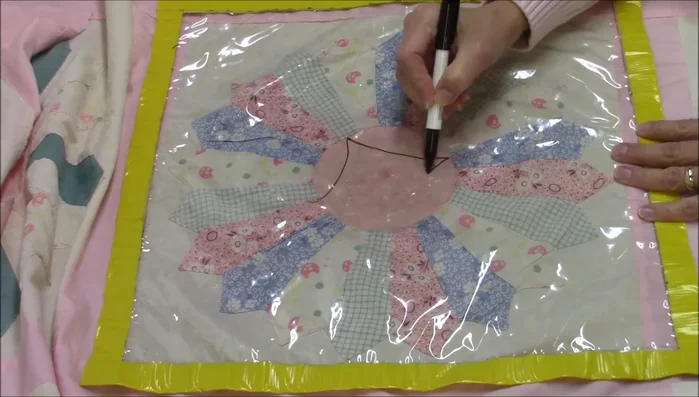
- Draw simple cross-hatching lines on plastic tablecloth.
Prepare the template Quilt the Dresden plate
- Use the guide to quilt two lines across in each direction on the Dresden plate center.
Quilt the Dresden plate
Methods: Continuous Curve Quilting
Tools Needed
- plastic tablecloth
- duct tape
- quilting machine
Step-by-Step Instructions
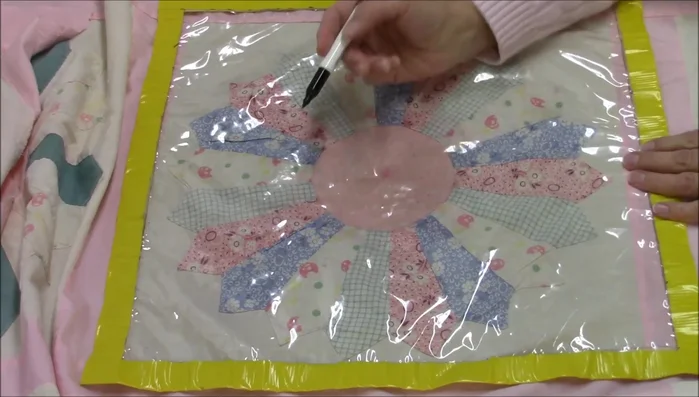
Prepare Template
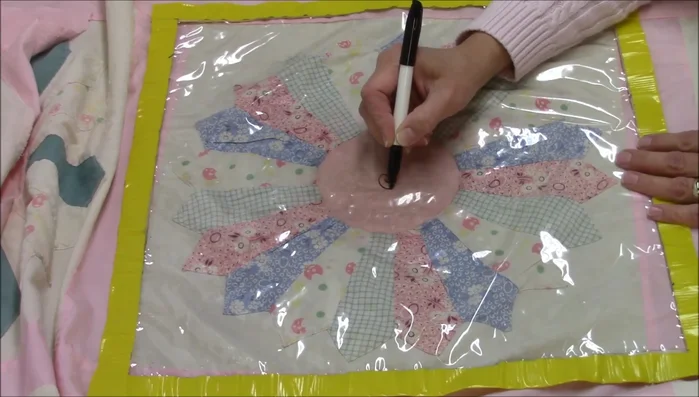
- Draw a continuous curve pattern on plastic tablecloth.
Prepare Template Quilt Dresden Plate
- Use the guide to quilt a continuous curve around the Dresden plate center. Consider adding a flower in the center.
Quilt Dresden Plate
Methods: Spiral Feather Quilting
Tools Needed
- plastic tablecloth
- duct tape
- quilting machine
Step-by-Step Instructions
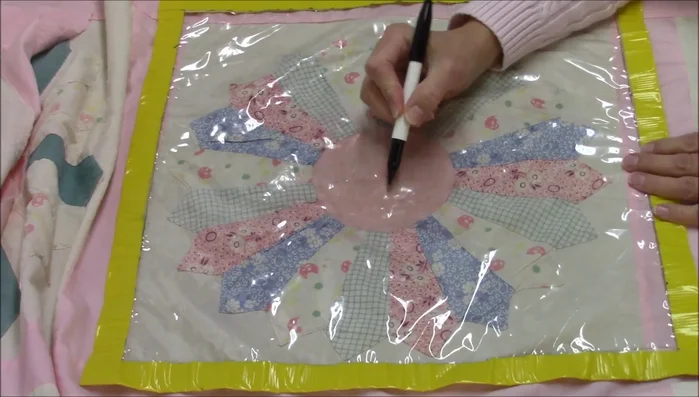
Prepare the Design Template
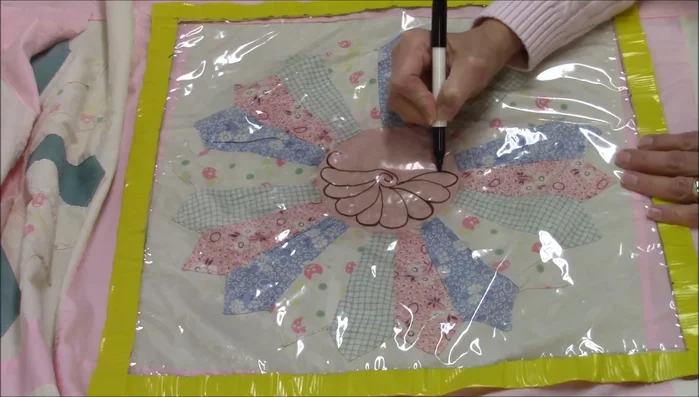
- Draw a spiral or a spin feather pattern on plastic tablecloth.
Prepare the Design Template Quilt the Dresden Plate
- Use the guide to quilt the spiral feather pattern around the Dresden plate center. Adjust circle size as needed.
Quilt the Dresden Plate
Read more: 3 Easy Pieced Heart Tutorials for Quilting Projects