The delicate dance of needle and thread, creating flowing feathers across fabric – freehand feather quilting and embroidery is a captivating skill that elevates quilting and textile art to new heights. This seemingly intricate technique, with its graceful curves and rhythmic stitches, can initially appear daunting, but with patience and practice, anyone can master its elegance. The beauty of freehand feathering lies in its spontaneous nature, allowing for unique and expressive designs limited only by your imagination.
This guide offers a comprehensive, step-by-step approach to conquering this rewarding technique, transforming apprehension into confident creation. From choosing the right tools and fabric to understanding the foundational feather stitch and progressing to more advanced designs, we will unravel the secrets behind creating stunning, bespoke freehand feather work. Let's begin our journey towards mastering this beautiful craft!
Safety Guidelines
- Always use sharp needles appropriate for your fabric and thread. Dull needles can cause skipped stitches, fabric damage, and increase the risk of needle-related injuries.
- Maintain proper posture and lighting to avoid eye strain and physical discomfort during prolonged quilting or embroidery sessions. Take breaks as needed.
- Keep your work area clean and organized to prevent accidental pricks or snags. Secure loose threads to avoid tangling and accidents.
Methods: Creating a Bouquet of Freehand Feathers with Embroidery Accents
Tools Needed
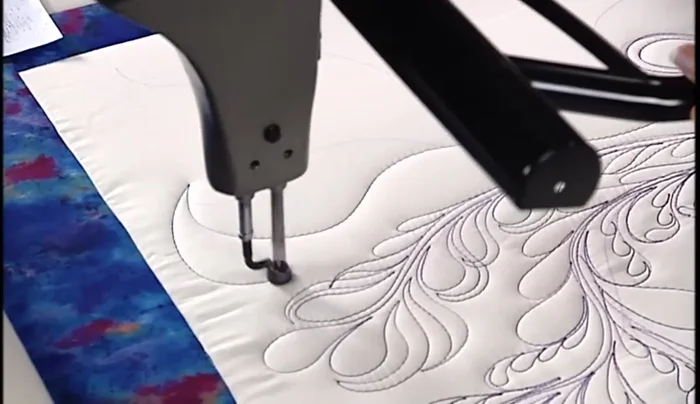
- Longarm quilting machine
- Embroidery machine
- Threads
- Sketch
Step-by-Step Instructions
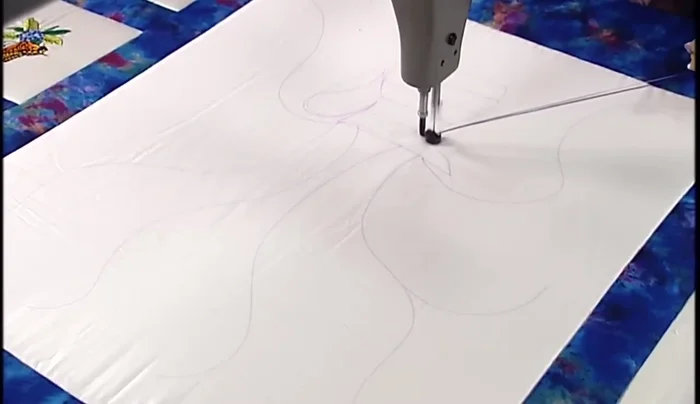
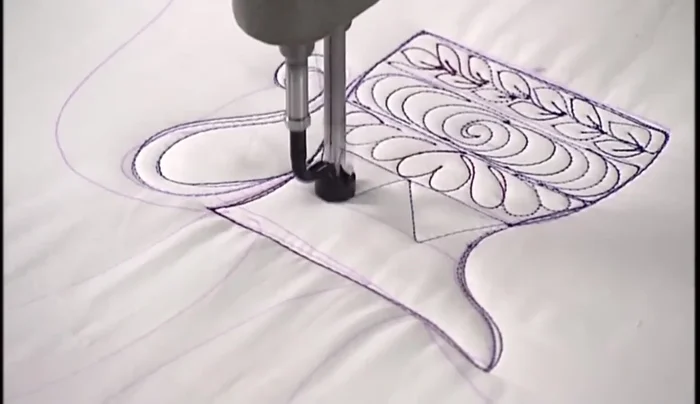
Sketch and Prepare
- Draw a pot and stems as guidelines for the feathers.
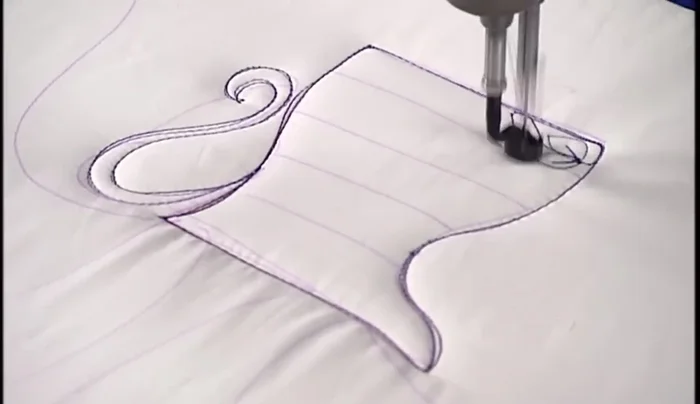
Create the Pot
- Stitch the pot outline multiple times for emphasis.
- Add leaves and stems inside the pot using simple stitching.

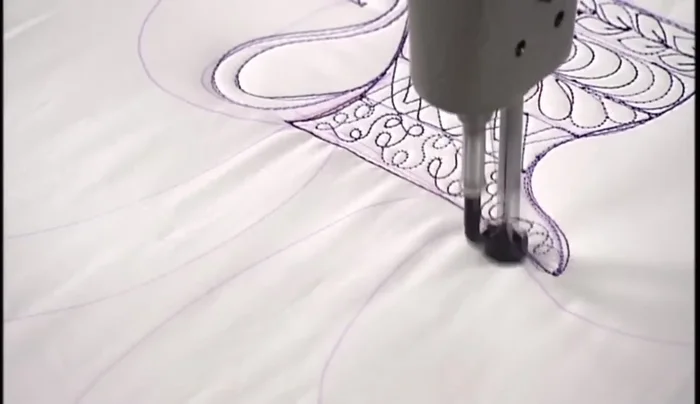
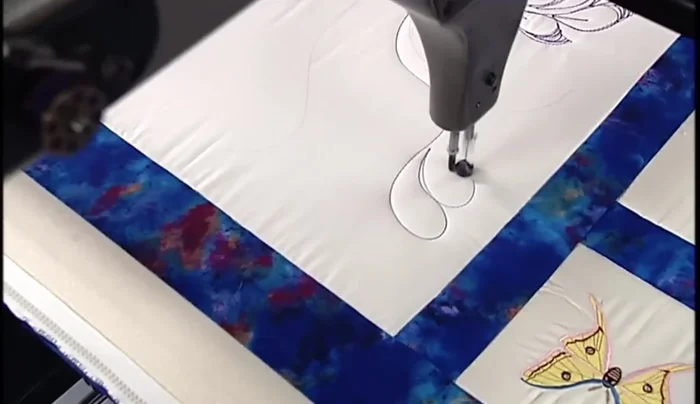
Create the Pot Basic Feather Construction
- Create the basic feather shape by following the stem with round curves.
- Add stems and pointed V-shapes to the feathers.
- Use different techniques for variation, such as zigzag lines, loops and double lines.
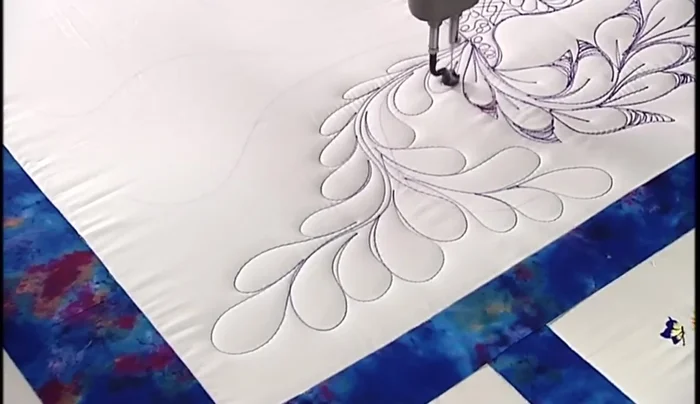
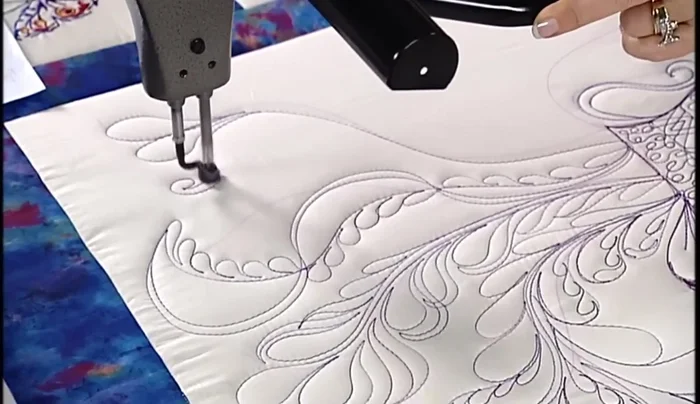
Basic Feather Construction Advanced Feather Techniques
- Stitch a smaller feather branching off from a main feather.
- Add additional smaller feathers inside the larger feathers.
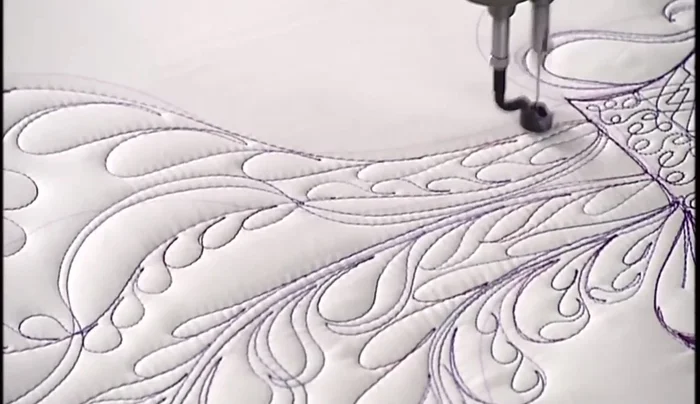
- Create a fern design using back-and-forth points, maintaining the V-shape parallel to the stem.
- Create curved ribbon shapes, emphasizing the heels (outer curve) and adding feathers in the valleys (inner curve).
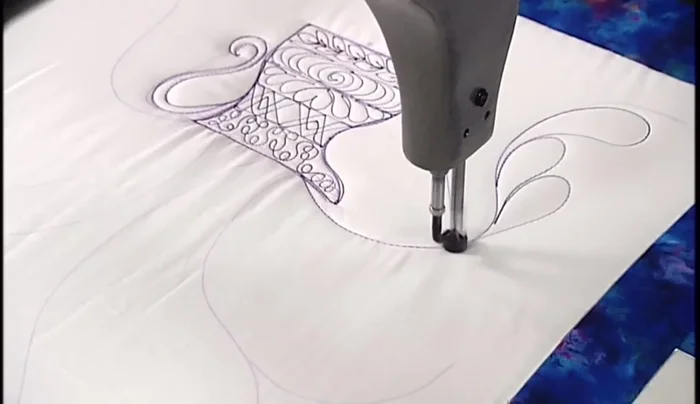
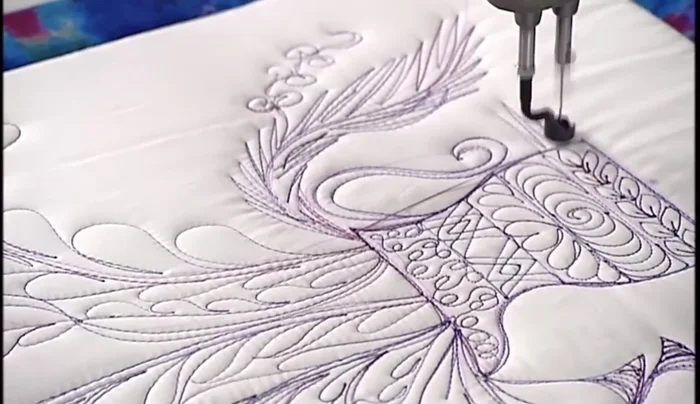
Advanced Feather Techniques - Create a regular feather then add a curl, forming a small bonnet-like shape.
Advanced Feather Techniques Finishing Touches
- Finish by adding a background or ground close to the pot to create a dimensional look.
Finishing Touches
Tips
- Practice on paper first: This helps to visualize and plan your design before stitching.
- Don't be afraid to experiment: Try different feather variations and combinations.
- Integrate feathers back into main stem: Seamlessly blend your feather variations into the main stems for a cohesive look.
Read more: 3 Easy Pieced Heart Tutorials for Quilting Projects