Transform your fabric scraps into stunning creations with these five fast and easy raw edge appliqué techniques! Tired of overflowing fabric bins and wishing you could use those precious little pieces? Raw edge appliqué offers a wonderfully simple yet impactful way to breathe new life into your scraps, creating unique and charming designs on everything from tote bags and quilts to clothing and home décor. This technique requires minimal sewing expertise and lets you focus on playful patterns and vibrant color combinations. No need for tedious turning and finishing of edges—simply fuse and stitch!
Forget time-consuming appliqué methods; this guide focuses on quick and accessible techniques perfect for beginners and seasoned crafters alike. We'll explore five different approaches, each with its unique charm and suitability for various fabrics and projects. Get ready to delve into the step-by-step instructions for each method below, and discover how to effortlessly create beautiful, one-of-a-kind pieces using your treasured fabric scraps.
Safety Guidelines
- Always use sharp, fresh needles and appropriate scissors to prevent fabric damage and ensure clean cuts. Dull tools can cause fraying and make the process more difficult.
- Handle your fabric carefully to avoid snags or pulls, especially with delicate materials. Gently maneuver the pieces during application.
- If using a glue adhesive, ensure it's suitable for your fabric types and test it in an inconspicuous area first to avoid staining or damage.
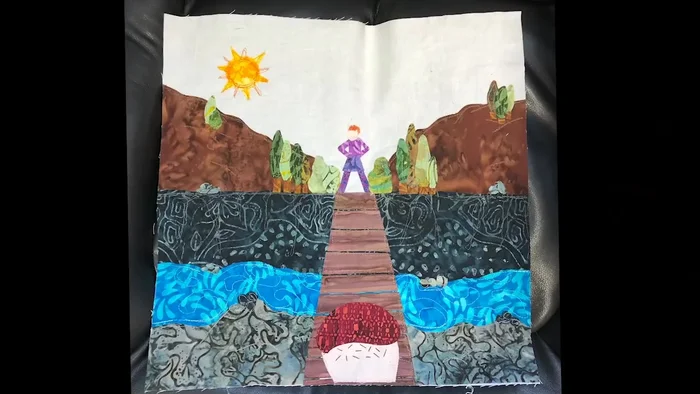
Methods: Scrappy Background with Defined Shapes
Tools Needed
- Fabric scraps
- Flexi Fuse fusible webbing
- Scrap batting
- Iron
- Parchment paper
- Clip art (optional)
Step-by-Step Instructions
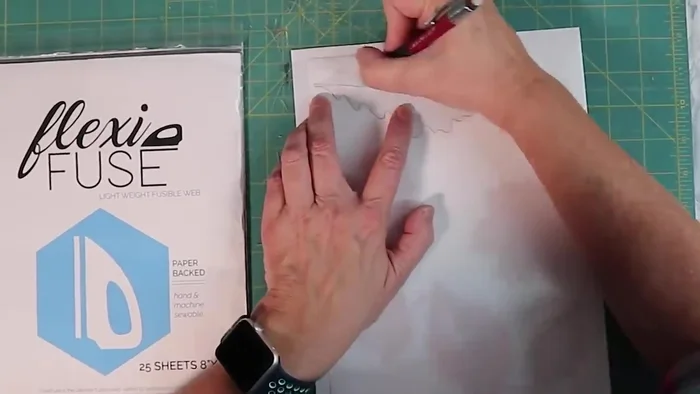
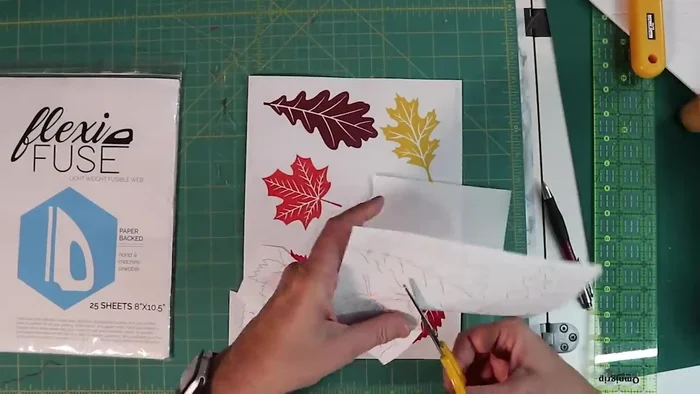
Prepare Appliqué Shapes
- Mark or trace your design (e.g., leaves) onto the paper side of Flexi Fuse.
- Roughly cut out the design.
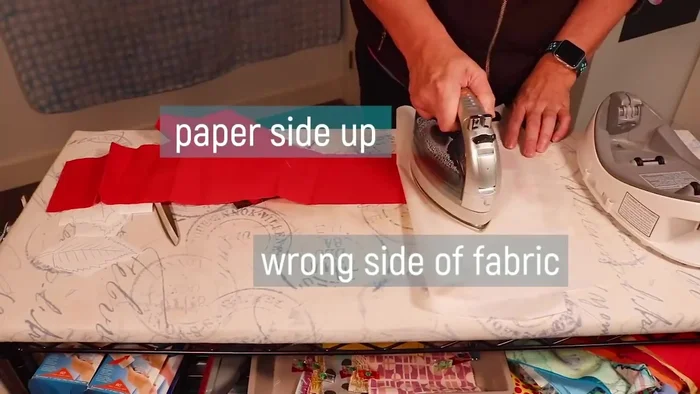
- Fuse the shape to the wrong side of your scrap fabric using parchment paper to protect your iron.
- Cut out your shape.

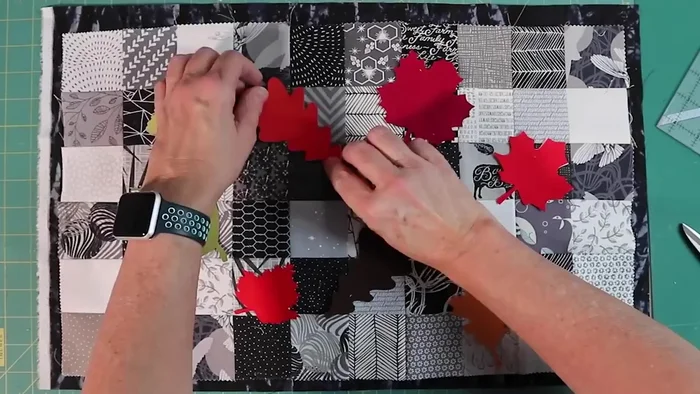
Prepare Appliqué Shapes Create Scrappy Background
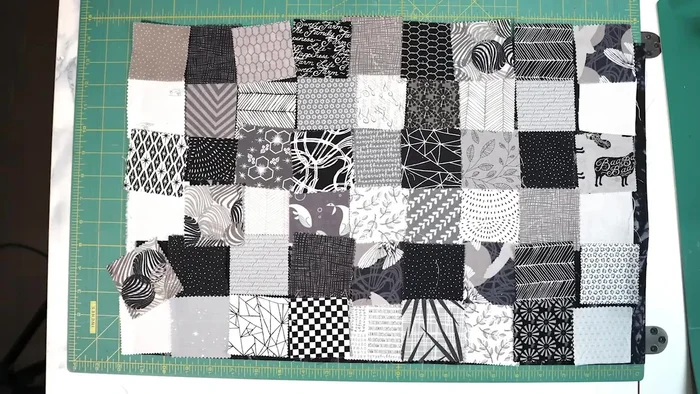
- Sew together scrappy squares to create a background.
Create Scrappy Background Assemble and Fuse Appliqué
- Arrange shapes on the background, then fuse in place.
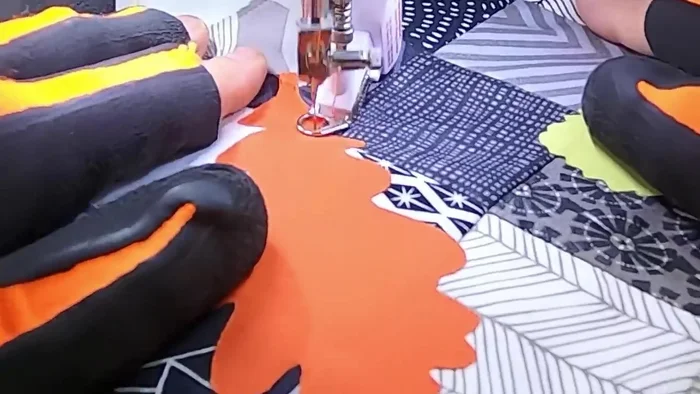
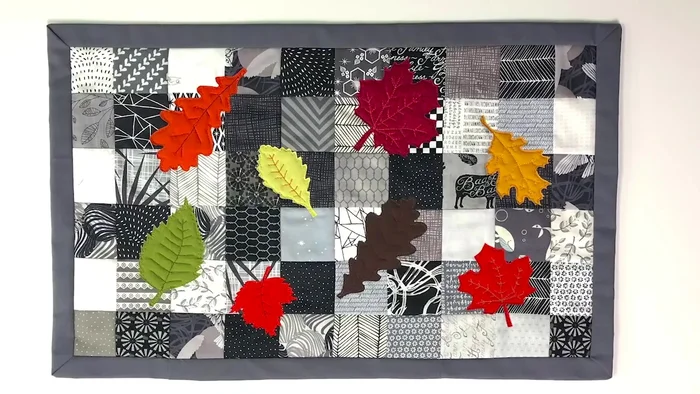
Assemble and Fuse Appliqué Quilt and Bind
- Create a quilt sandwich and sew the appliqué in place (straight stitch, zigzag, blanket stitch).
- Add binding.
Quilt and Bind

Tips
- Shift Flexi Fuse shapes together to conserve webbing.
- Press fabric scraps to remove creases before fusing.
- Fuse in stages to prevent pieces from shifting.
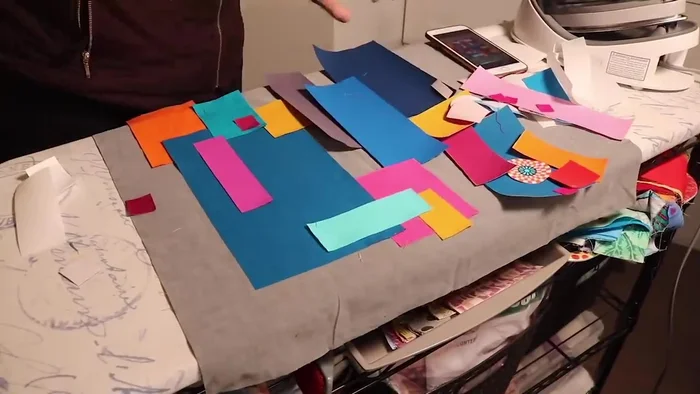
Methods: Scrappy Collage Appliqué
Tools Needed
- Fabric scraps
- Flexi Fuse fusible webbing
- Scrap batting
- Iron
- Parchment paper
Step-by-Step Instructions
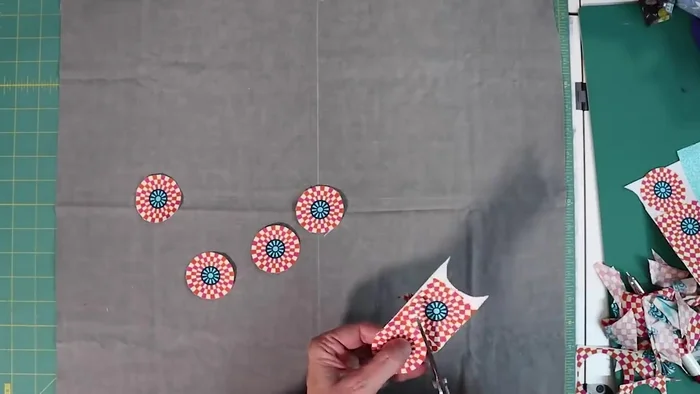
Prepare Fabric Shapes
- Fuse fabric scraps to Flexi Fuse, then cut out shapes.
Prepare Fabric Shapes Design the Collage
- Arrange shapes on a solid background fabric.
Design the Collage Fuse and Assemble Collage
- Fuse the collage in place in sections.
Fuse and Assemble Collage Quilt the Collage
- Create a quilt sandwich and quilt as desired.
Quilt the Collage

Tips
- Take a photo of your design before fusing to use as a guide.
- Work in sections to keep pieces aligned.
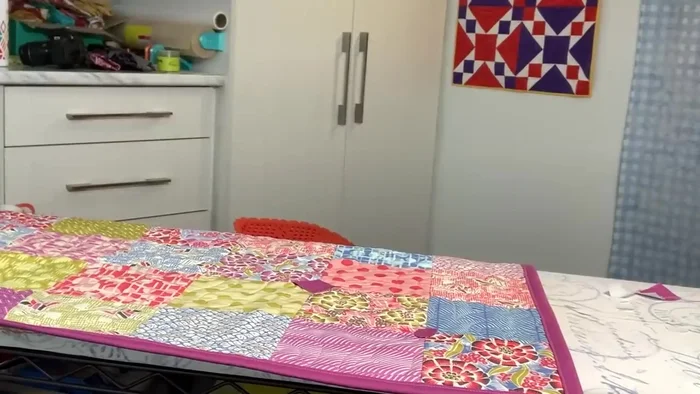
Methods: Adding Appliqué After Quilting
Tools Needed
- Fabric scraps
- Flexi Fuse fusible webbing
- Iron
Step-by-Step Instructions
Assess the Quilt
- Take a black and white photo of your quilt to assess value and contrast.
Assess the Quilt Select Fabrics
- Choose scrap fabrics to add contrast or interest.
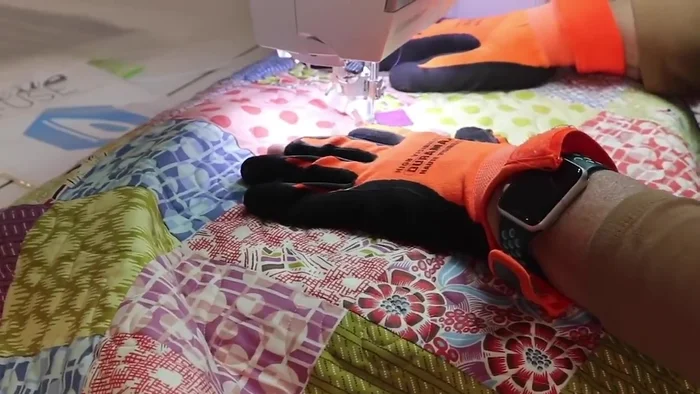
Apply Appliqué
- Fuse the chosen fabric scraps to the quilt.
Apply Appliqué Quilt and Finish
- Sew the patches in place, adding texture and design with quilting and thread.
Quilt and Finish

Tips
- Experiment with shapes, sizes, and layering.
Read more: 3 Easy Pieced Heart Tutorials for Quilting Projects