Log cabin quilt blocks, with their iconic concentric squares radiating outwards, are a timeless and beloved quilting pattern. Their simple construction belies a surprising versatility, allowing for endless color combinations and design variations. Mastering just a few key techniques can elevate your log cabin creations from charmingly rustic to truly stunning works of art. From achieving perfectly crisp seams to managing fabric waste efficiently, there's always room for improvement in your technique.
This article will explore three effective quilting techniques specifically designed to enhance your log cabin quilt block construction, significantly improving the overall look and feel of your finished project. We'll delve into a step-by-step guide, providing practical advice and helpful tips to help you confidently create beautiful, professional-looking log cabin quilts.
Safety Guidelines
- Always use sharp needles and rotary cutters to prevent fabric slippage and ensure clean cuts. Dull tools increase the risk of injury and inaccurate piecing.
- Handle your rotary cutter with extreme care. Keep fingers away from the blade and always store it safely when not in use to prevent accidental cuts.
- Press your seams carefully and consistently – either open or to one side – to create a flat, well-constructed block. Inconsistent pressing can lead to puckering and distortion.
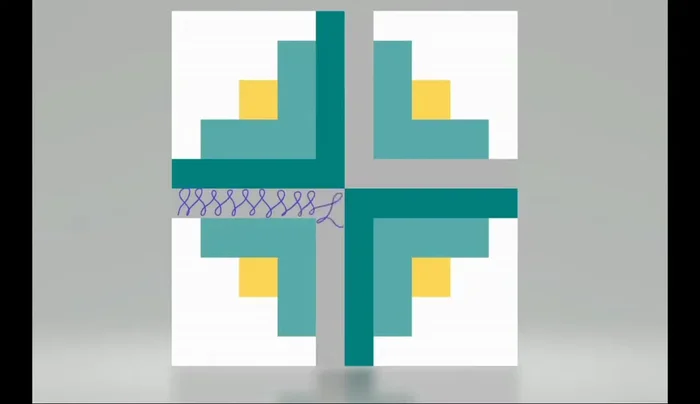
Methods: Quilting Individual Sections with Varied Borders
Tools Needed
- sewing machine
- quilting supplies
Step-by-Step Instructions
Quilt Individual Log Cabin Sections
- Quilt each section of the log cabin block individually.
- Use different quilting designs or patterns for each section. Alternate designs for visual interest.

Quilt Individual Log Cabin Sections Keep Background Simple
- Keep the background simple (e.g., straight lines) to avoid overwhelming the design.
Keep Background Simple

Tips
- Consider using similar designs in opposite corners for cohesion.
- Alternating designs keeps it interesting without being overly busy.
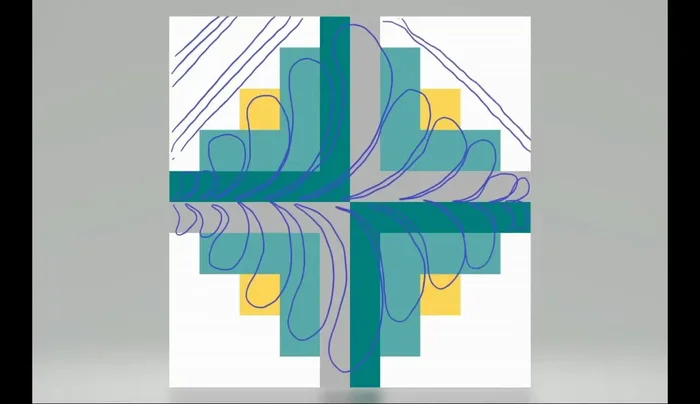
Methods: Treating the Entire Block as One Unit with a Large Motif
Tools Needed
- sewing machine
- quilting supplies
Step-by-Step Instructions
Envisioning the Log Cabin Block as One Unit
- Treat the entire log cabin block as a single design element.
Envisioning the Log Cabin Block as One Unit Applying a Large Central Motif
- Fill the entire block with one large quilting design (e.g., a large feather).
Applying a Large Central Motif Framing the Main Design
- Frame the main quilting design with a border design to draw attention to the center.
Framing the Main Design


Tips
- Diagonal lines can effectively frame the main design.
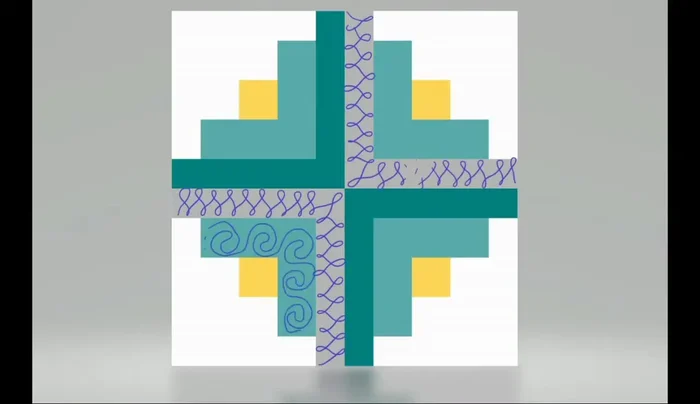
Methods: Quilting Based on Unified Shapes within the Block
Tools Needed
- sewing machine
- quilting supplies
Step-by-Step Instructions
Define Quilting Units
- Identify and quilt sections of similar colors or shapes as a single unit.
Define Quilting Units Connect and Emphasize Shapes
- Use quilting lines to connect or define these shapes.
Connect and Emphasize Shapes Add Visual Interest
- Add unexpected shapes (e.g., diamonds, squares) to create visual interest.
Add Visual Interest Complete the Background
- Use echoing and simple background quilting to complement the main design.
Complete the Background


Tips
- Use double lines for quilting to make them stand out against the background.
Read more: 3 Easy Pieced Heart Tutorials for Quilting Projects