Hearts are a timeless symbol of love and affection, making them a popular motif in quilting projects. Whether you're crafting a Valentine's Day quilt, a baby blanket, or a heartfelt gift for a loved one, incorporating charming heart designs adds a unique touch of personality. From simple and quick projects to more intricate pieces, the possibilities are endless. This tutorial offers three easy-to-follow methods for piecing hearts, perfect for quilters of all skill levels, from beginners just starting their quilting journey to experienced crafters looking for a fresh approach.
This article will guide you through three distinct yet accessible heart-piecing techniques, each with its own unique charm and visual appeal. Get ready to learn how to create these delightful heart shapes with straightforward instructions and helpful diagrams, moving seamlessly from choosing your fabrics to sewing your finished heart blocks. Prepare to be amazed at how easily you can create these beautiful elements for your next quilting project!
Safety Guidelines
- Always use sharp scissors or a rotary cutter for clean cuts to ensure accurate piecing and prevent fabric fraying.
- Press seams open or to one side consistently throughout your project to maintain a flat, even quilt. Use a pressing tool (like a clapper or iron) appropriate to your fabric.
- Pay close attention to matching notches and seam allowances (usually 1/4 inch) for precise alignment of your heart pieces. Using a quilting ruler and a cutting mat can greatly improve accuracy.
Methods: Rectangular Heart
Tools Needed
- Fabric
- Ruler
- Rotary Cutter
- Mechanical Pencil
- Sewing Machine
- Iron
Step-by-Step Instructions
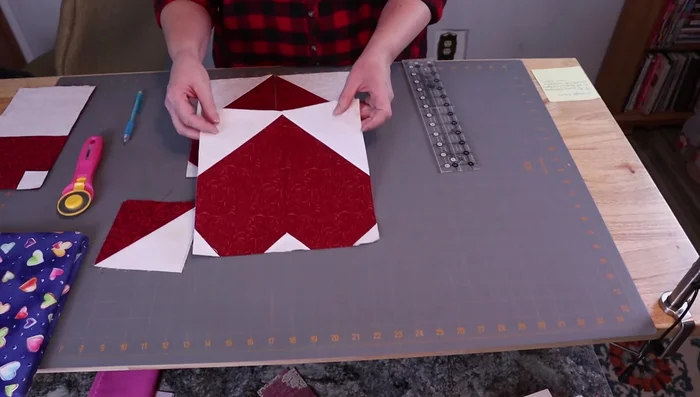
Prepare Fabric Pieces
- Four 1.5-inch background squares, two 5.5-inch background squares, and two 5.5 x 10.5-inch rectangle main heart pieces.

Prepare Fabric Pieces Draw Diagonal Lines
- Draw diagonal lines on background squares.
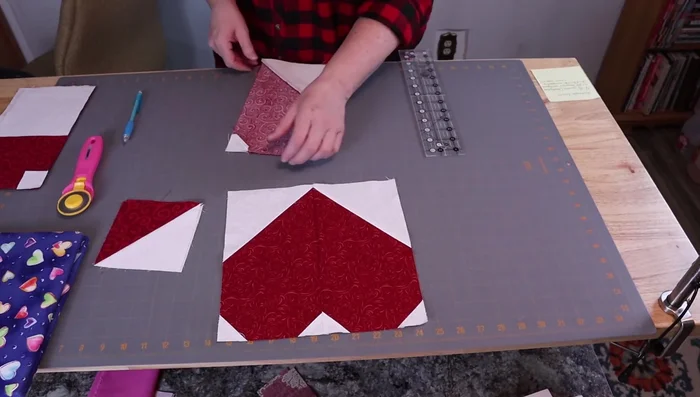
Draw Diagonal Lines Create Snowball Corners
- Sew and trim to create snowball corners, leaving 0.5 inch seam allowance for later use if desired.
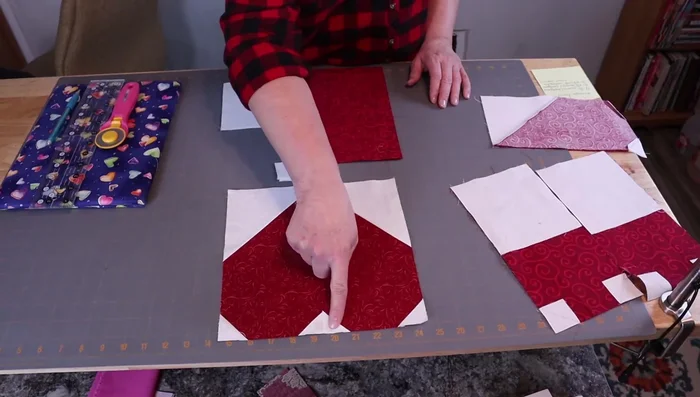
Create Snowball Corners Assemble the Heart
- Assemble the heart by joining the pieces along the drawn lines.
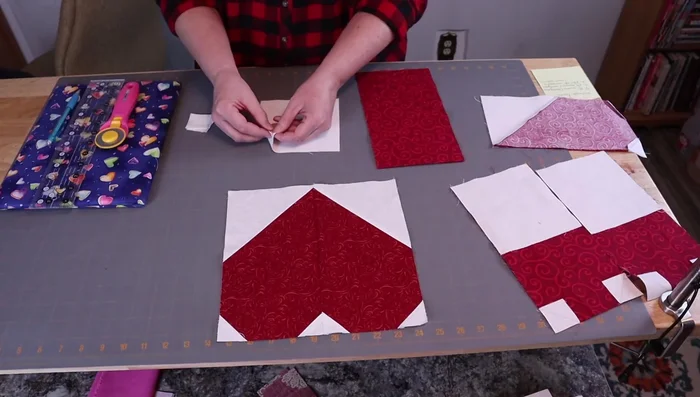
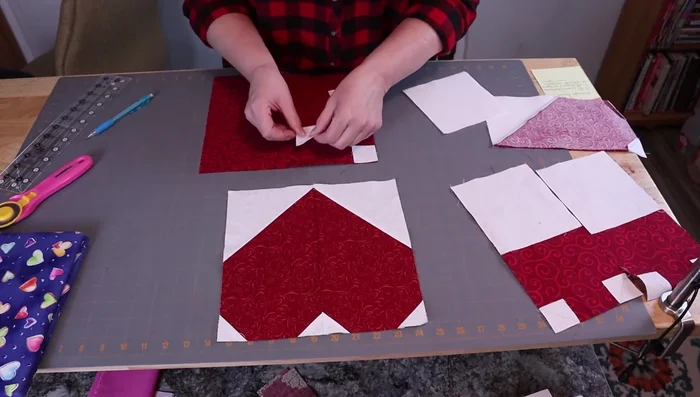
Assemble the Heart Press and Finish
- Press seams to create a flat, finished heart.
Press and Finish
Tips
- Use graph paper to plan and determine fabric sizes for hearts of any size.
- Press seams in alternating directions to nest nicely.
Methods: Four-Patch Heart
Tools Needed
- Fabric
- Ruler
- Rotary Cutter
- Mechanical Pencil
- Sewing Machine
- Iron
Step-by-Step Instructions
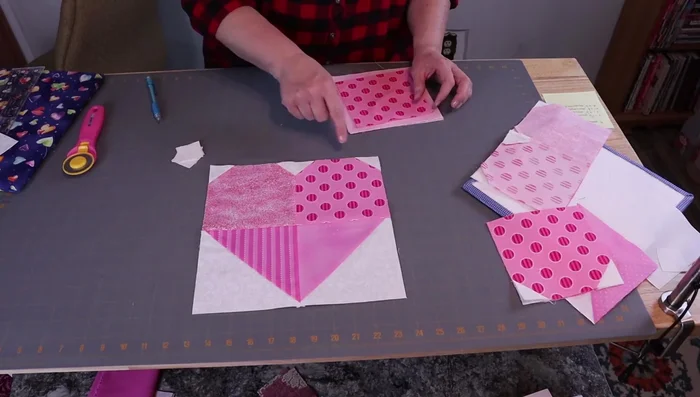
Prepare Fabric
- Four 1.5-inch squares, two 5.5-inch background squares, two 6.5-inch squares for half-square triangles.
Prepare Fabric Make Half-Square Triangles
- Create half-square triangles from 6.5-inch squares by drawing lines, sewing, trimming, and pressing.
Make Half-Square Triangles Assemble Heart Sections
- Assemble the top and bottom parts of the heart separately, using the half-square triangles and background squares. Press seams in alternating directions for nesting.
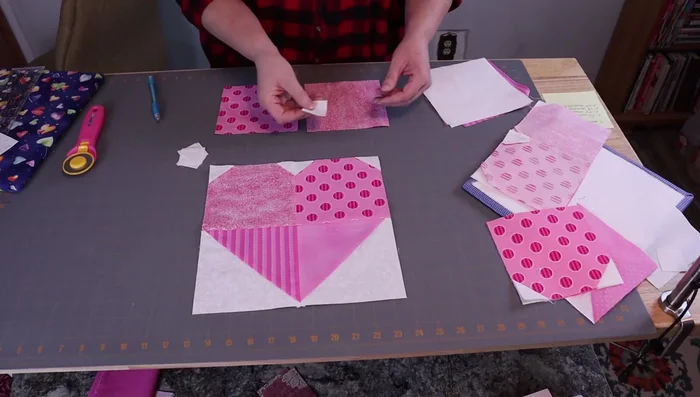
Assemble Heart Sections Join Heart Sections
- Join the top and bottom heart pieces together. Press seams in alternating directions.
Join Heart Sections


Tips
- Press seams in alternating directions for easier assembly and a clean finish.
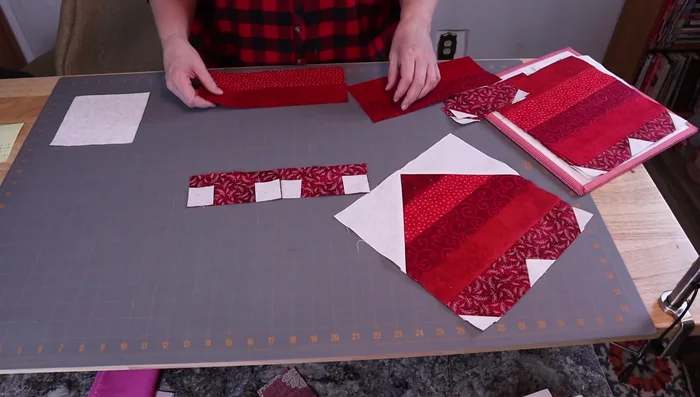
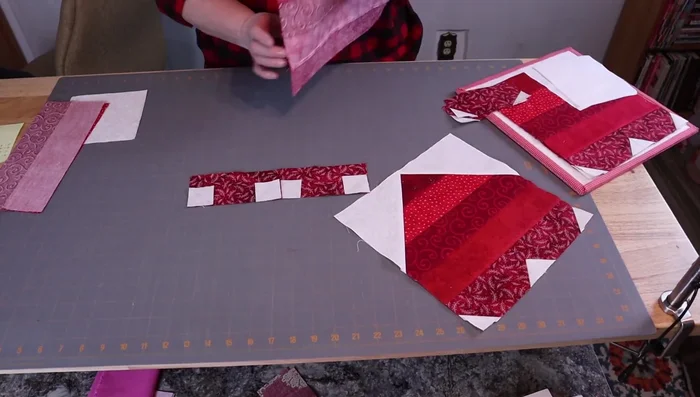
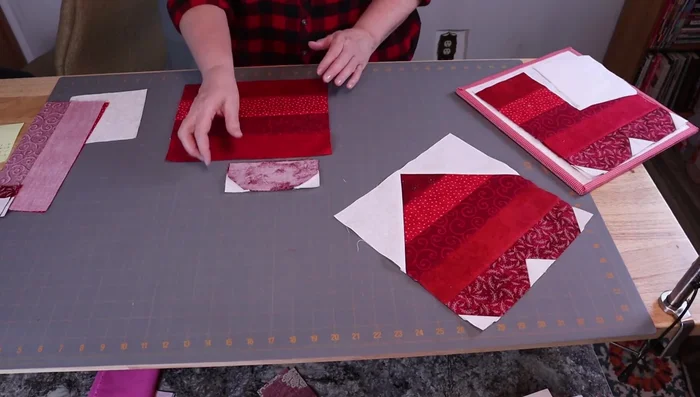
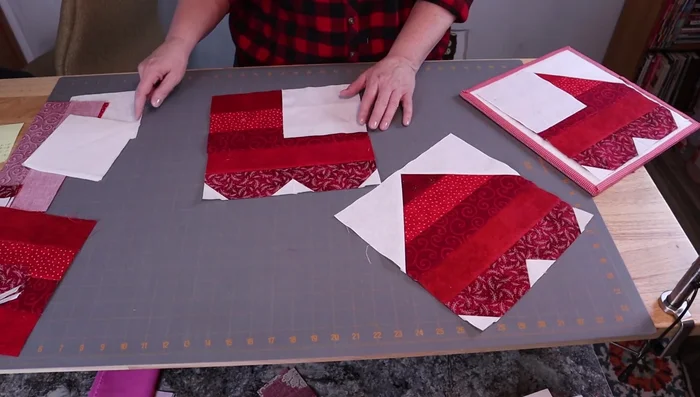
Methods: Strip-Pieced Heart
Tools Needed
- Fabric
- Ruler
- Rotary Cutter
- Mechanical Pencil
- Sewing Machine
- Iron
Step-by-Step Instructions
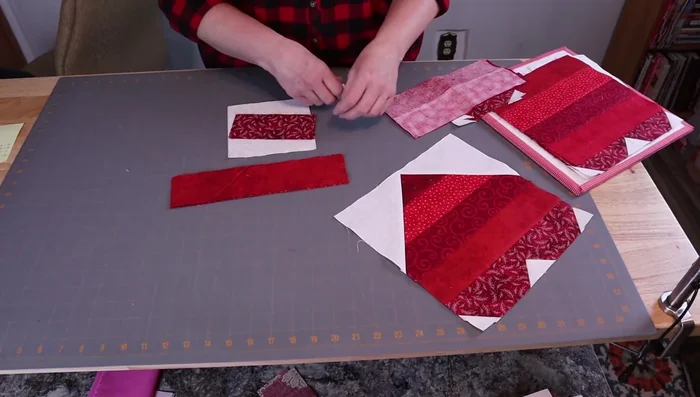
Prepare Fabric Pieces
- Four 1.5-inch squares, two 5.5-inch background squares, four 2.5 x 10.5-inch strips, two 2.5 x 5.5-inch rectangles.
Prepare Fabric Pieces Create Strip-Pieced Section
- Sew and assemble the four strips into two pairs. Press seams in one direction.
- Sew the two pairs of strips together. Press seams to one side.
Create Strip-Pieced Section Assemble Heart Sections
- Attach the strip pieced section to the four-patch section.
Assemble Heart Sections Snowball Corners and Finish
- Snowball the corners of the heart, sewing and trimming as before.
Snowball Corners and Finish
Tips
- Use a fresh rotary cutter blade for clean cuts.