Ever dreamt of crafting your own authentic-looking Viking tunic? Forget complicated patterns and hours of frustrating sewing – this tutorial unveils a remarkably simple yet effective method for creating a historically-inspired garment. We'll guide you through a straightforward approach, perfect for beginners and experienced crafters alike, allowing you to bring a piece of Viking Age history to life with minimal fuss. This isn’t about achieving perfect historical accuracy down to the last stitch, but about capturing the essence of a classic Viking tunic design with readily available materials and easy-to-follow instructions.
This simple approach prioritizes ease of construction without sacrificing a striking final product. Whether you're preparing for a historical reenactment, cosplay, or simply want a unique and stylish addition to your wardrobe, this tunic is a surprisingly achievable project. Ready to start stitching your own piece of Viking heritage? Let's dive into the step-by-step process!
Preparation and Safety Guidelines
- linen fabric
- needle
- thread
- measuring tape
- scissors
- thimble
- Use sharp fabric scissors to prevent injury and ensure clean cuts. Dull scissors can lead to uneven fabric edges and accidental cuts.
- Always handle needles and pins with care. Store them safely when not in use to avoid accidental pricks or ingestion by children or pets.
- If using natural fibers like linen or wool, pre-wash the fabric before sewing to prevent shrinkage after the tunic is completed.
Step-by-Step Instructions
Measurements and Cutting
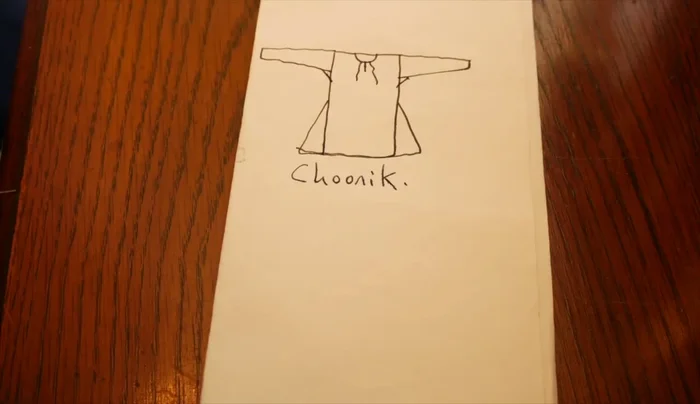
- Main body (shoulder to shin, doubled for length, chest width + a few inches), sleeves (arm circumference, shoulder to thumb knuckle), and underarm gussets (4 inches square).

Measurements and Cutting Attach Sleeves
- Sew the sleeves to the main body.
- Insert the underarm gussets.
Attach Sleeves Neckline Creation
- Make a slit a few inches forward of the halfway point, then extend the slit downwards to achieve the desired size and shape.
Side Seams
- Sew the side seams.
Hemming
- Hem the bottom of the tunic.
Hemming Finishing Touches
- Create small tabs and sew neckties to them for reinforcement and comfort.
Finishing Touches

Read more: Raglan Sleeve Sewing Tutorial: A Step-by-Step Guide
Tips
- Make the tunic bigger than needed; you can always trim excess fabric.
- Always use a thimble to prevent needle pricks.
- Start with a small neck hole and gradually enlarge it as needed to avoid a sagging neckline.