Frustrated with puckered darts that ruin the otherwise perfect lines of your garment? Achieving flawlessly smooth darts, those subtle yet crucial shaping elements, is the key to professional-looking sewing. A poorly executed dart can detract significantly from even the most beautifully chosen fabric and meticulously crafted garment. The frustration of ripping out seams and re-attempting a tricky dart is a common experience for sewists of all skill levels. But what if you could consistently achieve crisp, pucker-free darts every single time?
This article presents a tailored technique designed to eliminate the guesswork and frustration associated with dart sewing. We'll guide you through a step-by-step process, ensuring you master the art of dart creation and confidently elevate your sewing projects. Prepare to say goodbye to puckered frustration and hello to perfectly tailored garments.
Preparation and Safety Guidelines
- sewing machine
- scissors
- pins
- chalk
- measuring tape
- iron
- Always use sharp, high-quality needles appropriate for your fabric. Dull needles can cause skipped stitches and fabric damage, increasing the risk of injury.
- Take your time and maintain even tension throughout the stitching process. Rushing can lead to puckering and uneven finishes.
- Use a tailor's clapper or a pressing cloth to press seams open gently as you go, preventing distortion and ensuring a crisp, flat finish. Avoid applying excessive heat or pressure which could scorch delicate fabrics.
Step-by-Step Instructions
Prepare the Dart
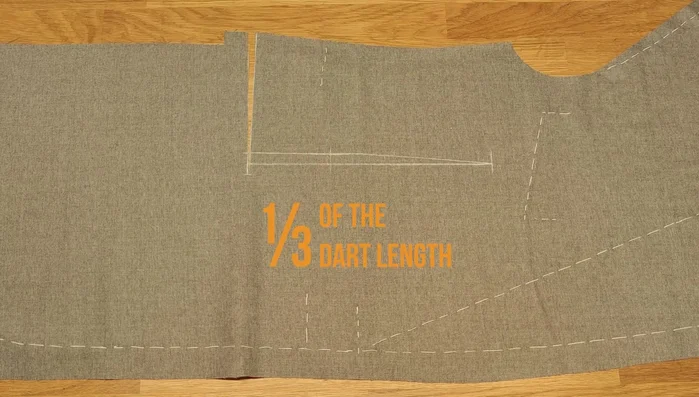
- Mark the center of your dart and add half the dart width to each side. No need to mark both sides if your dart is symmetrical.
- Cut about 1/3 of the dart length. Fold it in half with the base outside the chalk line for basting.

Prepare the Dart Prepare the Attachment Stripe
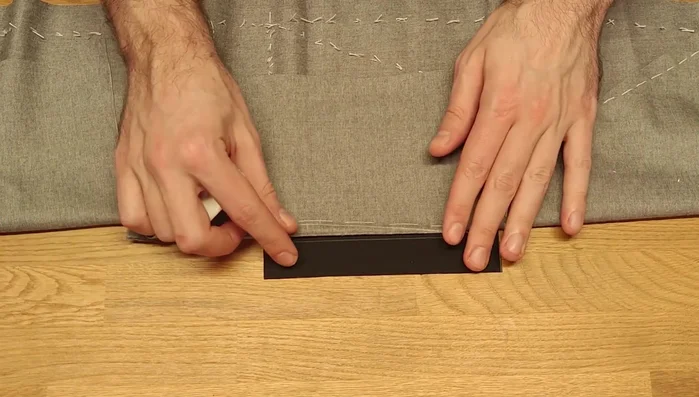
- Prepare a cloth stripe (approx. 4-5cm wide and 15-16cm long). Mark its center.
- Position the stripe so the top is about 4cm above the dart point. Pin or baste.
Prepare the Attachment Stripe Stitch the Dart
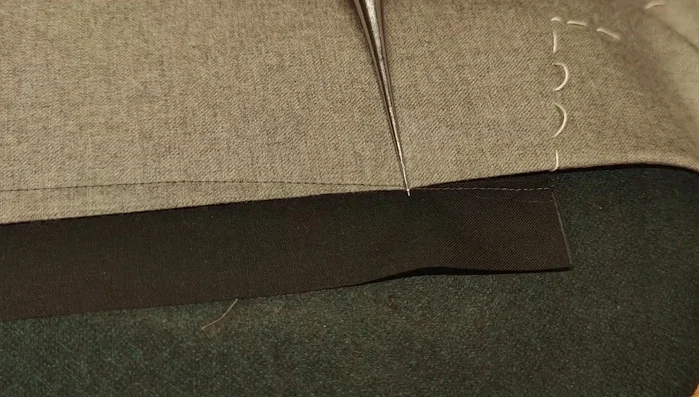
- Machine stitch the attachment piece without locking the stitch. Sew through the dart point, avoiding backtacking.
- Finish the dart stitching to the end; lock the stitch with several cm of sewing. Don't backtack.
Stitch the Dart Press and Trim
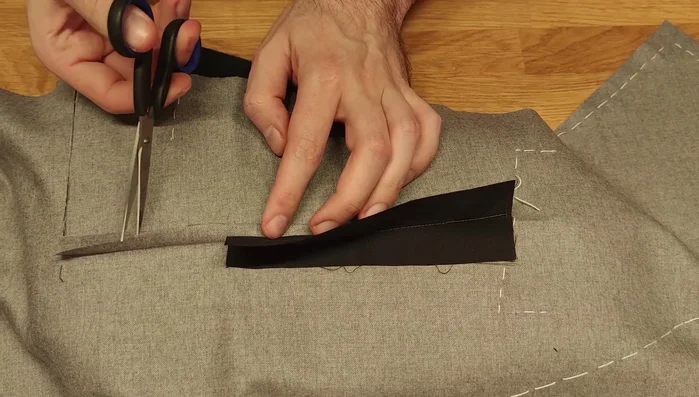
- Press everything flat.
- Cut the seam allowance closer to the black stripe (but not all the way), leaving several millimeters uncut.
- Press open. Trim the top layer to make it slightly narrower than the bottom one, cutting at an angle towards the dart point.
Press and Trim


Read more: Raglan Sleeve Sewing Tutorial: A Step-by-Step Guide
Tips
- Use the same fabric for the attachment piece for a seamless finish. A contrasting fabric helps with understanding the technique.
- Avoid backtacking at the beginning and end of the dart to prevent puckering.
- The attachment stripe helps balance both sides of the dart, resulting in a flat, even finish.
- Unlocking the stitch at the dart point is a common cause of puckering. This technique avoids that issue.