Frustrated with fiddly hand-sewing when attaching a skirt lining? Say goodbye to painstaking stitches and hello to a swift, seamless solution! This tutorial demonstrates a remarkably simple method for attaching a skirt lining using nothing more than a zipper and your trusty sewing machine. Forget wrestling with tiny needles and threads; we're streamlining the process to make creating perfectly finished garments faster and easier than ever before. This clever technique eliminates the need for hand-sewing entirely, providing a professional finish without the tedious work.
This no-hand-sewn method leverages the invisible strength of a zipper to securely attach your lining, resulting in a beautifully finished garment that drapes flawlessly. Prepare to be amazed by how quickly and effortlessly you can achieve a pristine result. Let's dive into the step-by-step instructions and discover how you can create a perfectly fitted skirt with minimal effort.
Preparation and Safety Guidelines
- Sewing Machine
- Serger (optional)
- Pins
- Zipper
- Always use a sharp zipper and pins to avoid fabric damage or injury. Dull tools can cause fabric slippage and make the process more difficult.
- Ensure your zipper is the correct length for your skirt. A zipper that's too short will leave a gap; one that's too long will be bulky and difficult to sew in place.
- Take your time! Rushing can lead to mistakes and frustration. Accurate pinning is crucial for a professional-looking finish.
Step-by-Step Instructions
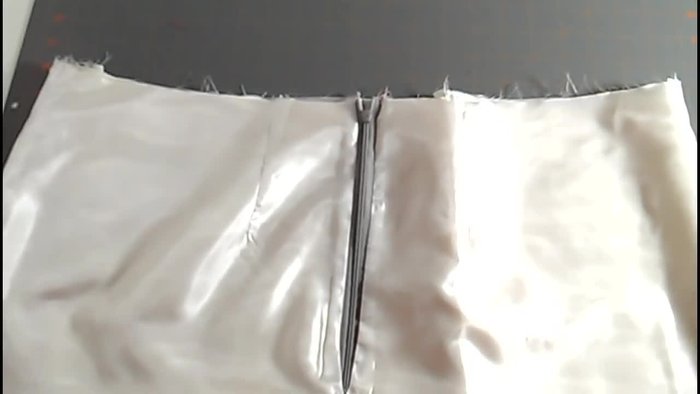
Prepare the Skirt
- Sew the center back seam, leaving an opening for the zipper. Finish the seam allowances (approximately 5/8 inch). Install a visible zipper; this provides more seam allowance for easier lining attachment.

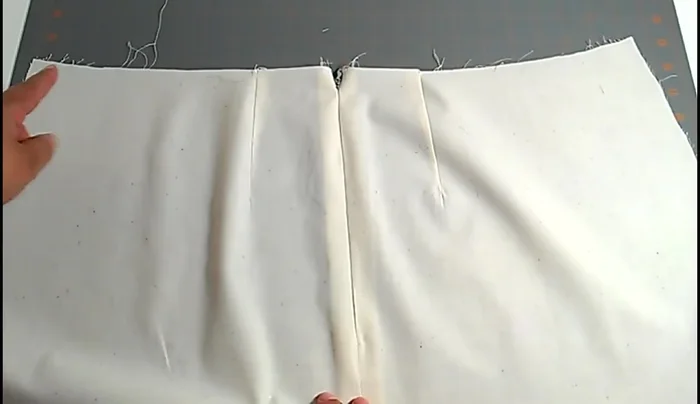
Prepare the Skirt Prepare the Lining
- Leave a center back opening 1 inch longer than the zipper (e.g., 8 inches for a 7-inch zipper). Finish the seam allowances (same allowance as the skirt).
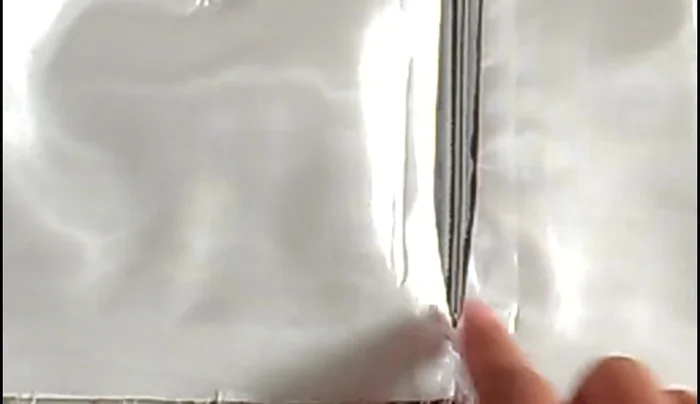
Prepare the Lining Attach Lining to Zipper
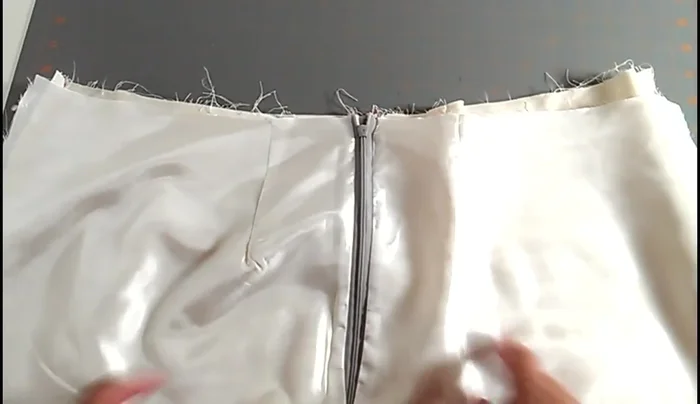
- With wrong sides together, pin the lining seam allowance to the skirt's zipper seam allowance, ensuring the lining is about 1/4 inch away from the zipper teeth. Pin one side of the lining to both seam allowances.
Sew Lining to Zipper
- Sew the lining to the zipper, paying attention to keep the center back seams aligned at the opening. Note that near the zipper pull, you might need to stop sewing, close the zipper, then continue sewing.
Sew Lining to Zipper Join Skirt and Lining
- With right sides together, sew the front skirt to the back skirt at the side seams, leaving the lining free. Then, with right sides together, sew the front lining to the back lining at the side seams.
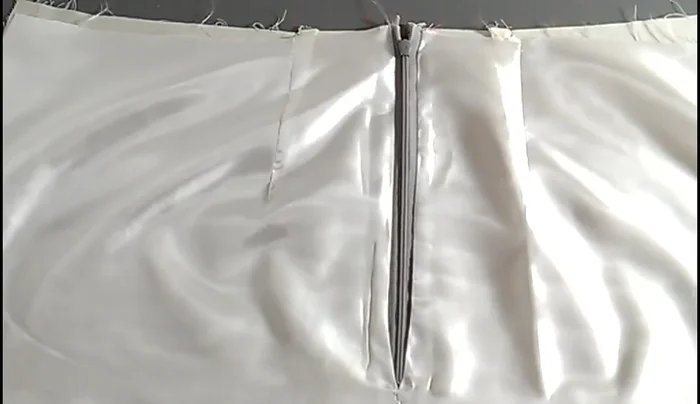
Join Skirt and Lining Finish and Baste
- Turn the skirt inside out. Match the lining to the skirt at the waist and baste in place.
Finish and Baste
Read more: Raglan Sleeve Sewing Tutorial: A Step-by-Step Guide
Tips
- Using a visible zipper provides more seam allowance, making lining attachment easier.
- Maintain consistent seam allowances (around 5/8 inch) on both the skirt and lining for a cleaner finish.
- Ensure the lining opening aligns with the center of the zipper.
- You may need to stop sewing near the zipper pull, close the zipper, and then continue to fully attach the lining.