Sewing with wide fabric panels presents unique challenges, especially when striving for perfect pattern matching. Whether you're working with bold prints, intricate designs, or simply desire a seamless, professional finish, aligning patterns across seams can feel daunting. Incorrect matching can significantly detract from the overall aesthetic of your project, transforming a beautiful fabric into a haphazard mess. This often leads to frustration and wasted fabric. However, achieving flawless pattern matching is entirely achievable with the right techniques.
This article will guide you through a step-by-step process to master the art of perfect pattern matching for wide fabric panels. We'll cover essential pre-sewing preparations, efficient cutting methods, and practical sewing techniques to ensure your seams seamlessly blend, showcasing the beauty of your chosen fabric to its fullest potential. From planning your layout to mastering the final stitch, prepare to elevate your sewing skills and create truly stunning projects.
Preparation and Safety Guidelines
- Sailrite canvas patterning ruler
- Straight pins
- Washable fabric marker
- Iron
- Sewing machine with light thread, small needle, and adjustable tension
- Always pre-wash your fabric before cutting to avoid shrinkage that could ruin your pattern matching after sewing.
- Use sharp shears or a rotary cutter for precise cuts to ensure accurate pattern alignment. Dull blades can cause inaccurate cuts leading to mismatched patterns.
- Test your pattern matching on a scrap of fabric before cutting into your main piece to identify any potential issues or adjustments needed in your cutting and sewing technique.
Step-by-Step Instructions
Matching and Initial Pinning
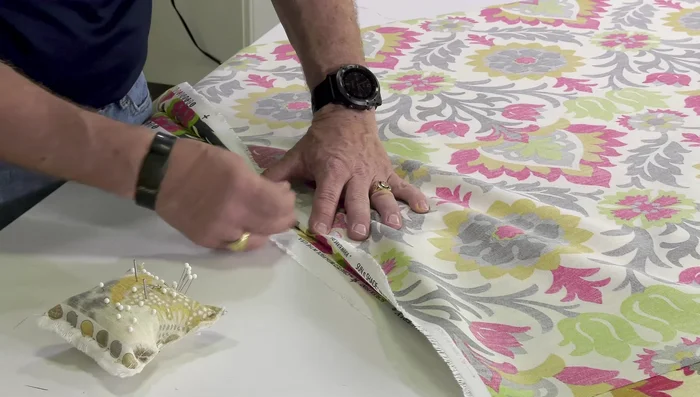
- Start at the center of both fabric panels, matching patterns to the selvage edge. Fold the top fabric back slightly, matching the pattern. Pin horizontally along the edge, ensuring the pins are perpendicular to the edge.

Matching and Initial Pinning Creating and Marking Crease Lines
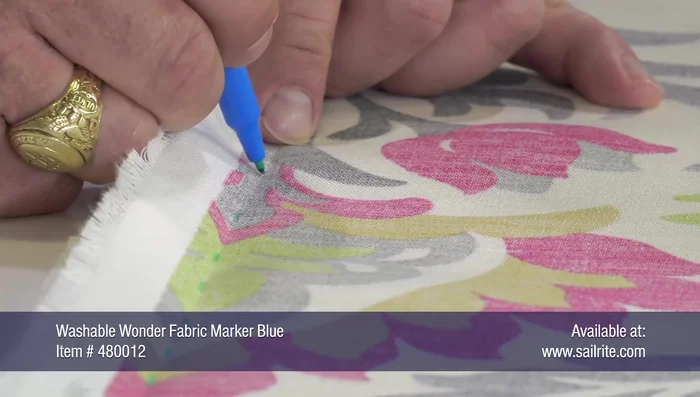
- Using a patterning ruler (or other hard object), firmly crease the fabric along the pinned edges, ensuring the pattern aligns perfectly. Use your thumb and forefinger to hold the fabric securely and prevent stretching. Mark crease lines with a washable fabric marker on the wrong side of the fabric.
Creating and Marking Crease Lines Precise Pinning for Sewing
- Unfold the top fabric, ensuring the pattern still matches. Re-pin the fabric along the crease lines, ensuring each pin is centered on the marked line. Insert pins perpendicular to the selvage edge, about every three inches. Add extra pins horizontally to prevent slippage.
Precise Pinning for Sewing Sewing the Fabric Panels
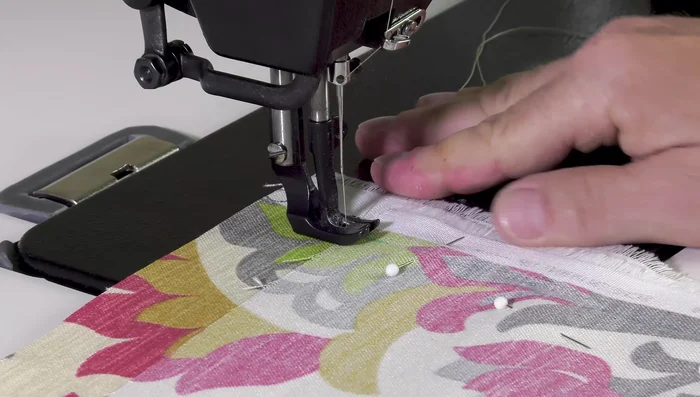
- Sew along the marked lines, using a light thread, small needle, and reduced tension to prevent puckering. Start with reverse stitching to lock the seam, then sew directly over the dash marks.
Sewing the Fabric Panels Finishing the Seam
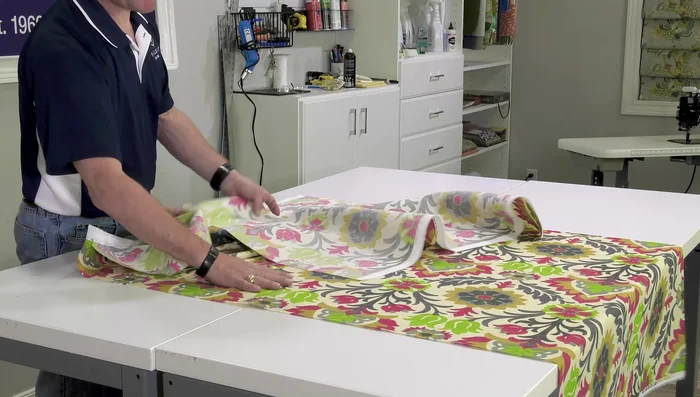
- Remove pins. Press the seam open with an iron using appropriate settings for your fabric type, checking for any recommended settings to avoid damage to the fabric.
Finishing the Seam

Read more: DIY Super Cute Whale Shower Curtain: A Step-by-Step Tutorial
Tips
- Avoid stretching one fabric more than the other to maintain pattern alignment.
- Use pins perpendicular to the selvage edge to keep fabric from slipping.
- Adjust sewing machine tension to prevent puckering.
- Use a washable fabric marker for easy removal of markings.