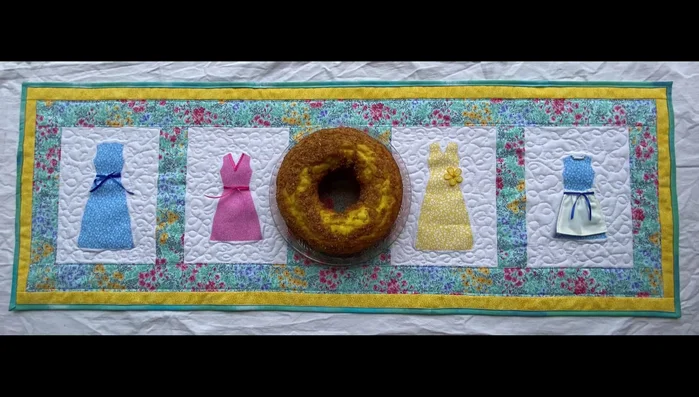
Transform your dining table into a vibrant masterpiece with this delightful DIY project! Dress appliqués, those charming fabric embellishments often seen on clothing, offer a unique and surprisingly simple way to create a stunning, personalized table runner. Forget expensive store-bought options; this guide will empower you to craft a one-of-a-kind runner that reflects your style and adds a touch of handmade charm to any occasion. Whether you're a seasoned crafter or a complete beginner, this project is accessible and rewarding.
Imagine the compliments you'll receive as your guests admire your handcrafted table runner. The beauty of this project lies in its adaptability; choose your favorite fabric, select playful or sophisticated appliqués, and let your creativity shine. Ready to bring your vision to life? Let's dive into the detailed step-by-step instructions and begin creating your unique DIY dress appliqué table runner.
Preparation and Safety Guidelines
- Fabric
- Fabric Adhesive (HeatnBond recommended)
- Dress Appliqué Pattern
- Iron
- Lightbox (or window)
- Ribbon (optional)
- Fabric Glue (optional)
- Embellishments (beads, etc.)
- Sewing Machine
- Batting
- Muslin (or backing fabric)
- Spray Adhesive
- Safety Pins
- Rotary Cutter (optional)
- Walking Foot (optional)
- Always use a stable, flat surface for cutting and working to prevent accidents. Secure fabrics to avoid slippage.
- Handle sharp tools like scissors, needles, and pins with care. Keep them away from children and store them properly after use.
- If using an iron, follow the manufacturer’s instructions carefully. Iron only on an appropriate heat setting for your fabric to prevent burning or damage.
Step-by-Step Instructions
Prepare Dress Appliqués
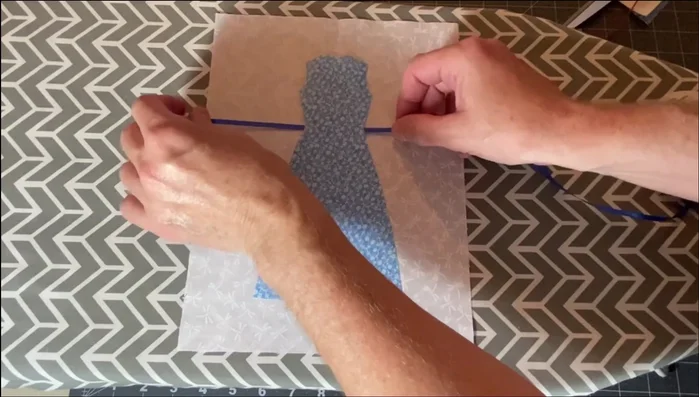
- Trace the dress pattern onto the paper side of the fabric adhesive, leaving extra fabric around the lines. Cut out the appliqués.

Prepare Dress Appliqués Prepare Fabric for Appliqués
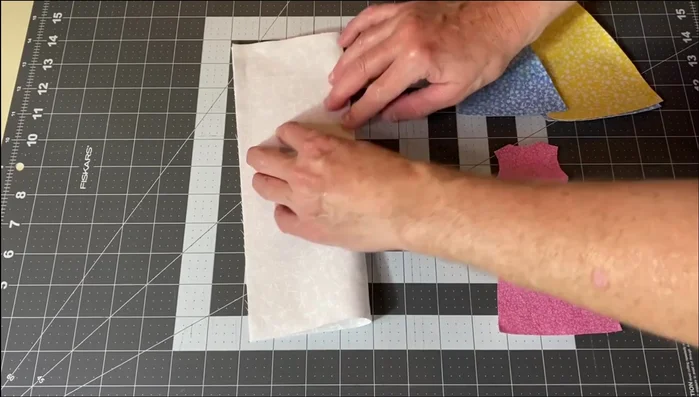
- Iron the fabric adhesive to the wrong side of fabric scraps (approx. 5x8.5 inches).
Prepare Fabric for Appliqués Assemble the Dresses
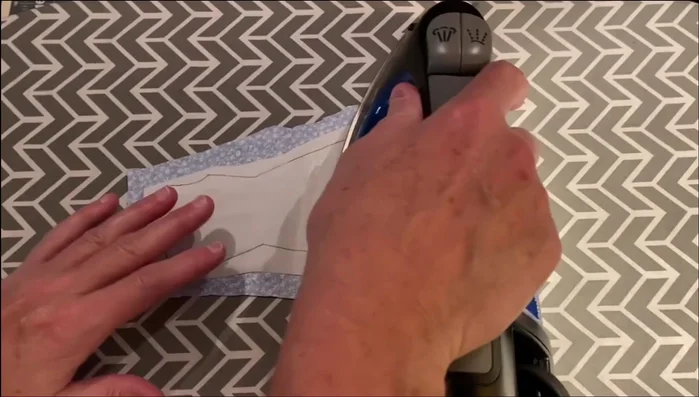
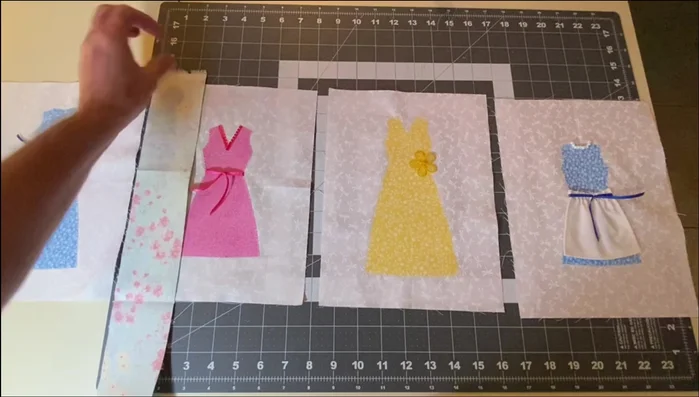
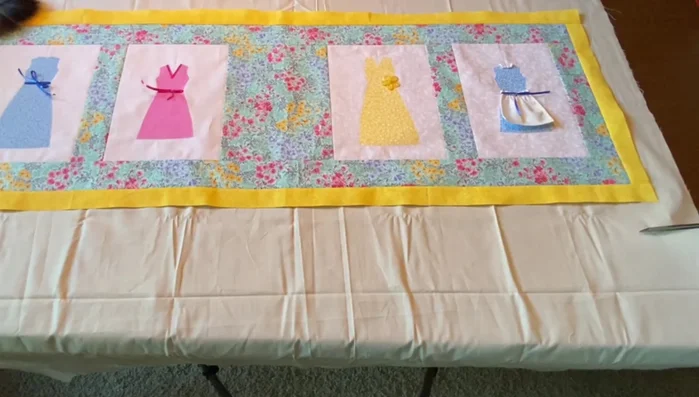
- Place one dress appliqué in the center of each 8x10.5 inch background fabric rectangle. Peel the backing paper from the appliqué and iron it to the fabric.
Assemble the Dresses Add Optional Embellishments
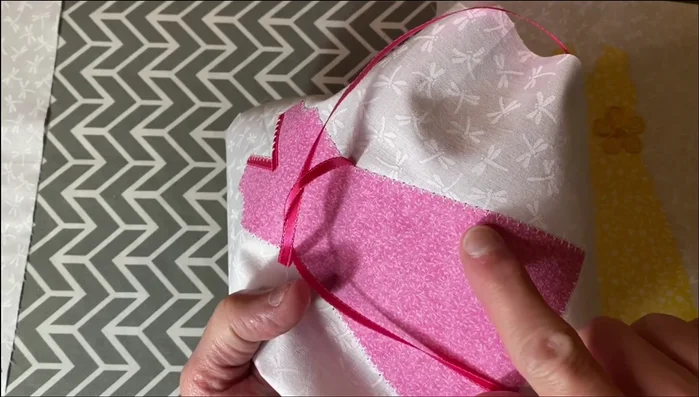
- Add ribbon belts, aprons, or other embellishments before ironing the dress completely to the background fabric.
Add Optional Embellishments Secure Dresses to Background
- Stitch around the edge of each dress to secure it to the background fabric.
Secure Dresses to Background Prepare Border Fabric
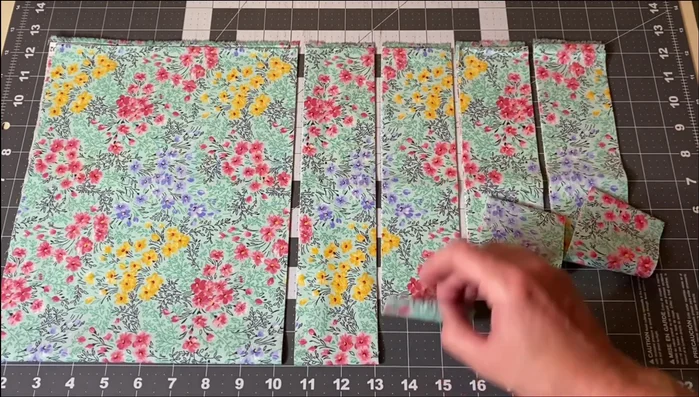
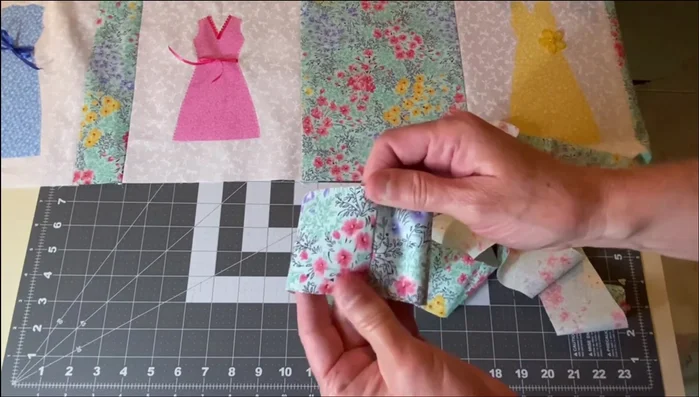
- Cut four 2.5-inch wide strips and one 8x10.5 inch rectangle from the border fabric.
Prepare Border Fabric Attach Border Strips to Dress Blocks
- Sew border strips to one side of each dress block (two left, two right).
Attach Border Strips to Dress Blocks Assemble Dress Blocks
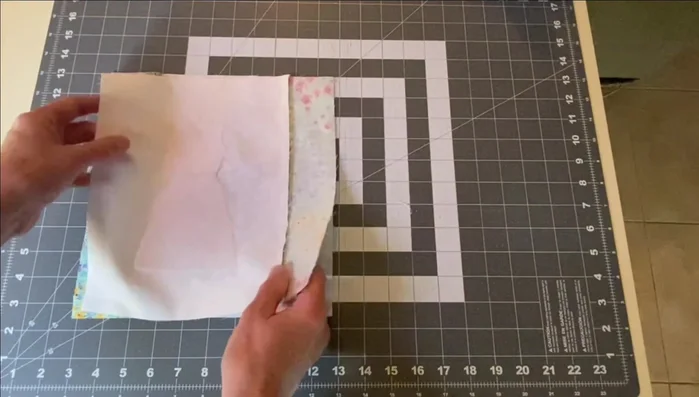
- Sew the two left blocks together, then sew the two right blocks together. Press the seams towards the border.
Assemble Dress Blocks Attach Center Fabric
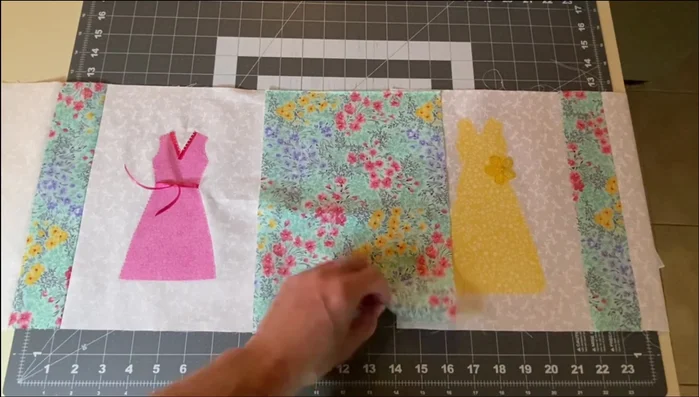
- Sew the center fabric rectangle to the left and right dress blocks, creating the main table runner panel.
Attach Center Fabric Attach Side Borders
- Sew two long strips together if necessary. Sew one strip to one side of the table runner panel, then the other strip to the remaining side. Press seams towards the outside.
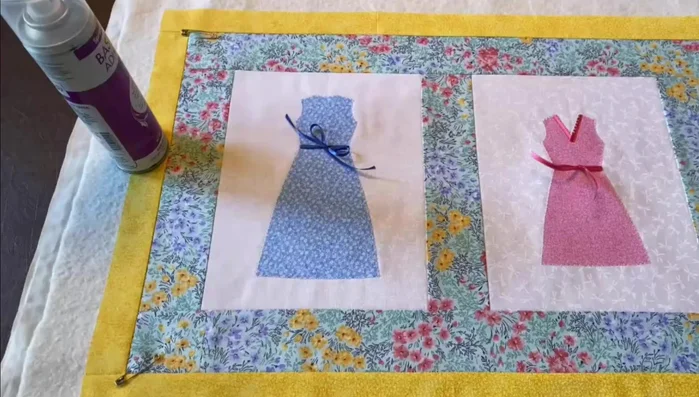
Attach Side Borders Prepare Quilt Sandwich
- Cut backing fabric and batting slightly larger than the table runner. If using multiple pieces of batting, carefully sew them together with a zigzag stitch.
Prepare Quilt Sandwich Baste Quilt Layers
- Baste the quilt top, batting, and backing fabric together using spray adhesive and safety pins.
Baste Quilt Layers Quilt the Layers
- Quilt the layers using free-motion or straight-line stitching.
Quilt the Layers Bind the Table Runner
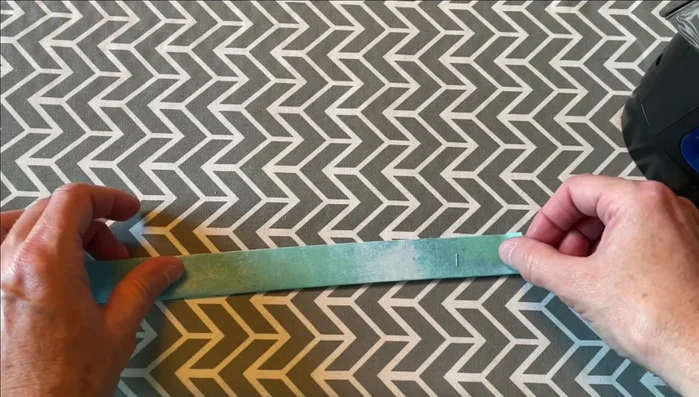
- Cut 2-inch binding strips, fold in half, and iron. Attach binding to the back, wrap to the front, and stitch down.
Bind the Table Runner

Read more: DIY Super Cute Whale Shower Curtain: A Step-by-Step Tutorial
Tips
- Use a lightbox or window to trace the dress appliqués onto the fabric adhesive for better visibility.
- Don't cut the fabric adhesive exactly on the lines; leave a little extra for easier handling.
- Strategically place the batting seam to hide it under a seam or busy pattern in the quilt top.