A rolled arm sofa, with its elegant curves and timeless appeal, can be a cherished piece of furniture for years. However, time and use inevitably take their toll, leaving fabrics faded, worn, or simply outdated. Rather than replacing this beloved piece, consider the rewarding project of reupholstering it yourself. This can dramatically transform its look and feel, breathing new life into your living room at a fraction of the cost of buying new. Giving a sofa a second life is a deeply satisfying experience, combining creative expression with practical problem-solving.
This comprehensive guide provides a detailed, step-by-step process to reupholster your rolled arm sofa successfully, even if you're a beginner. We'll walk you through every stage, from carefully removing the old fabric to expertly attaching the new, ensuring a professional-looking finish. Let's get started and transform that tired sofa into a stunning focal point!
Preparation and Safety Guidelines
- Staple gun
- Scissors
- Fabric
- Hammer
- Trim nails
- Tack strip
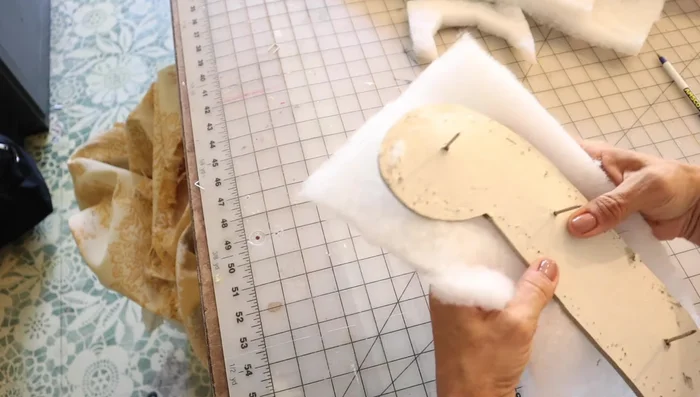
- Dacron
- Always disconnect power to any electrical components (vibrating tools, etc.) before beginning work. Avoid electrical shock.
- Use appropriate safety glasses and a dust mask to protect your eyes and lungs from staples, fabric fibers, and dust.
- Use caution when handling sharp tools like utility knives, scissors, and staple removers. Cut away from yourself and keep your fingers clear.
Step-by-Step Instructions
Prepare Materials
- Prepare fabric pieces. Cut all necessary pieces for the rolled arm, inside arm, outside arm, placket, and inside back.

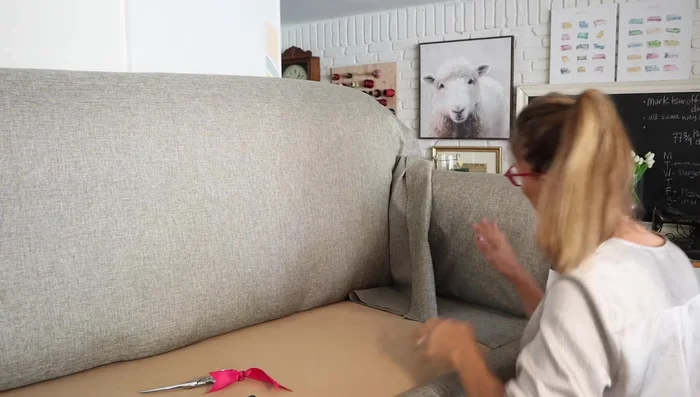
Prepare Materials Upholster the Rolled Arm
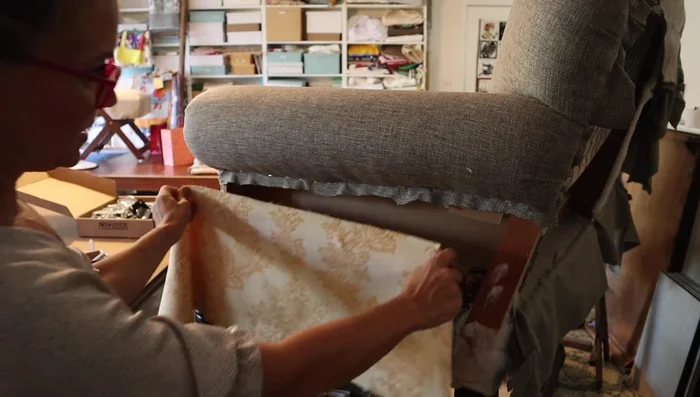
- Attach the rolled arm piece. Stuff the bottom part, staple it, and make relief cuts where necessary to accommodate the sofa's structure. Ensure smooth fabric lay by adjusting relief cuts as needed.
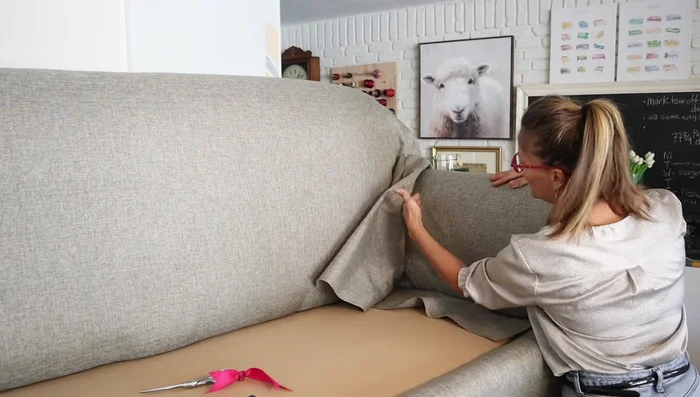
Upholster the Rolled Arm Upholster the Inside Arm
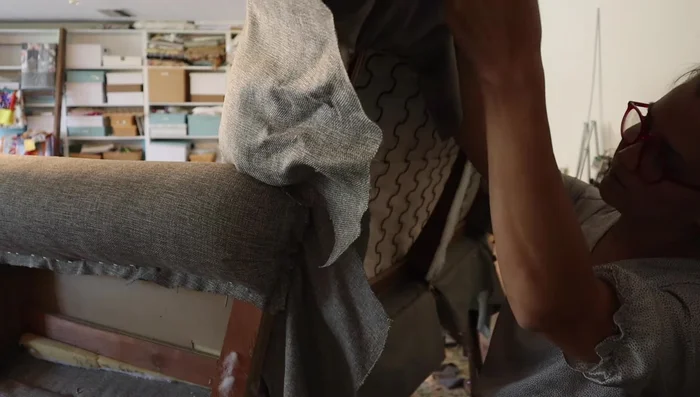
- Attach the inside arm piece. Tuck and pull the fabric into the crevice between the back and arm, ensuring a smooth finish. Address any puckering by deepening relief cuts.
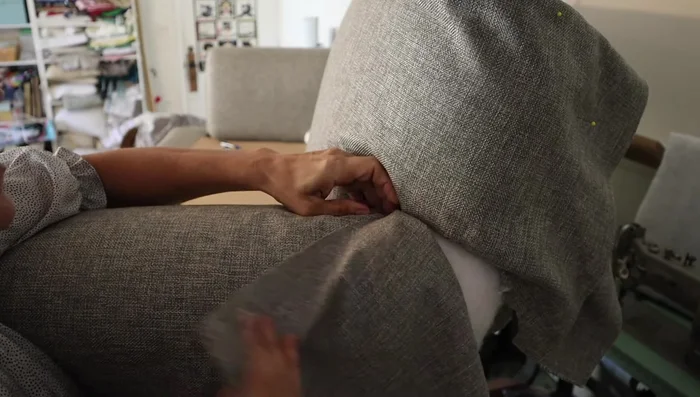
Upholster the Inside Arm Upholster the Outside Arm
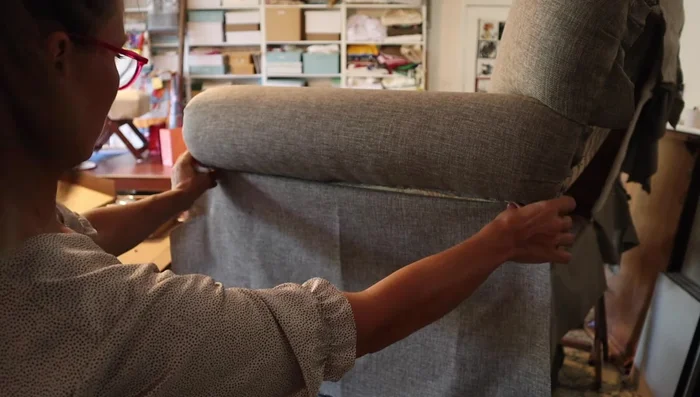
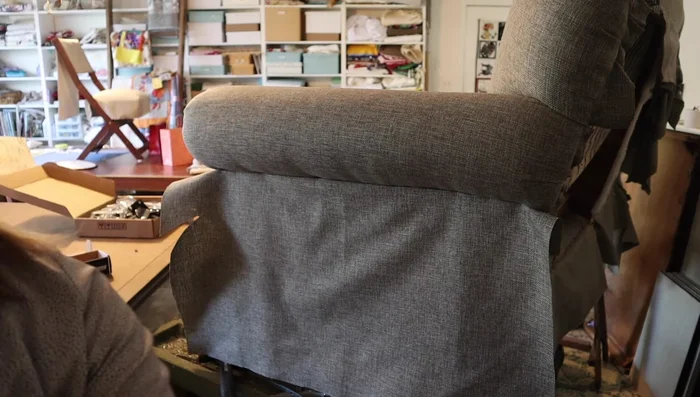
- Attach the outside arm piece. Staple around the front of this arm. Precisely align with existing holes for nails, if present, to avoid bending.
- Close the outside arm. Use a scrap piece of fabric to stabilize the side.
Upholster the Outside Arm Upholster the Inside Back
- Attach the inside back piece. Make relief cuts as needed to eliminate puckering and ensure a smooth fit. Pull and staple to secure.
Upholster the Inside Back Upholster the Main Back
- Attach the main back piece. Ensure fabric grain is aligned correctly. Staple, making relief cuts if needed.
- Secure the back using tack strip. Install a tack strip under the fabric to maintain a straight edge. Cover with Dacron for plumpness.
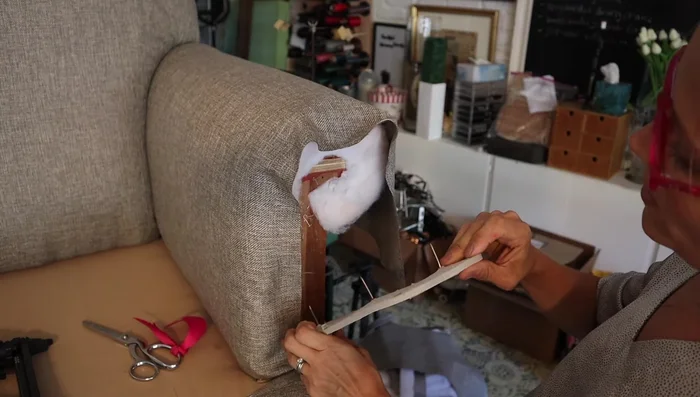
Upholster the Main Back Attach Final Piece and Finishing Touches
- Attach the final piece. Use existing nail holes or tiny trim nails to attach the final piece, concealing them by weaving fabric grains around the nail heads.
Attach Final Piece and Finishing Touches
Read more: DIY Super Cute Whale Shower Curtain: A Step-by-Step Tutorial
Tips
- Make relief cuts gradually. Check the fabric's smoothness after each cut to avoid going too deep.
- Precise nail placement. Align nails with existing holes to prevent bending. If no holes exist, use trim nails between fabric grains.
- Use tack strip for a neat finish. Applying tack strip under the fabric ensures a straight, snug fit.