The crisp lines of a maple leaf, a quintessential symbol of autumn, translate beautifully into the world of quilting. This project combines the precision of ruler work with the expressive freedom of free-motion quilting to create a stunning maple leaf quilt block. We'll explore how to accurately piece together the iconic leaf shape using readily available quilting tools, ensuring sharp points and perfectly matched seams. The detailed piecing will provide a strong foundation for the intricate quilting design to follow.
This tutorial will guide you through each step, from cutting and piecing the fabric to the satisfying process of stitching both straight lines and flowing curves. Learning to marry these two quilting techniques will elevate your skills and allow for truly unique and visually captivating results. Ready to begin? Let's dive into the step-by-step instructions for creating your own longarm quilted maple leaf block.
Preparation and Safety Guidelines
- Janome Quilt Maker Pro 20 long arm
- Ruler base
- Long arm quilting rulers
- Always use a walking foot or appropriate feed system for ruler work to prevent fabric slippage and ensure accurate stitching. Improper feed can lead to distorted blocks.
- Maintain a firm grip on both the ruler and fabric during ruler work to prevent the ruler from slipping and causing injury. Use a quilting glove for better control and to protect your hand.
- When switching between ruler work and free motion quilting, lower your feed dogs and raise your presser foot before removing the ruler to avoid needle damage or accidents.
Step-by-Step Instructions
Prepare the Quilt Block
- Remove basting stitches from the chosen block.

Prepare the Quilt Block Outline the Maple Leaf
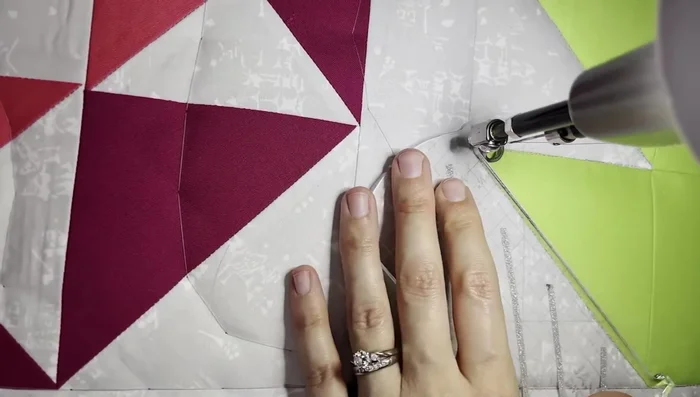
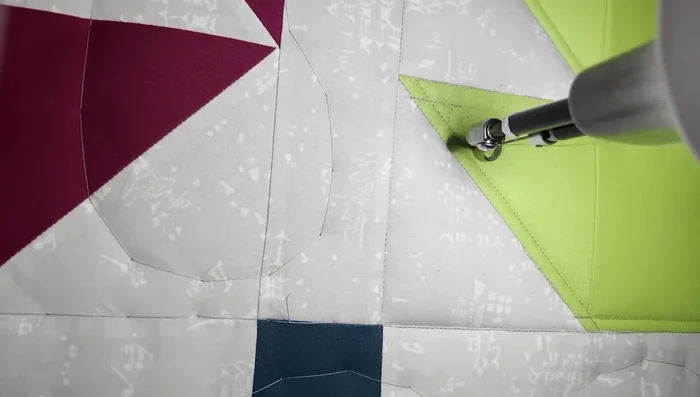
- Stitch in the ditch along the seams of the maple leaf block, using a long arm quilting ruler as a guide. Pay attention to keeping stitches centered in the seam.
Outline the Maple Leaf Offset Quilting
- Stitch a quarter-inch offset line from the outlining seams, creating a parallel line around the maple leaf.
Offset Quilting Free Motion Quilting (Leaf)
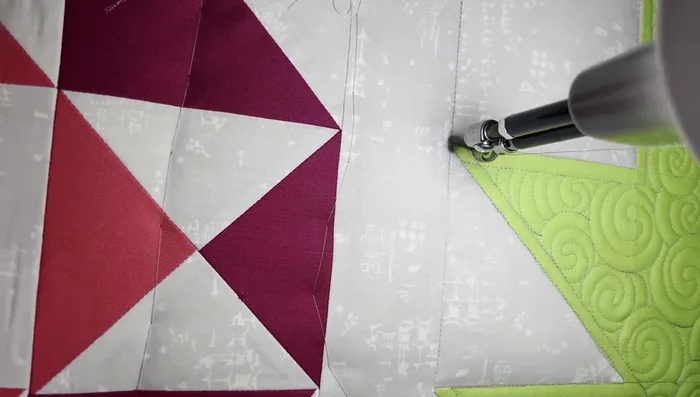
- Fill the inside of the maple leaf with swirls. Use a calming, circular motion to create a consistent pattern. Echo the swirls for smaller areas.
Free Motion Quilting (Leaf) Free Motion Quilting (Background)
- Fill the background with "smoky swirls" - partial S-shapes with pointed centers, repeated and echoed to fill the space. This creates a contrasting texture to the leaf’s swirls.
Free Motion Quilting (Background) Finishing
- Secure threads and remove the block from the machine.
Finishing


Read more: King Size Quilt Tutorial: Efficient Chain Piecing Method
Tips
- Use long arm quilting rulers (at least ⅛ inch thick) to avoid issues with the hopping foot.
- Pressing seams open makes stitching in the ditch easier.
- Be mindful of your needle placement when stitching in the ditch to maintain neatness.
- Don’t panic if stitching isn’t perfectly in the ditch; it takes practice.
- Echoing quilting motifs can be helpful for filling awkward spaces efficiently.