Cross-stitch quilts, with their charming, intricate designs, offer a unique blend of traditional crafting and personalized artistry. The meticulous detail involved in creating these quilts is often admired, but the quilting process can seem daunting, especially for those aiming for a professional, even finish. Many quilters find the traditional hand-quilting method time-consuming, leading them to explore machine quilting as a faster and equally effective alternative. This approach preserves the beauty of the cross-stitch while providing a sturdy, long-lasting quilt.
This guide focuses on mastering the art of machine quilting your cross-stitch creations, offering a clear and concise approach for quilters of all skill levels. We’ll explore essential techniques, from choosing the right quilting stitch to managing fabric layers and achieving a smooth, consistent finish, all while preserving the delicate integrity of your cross-stitched design. Let’s dive into the step-by-step process and transform your handcrafted cross-stitch top into a treasured heirloom.
Preparation and Safety Guidelines
- Longarm Quilting Machine
- Always use a walking foot or even-feed foot on your sewing machine to prevent fabric layers from shifting and creating puckers, especially when quilting dense cross-stitch.
- Test your quilting stitches on a scrap of fabric similar to your quilt top before quilting the entire project. This allows you to adjust tension and stitch length for optimal results and avoid damaging your finished cross-stitch.
- Use sharp needles appropriate for your fabric weight. Dull needles can snag and damage your cross-stitch, leading to pulled threads or broken stitches.
Step-by-Step Instructions
Prepare the Quilt and Machine
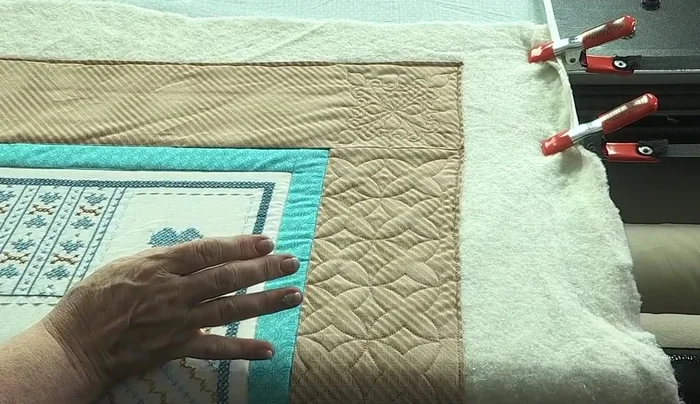
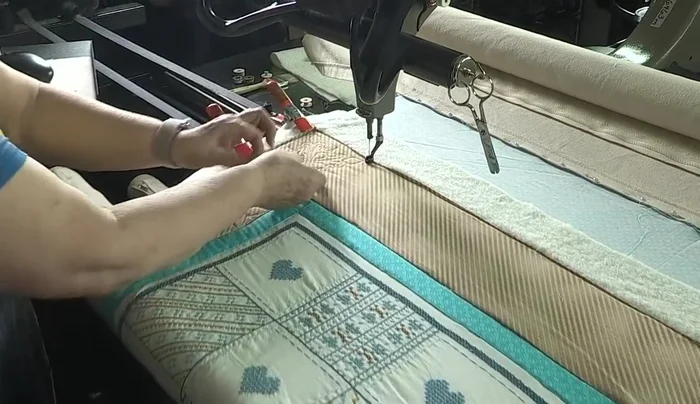
- Load the quilt sideways on the longarm machine to accommodate the cross-stitch orientation.
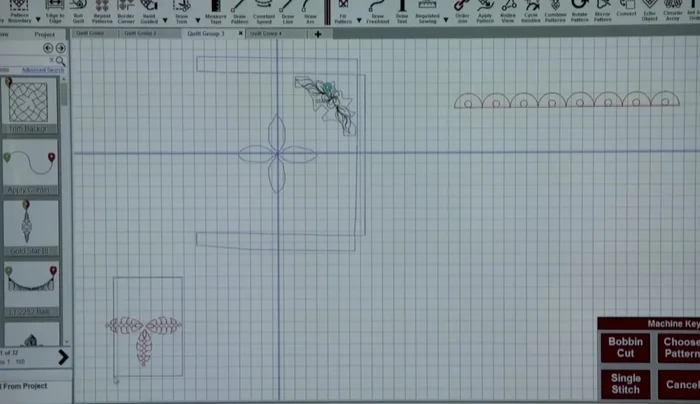
- Draw boundaries around the quilt's borders using the machine's digitizing tools. This helps to ensure accurate stitching and allows for visual checking of any inconsistencies in the quilt's shape.

Prepare the Quilt and Machine Establish Border Quilting
- Import and position the digitized border patterns, adjusting size and rotation as needed to perfectly fit the drawn boundaries.
- Start quilting the borders. The video uses a fill pattern that stabilizes the quilt.
Establish Border Quilting Quilt Smaller Sections
- For smaller areas (like the turquoise section), use a simple, fast design like parallel loops to add quilting without obscuring the cross-stitch.
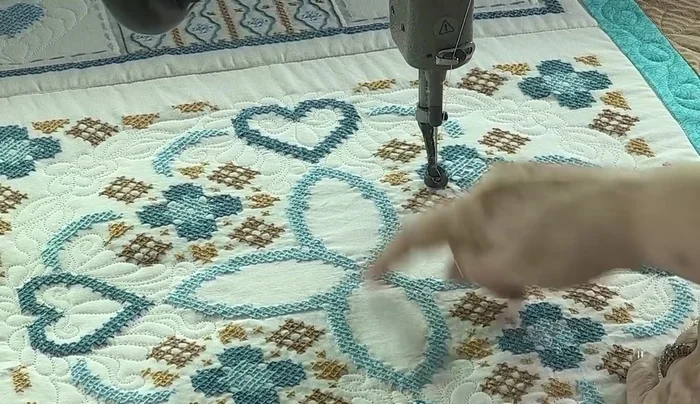
Quilt Smaller Sections Quilt Around Embroidered Elements
- In areas around embroidered elements, create a delicate design that complements the embroidery without stitching directly on it. The example uses teardrops and small feathers.
Quilt Around Embroidered Elements Quilt the Central Area
- For the central area, use a larger pattern (e.g., feathers) that adds visual interest without overwhelming the cross-stitch.
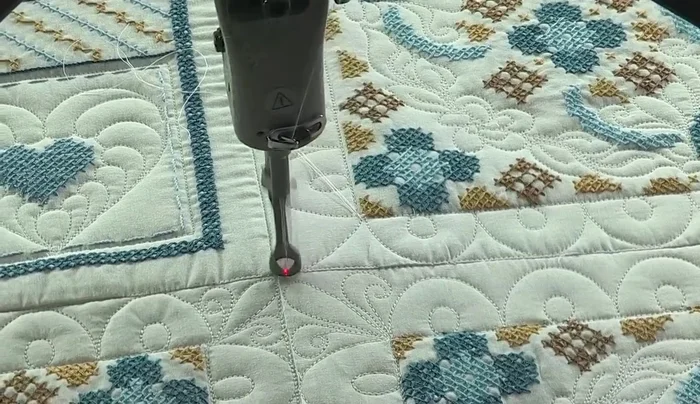
Quilt the Central Area Fill Remaining Areas
- Import and position smaller patterns to fill in remaining areas, adjusting their placement to ensure they align with the quilt's edges and existing designs.
Fill Remaining Areas Finish with Corner Detail
- Add a final corner pattern freehand to complete the quilting.
Finish with Corner Detail


Read more: King Size Quilt Tutorial: Efficient Chain Piecing Method
Tips
- Use the machine's digitizing tools to create accurate boundaries for consistent quilting.
- Choose simple, fast quilting designs for smaller areas to avoid obscuring the cross-stitch.
- Use the machine's features to easily adjust patterns and ensure a perfect fit around embroidered elements.
- Pay attention to your machine's sounds and needle condition to prevent damage and maintain consistent stitching.
- Consider using a meandering design or other freehand techniques to create a more fluid look in certain areas.