Are you drowning in a sea of jelly roll strips, those delightful fabric rolls promising countless quilting projects but ultimately left languishing in your craft room? Transform that fabric overload into a stunning quilt with this fast and easy jelly roll stash buster pattern! This value-based design allows you to use up those precious scraps, creating a beautiful and unique piece without the overwhelming complexity often associated with quilting. We’re focusing on efficient construction techniques to minimize your sewing time and maximize your creative output.
Forget complicated cutting and piecing – this pattern embraces a simple yet striking approach. The result? A charming quilt showcasing the vibrant colors and prints of your jelly roll collection, all in a fraction of the time it takes with traditional methods. Ready to dive into the fun and transform your fabric scraps into a cherished heirloom? Let's get started with the step-by-step instructions below!
Preparation and Safety Guidelines
- Sewing machine
- Iron
- Ironing board
- Scissors
- Measuring tape
- Pins or clips
- Markers or stickers
- Always pre-wash your fabric before starting. Jelly roll strips can shrink differently, leading to distortion in your finished quilt if not pre-washed.
- Use a rotary cutter and mat for accurate cutting. Consistent strip sizes are crucial for a neat and professional-looking finished quilt.
- Pay attention to your seam allowance. Maintaining a consistent 1/4 inch seam allowance throughout the project will prevent wonky seams and ensure your quilt blocks fit together perfectly.
Step-by-Step Instructions
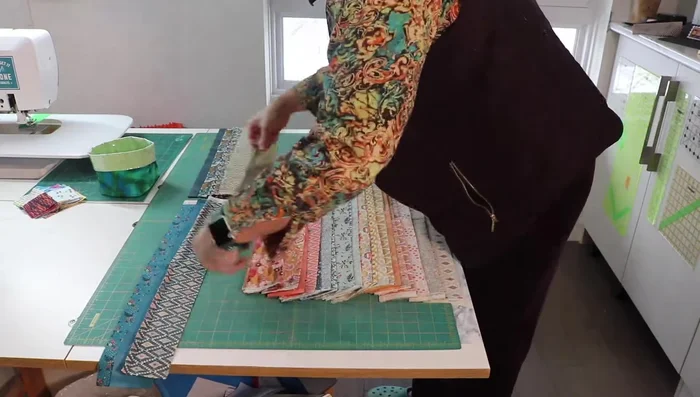
Prepare Fabric Strips
- Gather 40 fabric strips (2.5 inches wide x at least 43 inches long). Organize them from darkest to lightest, taking a black and white photo for reference.

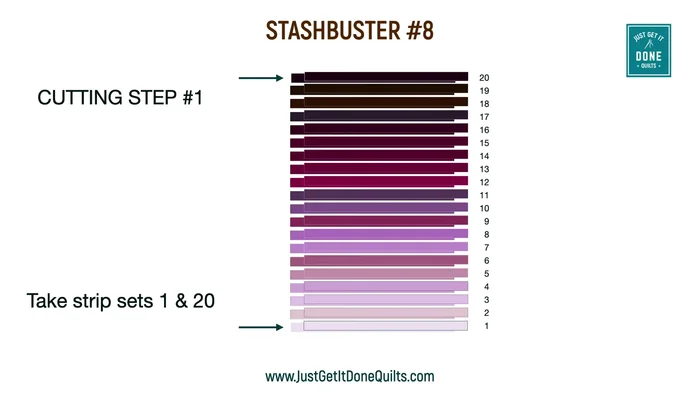
Prepare Fabric Strips Pair and Mark Strips
- Pair the two lightest strips, then the next two, and so on until you have 20 pairs. Mark each pair with numbers 1-20.
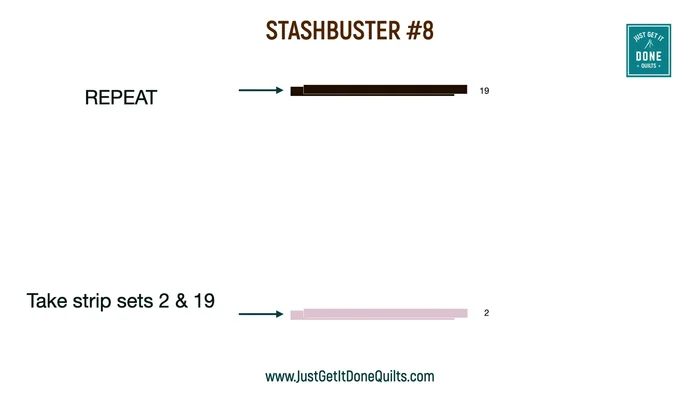
Pair and Mark Strips Create and Mark Strip Stacks
- For each pair (e.g., pair 1 and 20), make a stack of four strips. Trim selvages and cut one stack at the measurements specified in the pattern (details provided in video) and the other at the remaining length.
- Attach the corresponding number (e.g., 1 to the shorter stack, 20 to the longer) to each stack.
- Repeat steps 3 and 4 for all 20 pairs.
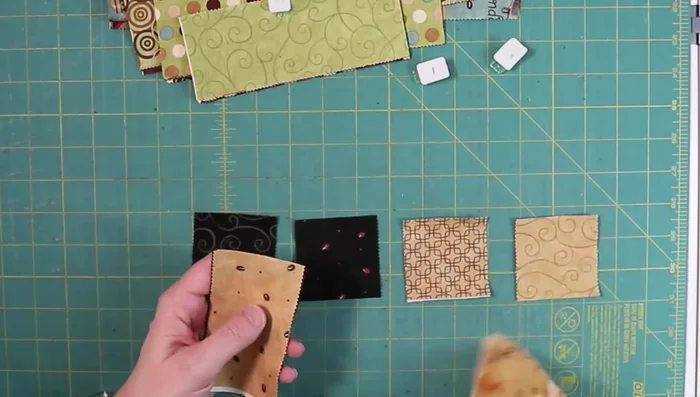
Create and Mark Strip Stacks Sew Strip Sets
- Lay out the strip sets, alternating dark and light. Sew the strip sets together, ensuring seams are perpendicular and iron well after each seam.
Sew Strip Sets Assemble Quilt Blocks
- Sew the pairs of blocks together (dark/light, light/dark). Press seams to the darker side. Line up the long sides of the blocks, nesting the middle seams, pin, and sew.
Assemble Quilt Blocks Add Borders (Optional)
- Cut and sew borders to the desired size.
Quilt the Top
- Quilt the quilt top using straight lines, wavy lines, or a pantograph.
Quilt the Top Bind the Quilt
- Bind the quilt with a binding of your choice.
Bind the Quilt


Read more: King Size Quilt Tutorial: Efficient Chain Piecing Method
Tips
- Use a sewing ledge for straight seams.
- Use a leader and chain piece to improve efficiency.
- Iron and finger press seams to create a crisp finish.
- Baste the bias edge of the quilt blocks to prevent stretching during sewing and quilting.
- Consider using a seam roller to speed up the ironing process.