Summer fun doesn't have to melt away! This tutorial shows you how to craft adorable, felt ice cream toys that are perfect for imaginative play, party favors, or even whimsical home décor. Forget expensive store-bought toys; with just a few simple supplies and a little bit of time, you can create a delightful collection of ice cream cones, scoops, and sprinkles – all made from soft, huggable felt. These charming creations are incredibly easy to sew, even for beginners, and the possibilities for customization are endless! You can choose any color combination imaginable, adding your own personal touch to each sweet treat.
Imagine tiny hands happily scooping up these felt delicacies! Ready to transform your crafting skills and create your own delightful ice cream parlor? Then let’s dive into the step-by-step instructions, guiding you through the simple process of making these irresistible felt ice cream toys. From cutting the felt shapes to the final stitching, we'll walk you through each stage to ensure you achieve perfectly adorable results.
Preparation and Safety Guidelines
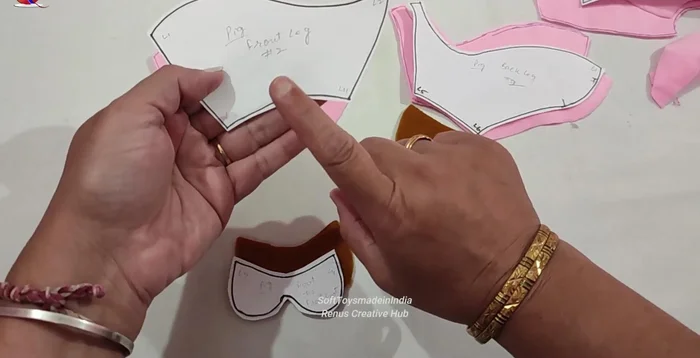
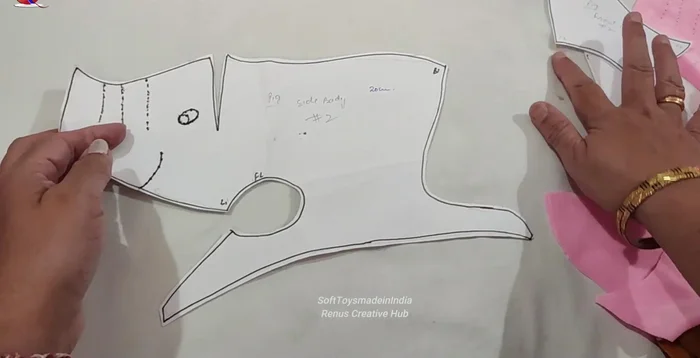
- Cutting pattern
- Pink felt (20cm)
- Light pink felt (small piece)
- Brown felt pen
- Pencil
- Tailor's felt thread
- Scissors
- Cutting mat
- 100g felt
- Elastic
- Adult supervision is required at all times, especially when using sharp objects like scissors and needles.
- Keep small parts away from young children to prevent choking hazards. Felt toys are not suitable for children under 3 years old.
- Use fabric-safe glue or thread that is strong enough to prevent accidental ingestion of small parts.
Step-by-Step Instructions
Cutting the Felt
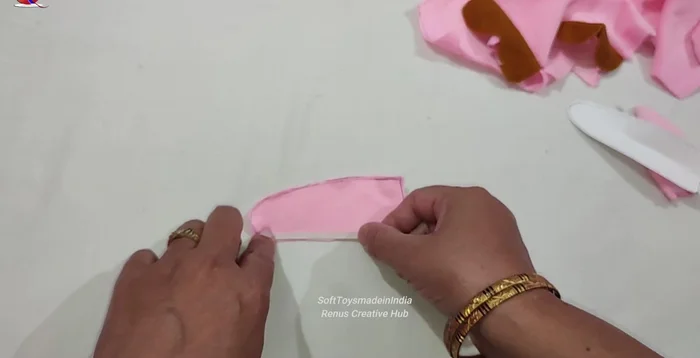
- Place the pattern on the felt and cut out the pieces.

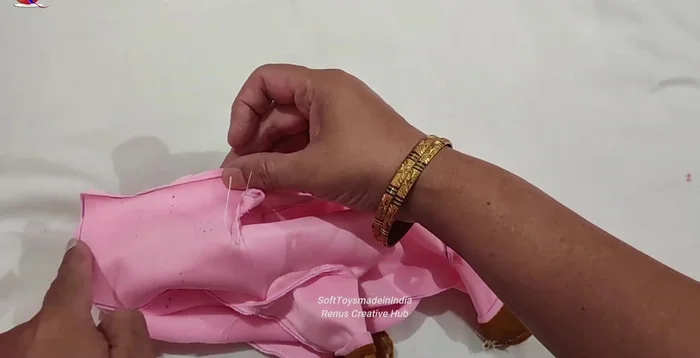
Cutting the Felt Assembling the Body
- Join the light pink and dark pink felt pieces together, one straight and one reversed, and stitch them.
- Join the upper part of both body pieces, leaving a gap at the bottom.
- Complete the body stitching, leaving a small opening at the bottom for stuffing.
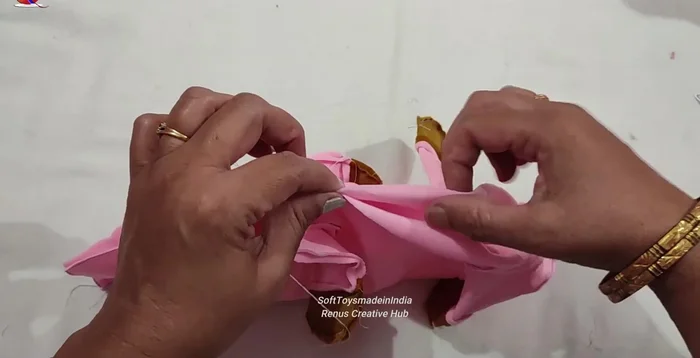
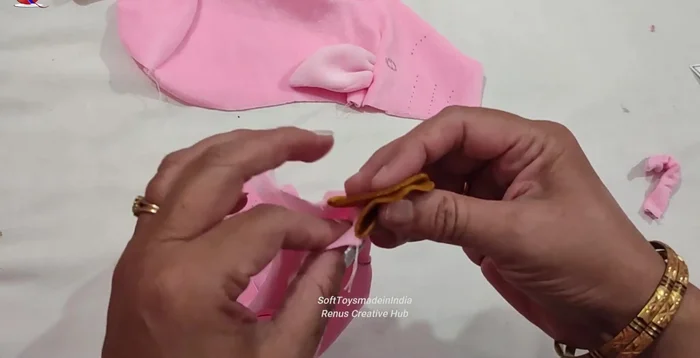
Assembling the Body Attaching the Legs
- Attach the brown felt legs and feet by stitching them to the body pieces.
- Sew the legs together, folding them at the front.
Attaching the Legs Adding Neck Opening & Stuffing
- Join the front and back body pieces together, leaving the bottom open.
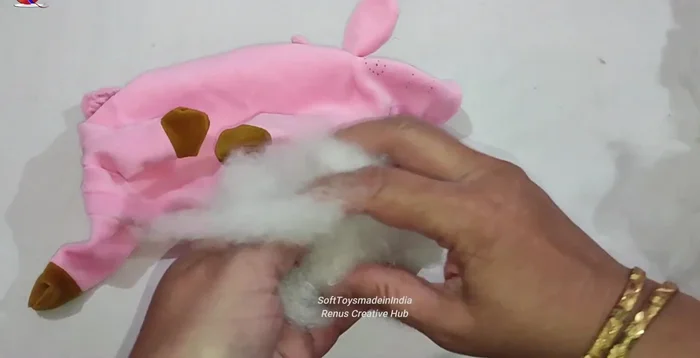
- Add elastic to the neck opening before completely closing it.
- Stuff the toy with fiberfill.
Adding Neck Opening & Stuffing Closing the Body
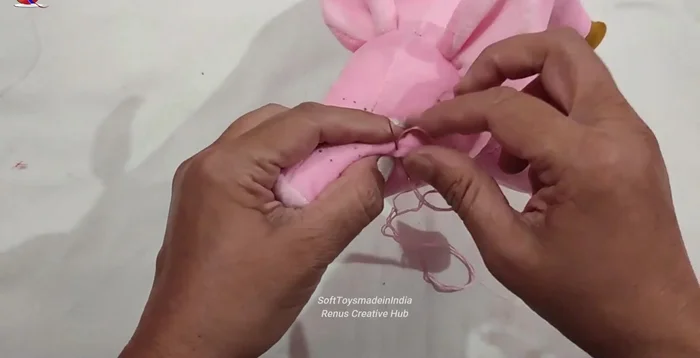
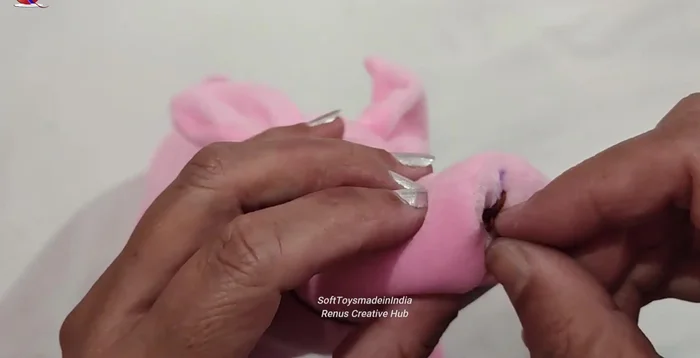
- Close the bottom opening with a hidden stitch.
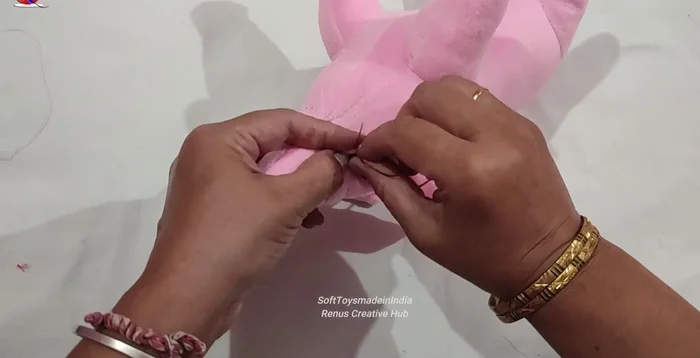
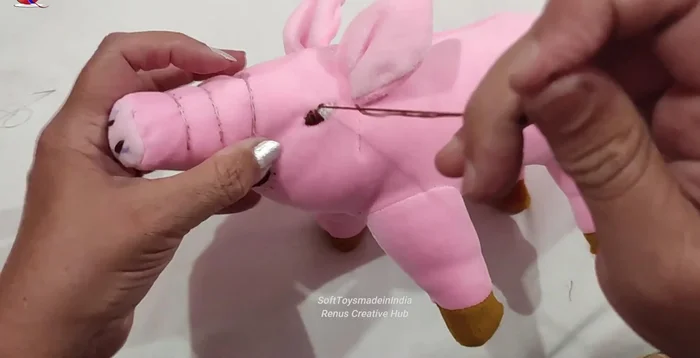
Closing the Body Adding Facial Features
- Stitch the ears to the top of the head.
- Embroider the eyes using pink thread and back stitch.
- Embroider the mouth using back stitch and slightly pulling the thread to create dimension.
- Embroider the nose using straight stitches.
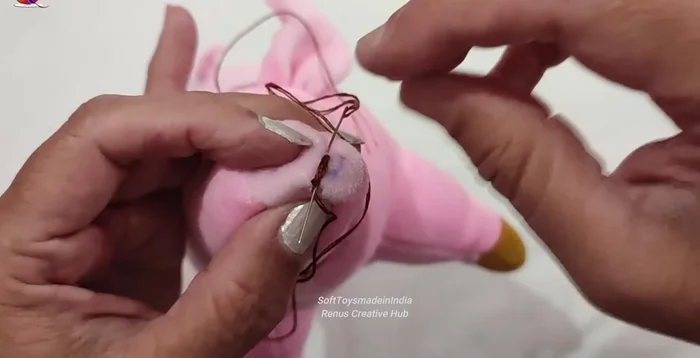
Adding Facial Features Embroidering Ice Cream Details
- Embroider the ice cream details using brown and white thread in a simple straight stitch.
- Outline the ice cream details using brown thread back stitch.
Embroidering Ice Cream Details


Read more: DIY Fluffy Duck Plushie Tutorial: A Step-by-Step Guide
Tips
- Pull the thread slightly when embroidering the mouth and eyes to create a 3D effect.
- Use medium-sized stitches for embroidery.
- For a neater finish, use a thinner thread or double it for embroidery.
- Stuff the toy firmly for a pleasing shape.