Have you ever dreamed of owning a miniature, cuddly version of your favorite instrument? This ultimate guide will take you on a fun and creative journey into the world of DIY guitar plushies! Whether you're a seasoned crafter or a complete beginner, we'll equip you with everything you need to create adorable acoustic and electric guitar plushies, perfect for displaying on your instrument stand, gifting to a fellow musician, or simply adding a touch of musical charm to your home. Forget expensive, mass-produced toys – let's unleash your inner artist and craft something truly unique.
This guide provides comprehensive, step-by-step instructions for crafting both acoustic and electric guitar plushies, using readily available materials and simple techniques. From choosing your fabrics and stuffing to adding intricate details like strings and pickguards, we'll guide you through every stage of the process, ensuring your finished plushies are as charming as they are well-made. Let's get started and create your own miniature musical masterpieces!
Preparation and Safety Guidelines
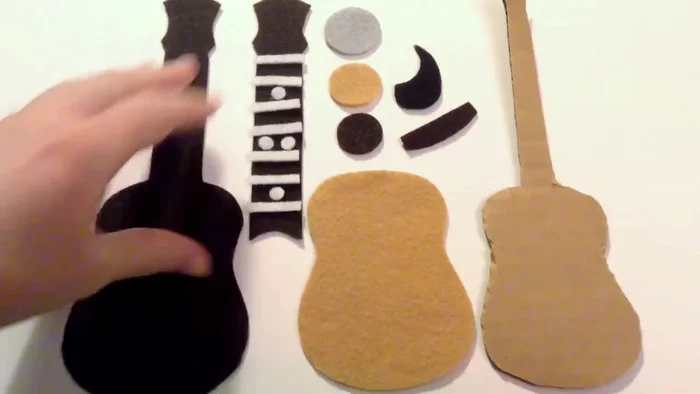
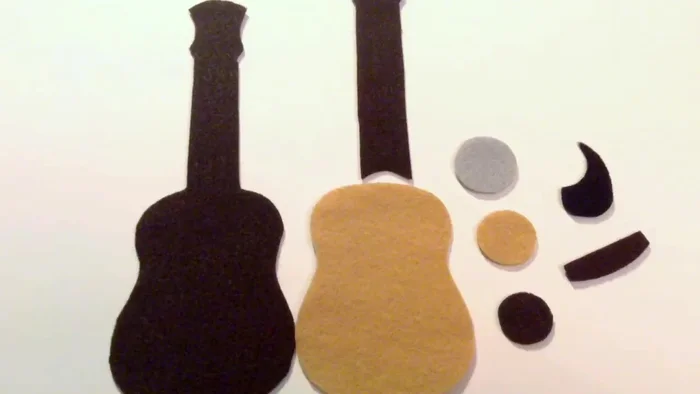
- Black, white, gray, tan, and dark brown felt
- Dark brown, tan, and white thread
- Cardboard
- Stuffing
- Nine small white buttons (or white felt)
- Fabric glue
- Always supervise young children during crafting and playtime with finished plushies to prevent choking hazards from small parts.
- Use fabric glue, felt, or other materials appropriate for children's crafts to avoid harsh chemicals or toxic materials.
- Sharp tools like needles or scissors should only be used by adults or older children with supervision.
Step-by-Step Instructions
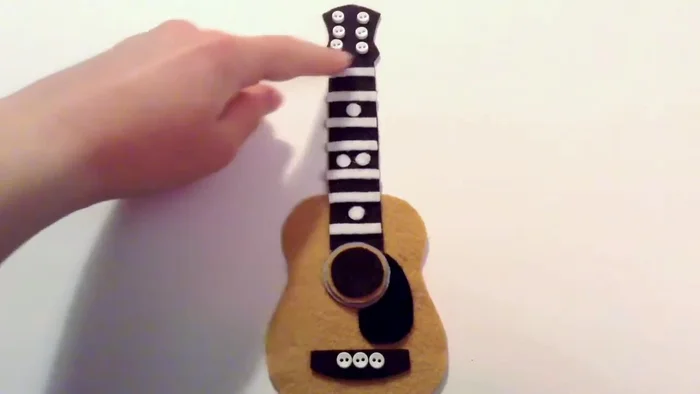
Prepare the Felt Pieces
- Cut out all felt pieces according to the template (available in the description).

Prepare the Felt Pieces Assemble the Guitar Body
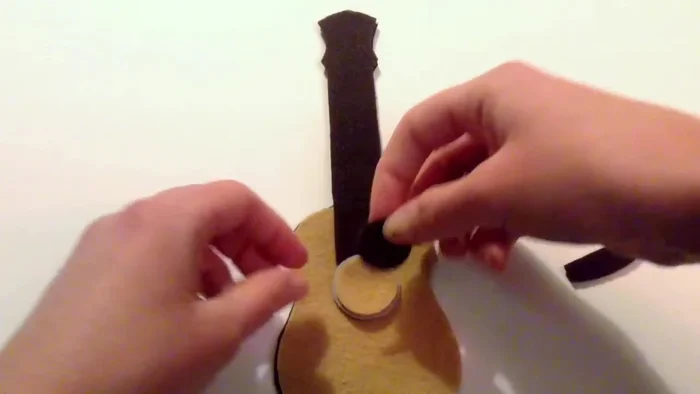
- Glue the tan piece onto the large dark brown piece. Then, glue the small dark brown piece on top, overlapping the tan piece.
- Glue the gray, tan, and dark brown circles together, then glue them and the black and dark brown pieces onto the tan piece. Only glue the section indicated; do not glue the dark brown piece to the larger dark brown piece.
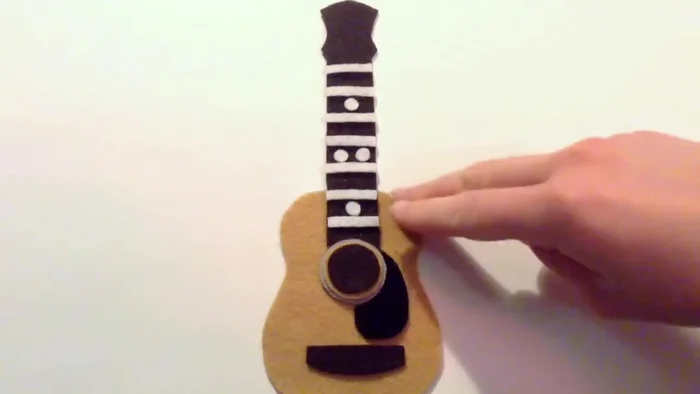
- Glue the seven white strips and four small white circles onto the dark brown piece.
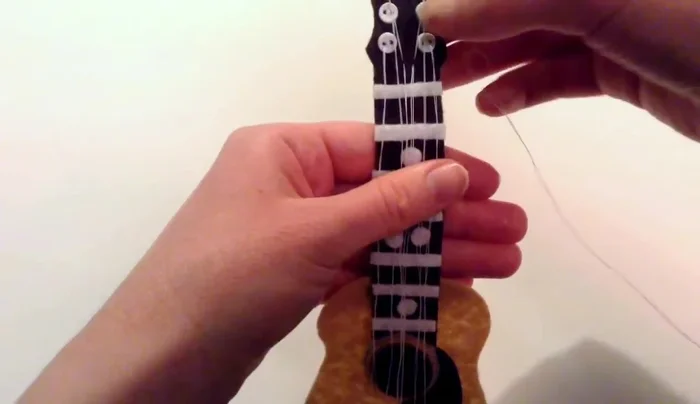
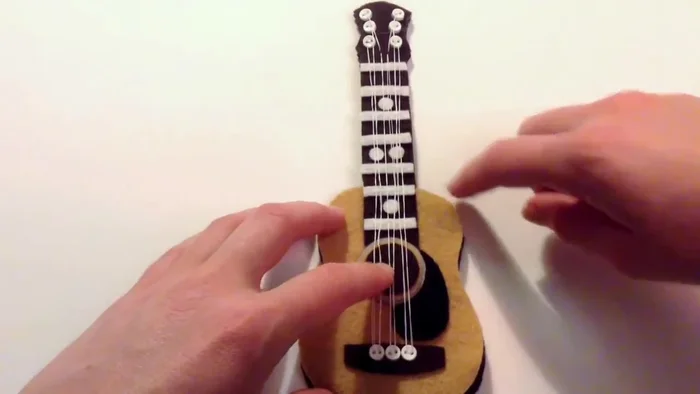
Assemble the Guitar Body Attach the Buttons and Sew the Strings
- Sew nine white buttons onto the guitar (six on top, three on bottom). If you don't have buttons, use white felt circles.
- Stitch the strings using white thread, going through the buttons as demonstrated in the video. Ensure stitches are loose enough to lay flat and not bunch.
Attach the Buttons and Sew the Strings Secure the Strings
- To secure the strings, stitch along each white strip with white thread to keep them in place.
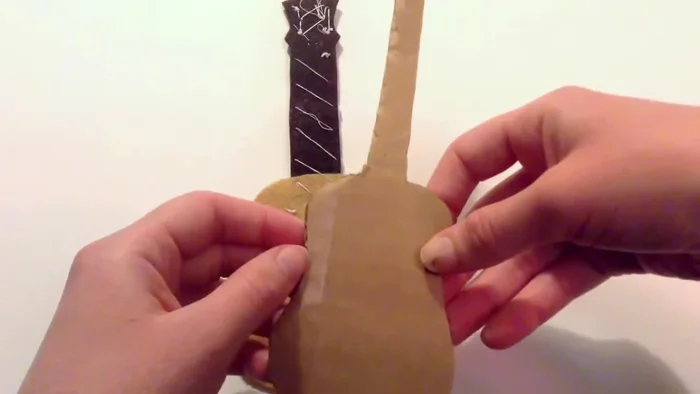
Secure the Strings Attach the Backing and Stuff the Guitar
- Glue the cardboard cutout to the back of the guitar, then glue the remaining dark brown piece on top.
- Sew around the edges using dark brown and light brown thread, leaving a small opening to stuff the base with stuffing before closing it completely.
Attach the Backing and Stuff the Guitar

Read more: DIY Fluffy Duck Plushie Tutorial: A Step-by-Step Guide
Tips
- Use fabric glue to adhere felt pieces, ensuring that only the specified areas are glued.
- Don't pull the strings too tight while stitching, ensuring enough thread remains to lay flat.
- If you don't have small white buttons, substitute with felt circles.
- Take your time with the string stitching; it's the most detailed part of the process.