Dive into the enchanting world of crafting with this delightful guide to creating your very own DIY whale plushie! There's something incredibly satisfying about bringing a cuddly creature to life with your own two hands, and this charming whale is no exception. Whether you're a seasoned crafter or a complete beginner, this project is surprisingly accessible, offering a rewarding experience perfect for a relaxing afternoon or a fun weekend activity. Imagine the joy of snuggling up with your handmade marine mammal, a unique and personalized companion crafted with love and care.
This step-by-step guide will walk you through each stage of the process, from gathering materials to the final stitching, ensuring you create a beautifully crafted whale plushie to cherish for years to come. Let's embark on this creative journey and transform simple fabric and filling into an adorable, huggable friend. Prepare to be amazed at how easy it is to create something so endearing!
Preparation and Safety Guidelines
- fabric
- sewing machine/needle and thread
- scissors
- stuffing (memory foam and polyester)
- pattern
- Adult supervision is required, especially for younger crafters using needles or scissors.
- Always use fabric-safe materials and stuffing to avoid allergic reactions or damage to the plushie.
- Ensure all loose threads and embellishments are securely attached to prevent choking hazards, particularly if the plushie is intended for a child.
Step-by-Step Instructions
Design and Cut
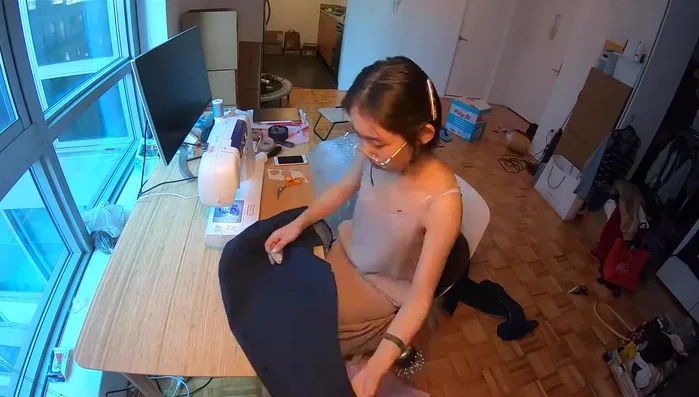
- Draw and enlarge the whale design.
- Cut out two sets of fins and the whale body pieces with a quarter-inch seam allowance.

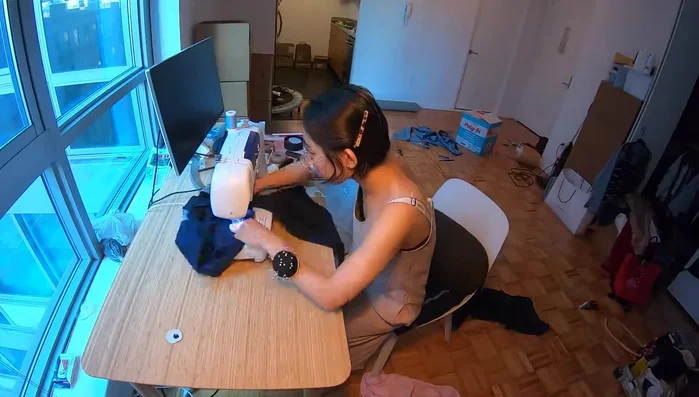
Design and Cut Sew Fins and Tail
- Sew the fins and tail together (inside out).
- Flip the pieces right side out and add details.
Sew Fins and Tail Assemble Whale Body
- Create creases on the whale's belly/chin.
- Stuff the fins and sew the chin together.
- Sew the back pieces together.
- Sew the fins to the back.
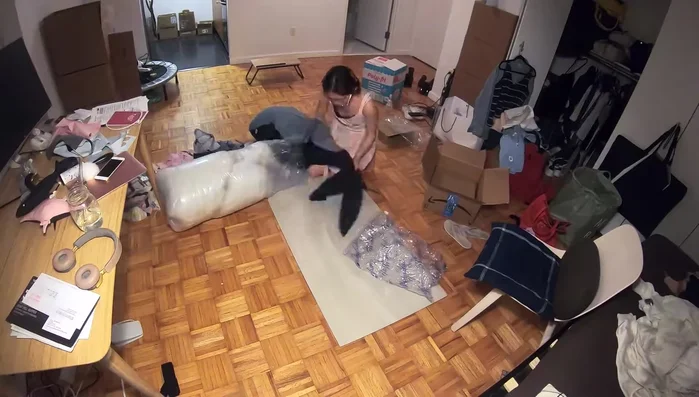
Assemble Whale Body - Sew the back to the belly, leaving a hole for stuffing.
- Attach the tail to the belly and back.
Assemble Whale Body Add Details
- Hand-stitch the eyes onto the front.
Stuff and Finish
- Stuff the whale with memory foam (around the head) and polyester filling.
- Close the remaining hole.
Stuff and Finish


Read more: DIY Fluffy Duck Plushie Tutorial: A Step-by-Step Guide
Tips
- Use memory foam for a firmer feel around the head.