Amsterdam beckons, and your packing list is… well, a little chaotic. Lugging a bulky suitcase through cobblestone streets and onto canal boats isn't exactly the idyllic image you conjured up. What if we told you that you could create a stylish, practical, and surprisingly spacious backpack tote in just 48 hours, perfect for your upcoming Amsterdam adventure? Forget overpriced luggage and embrace the thrill of a DIY project that perfectly complements your travel style. Imagine carrying your essentials – camera, guidebook, snacks, and that essential extra pair of socks – all in a custom-made bag reflecting your personal touch.
This easy-to-follow guide will walk you through the step-by-step process of crafting your own DIY tote bag backpack, ready for Amsterdam in just two days. We'll cover everything from choosing the right materials to mastering simple sewing techniques, ensuring a result that's both functional and fashionable. So, grab your fabric, thread, and scissors; let's transform your Amsterdam packing woes into a creative and rewarding experience!
Preparation and Safety Guidelines
- Leather (black and green)
- Rivets (gold)
- Elastic
- Sewing machine
- Punching tool
- Tape
- Liner fabric (optional)
- Magnets (optional)
- Ensure all seams are securely stitched, especially the shoulder straps and base, to prevent tearing under weight during your trip.
- Use durable, water-resistant fabric if possible to protect your belongings from unexpected rain in Amsterdam.
- Test the bag's weight capacity before your trip by filling it with similar items and carrying it for a while to ensure comfort and prevent strain.
Step-by-Step Instructions
Design and Planning
- Create a paper model with three pockets and a luggage pass-through.
- Choose leather for the bag, and consider using contrasting colors (e.g., black and green).
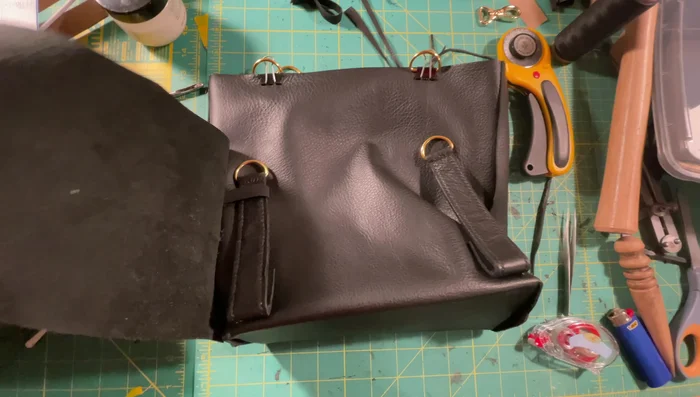
Constructing the Main Body
- Sew the outer pockets onto the main body of the bag.
- Sew the side seams together.
Adding Pockets
- Place this pocket on the back side, hidden by the luggage panel.

Adding Pockets Creating the Luggage Flap
- Sew the luggage flap, optionally adding a liner for stiffness and a curve accentuation.
Creating the Luggage Flap Attaching Straps and Hardware
- Secure the bottom straps with tape, and use elastic for extra support.
- Create and attach straps.
Attaching Straps and Hardware Finishing Touches
- Be careful not to punch through the entire material.)
- Use magnets as closures for the bag.
Finishing Touches


Read more: DIY Quilted Makeup Pouch Tutorial: The Easiest and Fastest Method
Tips
- Consider the weight of the materials when deciding whether to line the bag.
- Use a punch pad to protect your materials while adding rivets.