Toddler clothes can be surprisingly expensive, and tiny humans grow out of them at lightning speed! That's why making your own is such a smart and satisfying solution. This tutorial focuses on creating adorable and practical DIY toddler shorts, perfect for playtime, summer days, or adding to your little one's wardrobe. We’ll guide you through a super-simple pattern drafting process, eliminating the need for complicated measurements and pre-made patterns. You'll be amazed at how easy it is to craft custom-fit shorts that reflect your child's personality and your own sewing style.
Forget expensive store-bought options and embrace the joy of creating something special for your toddler. This project requires minimal sewing experience and readily available materials, making it ideal for beginners. Ready to get started crafting comfy and cute shorts your little one will love? Let's dive into the step-by-step sewing instructions!
Preparation and Safety Guidelines
- sewing machine
- measuring tape
- ruler
- fabric
- elastic
- optional: French curve
- Adult supervision is crucial at all times during the project, especially when using sewing machines or sharp tools. Keep needles and pins out of reach of toddlers.
- Always use fabrics specifically designed for children's clothing. Choose soft, breathable materials that meet safety standards and are free from harmful chemicals.
- Check the finished shorts carefully for any loose threads, small parts that could be choking hazards, or any potential sharp edges before allowing your toddler to wear them.
Step-by-Step Instructions
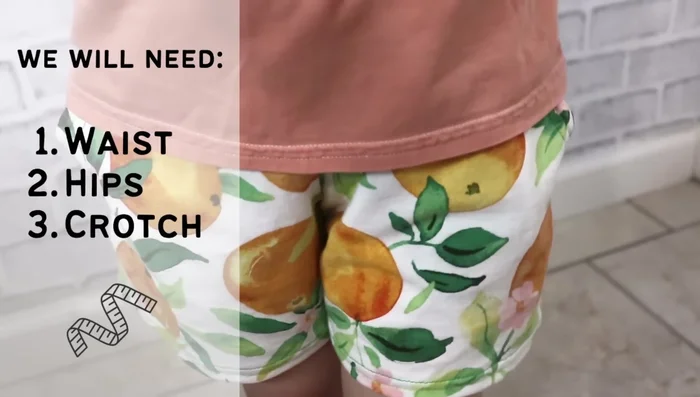
Take Measurements
- full waist circumference (at belly button level), full hip circumference (at the fullest part), and crotch depth (distance from sitting surface to waistline).

Take Measurements Draft Front Pattern Piece
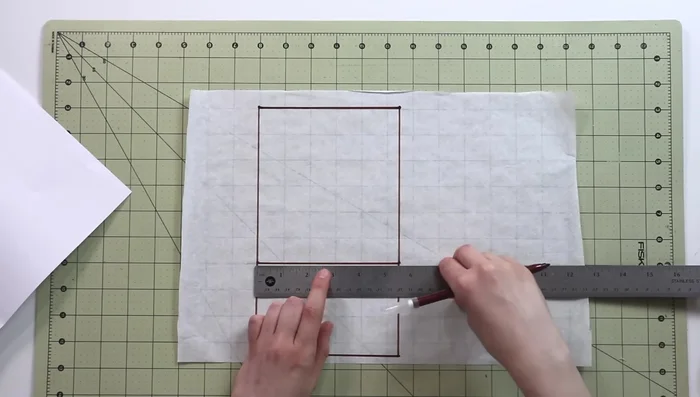
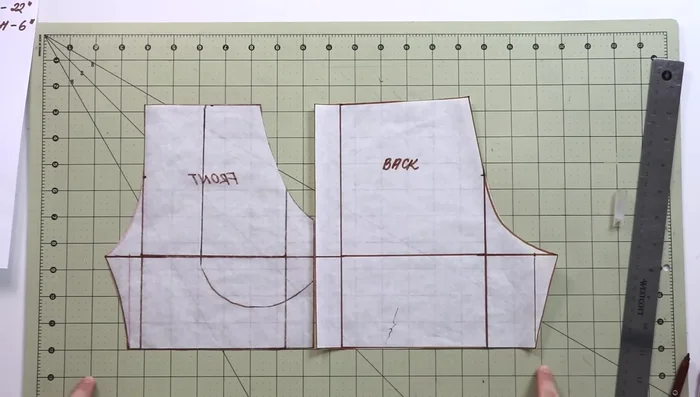
- Create a rectangle. The top is one-quarter of the hip circumference, and the side is the crotch depth. Add a crotch extension (one-quarter of hip circumference), divide it in half, and create a smooth curved crotch line. Reduce the bottom by about 1 inch from the crotch extension and create a straight perpendicular line down, then connect it to create the inner leg seam with a curved line. Lower the top by 1/4 inch and add 1 inch to the side seam for ease.
Draft Front Pattern Piece Draft Back Pattern Piece
- Create a rectangle matching the front's dimensions. Add a crotch extension (half of the hip circumference measurement), divide the top in half, and lower the top 1/4 inch. Angle the top line to allow more room for the buttocks. Take 1/2 inch away from the center back and connect the points with a straight line. Create a smooth curved crotch line. Add 1 inch to the side seam for ease. Create the inner leg seam, matching length with the front piece.
Draft Back Pattern Piece Create Waistband
- Place pattern pieces side by side. Measure the top from one end to the other. This is half the waistband length. The width is twice the elastic width plus 1/4 inch for ease.
Create Waistband Cut Fabric
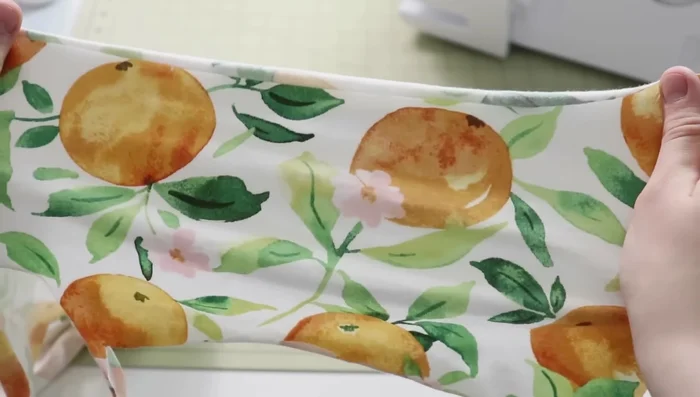
- Cut two mirrored front pattern pieces, two mirrored back pattern pieces, and the waistband on the fold. Add seam allowances (if not included in your pattern).
Cut Fabric Sew Pockets (Optional)
- Sew the pockets (if applicable).
Sew Pockets (Optional) Sew Side Seams
- Sew side seams (right sides together).
Sew Side Seams Finish Hem (Optional)
- can be done last).
Finish Hem (Optional) Sew Crotch Seam & Join Legs
- Sew the crotch seam and join pant legs.
Sew Crotch Seam & Join Legs Add Waistband
- Add the waistband with elastic.
Add Waistband


Read more: Raglan Sleeve Sewing Tutorial: A Step-by-Step Guide
Tips
- For easier drafting for children, assume the waist is at belly button level.
- Use elastic or yarn to easily mark the waistline on the child.
- Measurements can be in inches or centimeters; the math remains the same.
- Add extra width to the side seams for ease and to accommodate growth.
- Ensure inner leg seams match in length for a clean finish.