Ever fallen in love with a t-shirt, only to find it’s discontinued, ridiculously expensive, or simply unavailable in your size? We’ve all been there. That perfect fit, that incredible fabric, that unique design… gone. But what if we told you there's a way to effortlessly recreate that cherished garment? This isn't about complex sewing or advanced techniques; it's about a simple, accessible method that lets you replicate your favorite t-shirt perfectly. Forget scouring online marketplaces and settling for second best.
This ultimate guide provides a detailed, step-by-step process for copying your beloved t-shirt, transforming a plain tee into an exact replica. We'll walk you through everything from choosing the right fabric and pattern making to cutting and stitching, ensuring you achieve a flawless result. Prepare to unlock the secret to effortlessly owning multiple versions of your favorite top – let’s get started!
Preparation and Safety Guidelines
- T-shirt
- Paper (large roll or multiple sheets)
- Tracing wheel (optional)
- Sharpie or pencil
- Ruler
- Scissors
- Sewing machine
- Pins
- Iron
- Tape measure
- Always pre-wash your fabric before starting. Shrinkage after washing can ruin your carefully copied design.
- Use caution with your chosen heat transfer method (iron, heat press). Excessive heat can scorch or damage your fabric. Follow manufacturer instructions closely.
- Test your heat transfer method on a scrap piece of the same fabric before applying it to your final shirt to avoid mistakes.
Step-by-Step Instructions
Prepare Pattern Materials
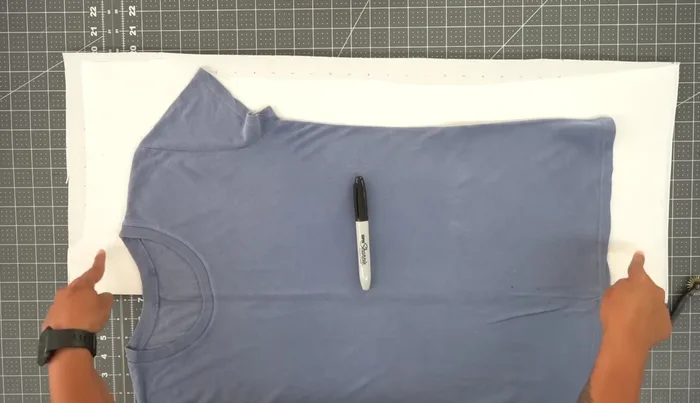
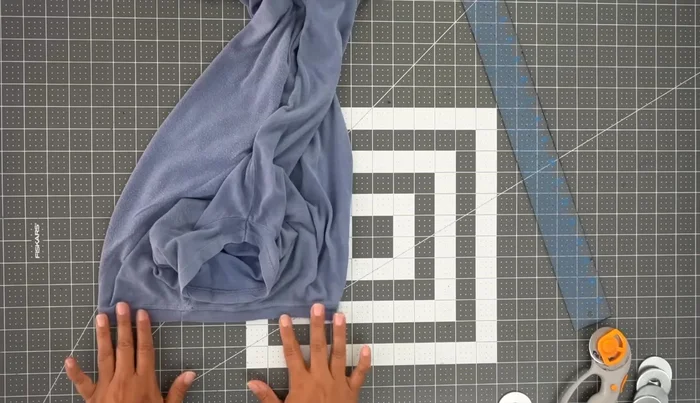
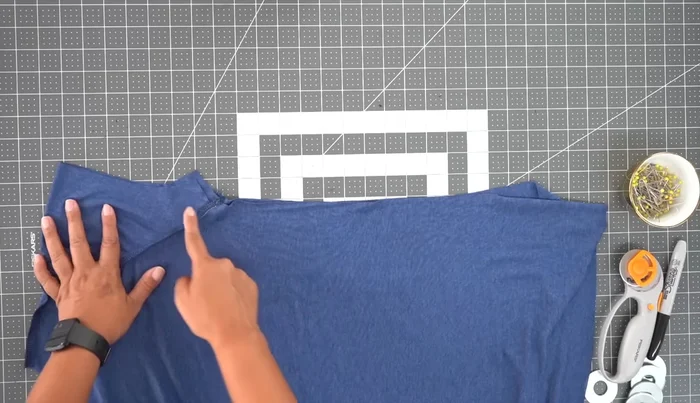
- Fold your t-shirt in half and press the center crease. Fold a large sheet of paper in half. Place the folded t-shirt's crease along the paper's fold.

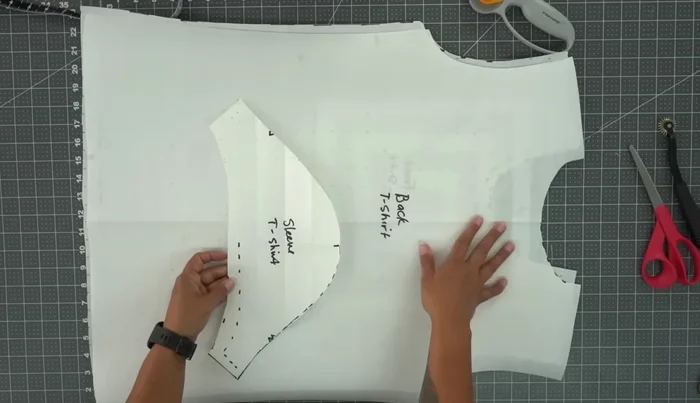
Prepare Pattern Materials Trace T-Shirt Onto Paper
- Trace around the body of the shirt, including the neckline, shoulder, and armscye. You can use a tracing wheel for precise markings or a pencil/sharpie to mark points along the seams, then connect them.
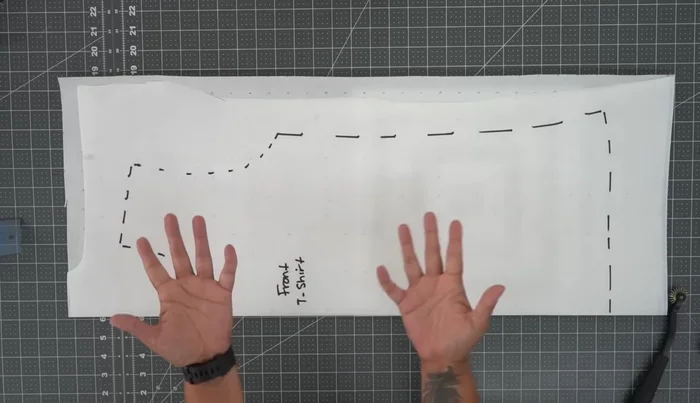
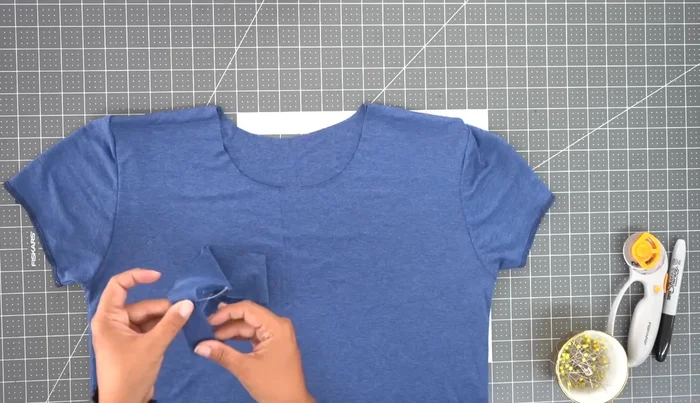
Trace T-Shirt Onto Paper Add Seam Allowance to Pattern
- Add seam allowance (at least 1 inch for the hem, 5/8 inch for sides and armscye, 1/2 inch for the neck) to your traced pattern pieces.
Add Seam Allowance to Pattern Cut Out Front Pattern Piece
- Cut along the outer lines of your marked pattern, creating a full front pattern piece.
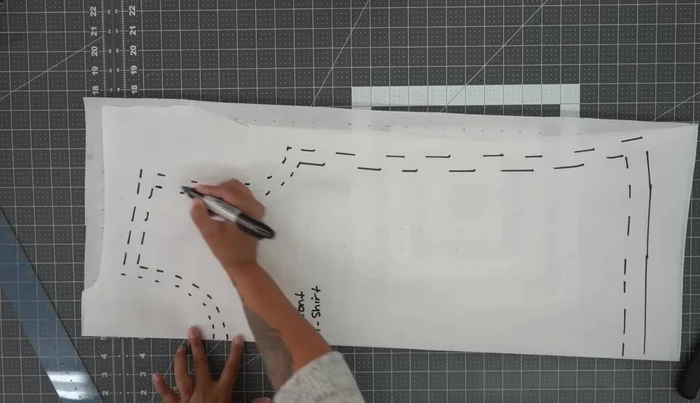
Cut Out Front Pattern Piece Create Back Pattern Piece
- Use the front pattern piece to create the back pattern piece. The only difference should be the back neckline, which is often higher than the front.
Create Back Pattern Piece Create Sleeve Pattern
- Fold another sheet of paper in half. Place the sleeve on the fold, iron it flat, and trace around it, including the hem and underarm seam. Add seam allowance (5/8 inch at the bottom, 1/2 inch at the underarm and sleeve cap). Trim about 1/4 inch off the backside of the sleeve to create a smoother curve.
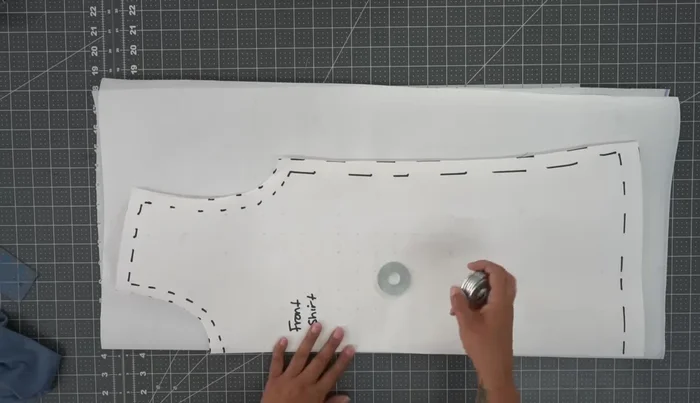
Create Sleeve Pattern Cut Out All Pattern Pieces
- Cut out two sleeve pieces, one back piece, and one front piece.
Cut Out All Pattern Pieces Create Neckband Pattern
- Measure the neckline of the front pattern piece and add 1/4 inch for seam allowance. Create a rectangle that's twice the neckline length and 2 inches wide. Cut it out.
Create Neckband Pattern Sew Shoulder Seams
- Sew the front and back pieces together at the shoulder seams using 5/8 inch seam allowance. Serge or zig-zag stitch the seam allowance.
Sew Shoulder Seams Attach Sleeves
- Attach the sleeves using the flat method. Match the notches and ease in the sleeve cap. Stitch using a 1/2 inch seam allowance. Repeat for the other sleeve.
Attach Sleeves Sew Side Seams
- Sew the side seams, including the underarm seams, using 5/8 inch seam allowance. Serge or zig-zag stitch the raw edges.
Sew Side Seams Attach Neckband
- Sew the ends of the neckband together to form a loop. Press the neckband in half, wrong sides facing. Pin the neckband to the neckline, matching the center points. Stitch using 1/2 inch seam allowance. Serge and press the seam allowance.
Attach Neckband Hem Sleeves and Body
- Hem the sleeves and body of the t-shirt using a narrow zig-zag stitch.
Hem Sleeves and Body


Read more: Raglan Sleeve Sewing Tutorial: A Step-by-Step Guide
Tips
- Use a larger piece of paper to avoid having to piece together multiple sheets.
- If your neckband is too large, adjust the length to ensure a snug fit.
- For a more precise tracing, use a tracing wheel. If you don't have one, you can use pins or other marking tools.
- Consider adding larger seam allowances if you want a looser, more oversized fit.