Is your beloved ottoman looking a little worse for wear? Perhaps the fabric is stained, faded, or simply no longer complements your décor. Before you consider replacing it entirely, consider the surprisingly simple and cost-effective solution: a DIY ottoman slipcover! Transforming your tired furniture is easier than you think, breathing new life into a cherished piece without breaking the bank or requiring advanced sewing skills. This project is perfect for beginners, requiring minimal tools and materials, yet yielding impressive results that will elevate your living space.
Forget expensive reupholstery services and embrace the satisfaction of a personalized touch. A new slipcover allows you to easily switch up your style whenever the mood strikes, simply by changing the fabric. Ready to revitalize your ottoman and add a touch of flair to your home? Let's dive into the straightforward, step-by-step process that will have you enjoying your refreshed ottoman in no time.
Preparation and Safety Guidelines
- Fabric
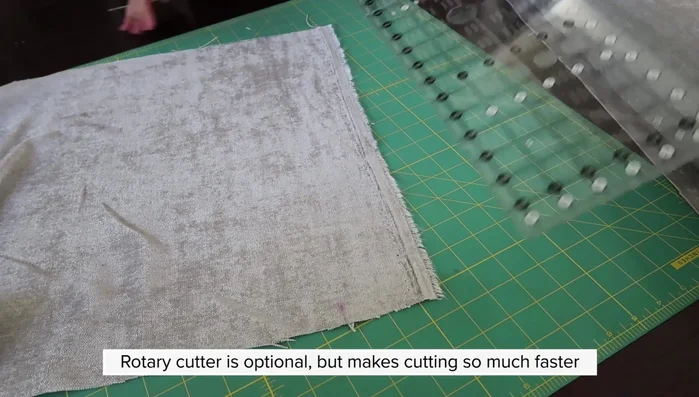
- Rotary cutter (optional)
- Healing mat (optional)
- Sewing machine
- Measuring tape
- Pins
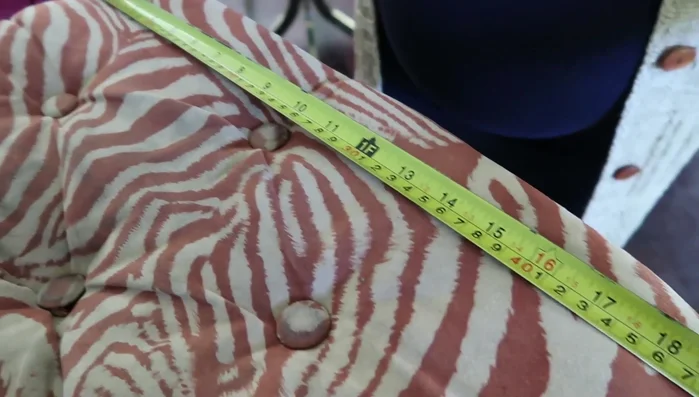
- Always measure your ottoman carefully before purchasing fabric. Add extra inches for seam allowance and ease.
- Use sharp scissors or a rotary cutter for clean cuts and prevent fraying. Consider using pinking shears for raw edges.
- If using a fabric that requires pre-washing, do so before cutting and sewing to avoid shrinkage after the slipcover is completed.
Step-by-Step Instructions
Measure and Cut Fabric
- Measure your ottoman.
- Cut out fabric squares. Add extra fabric for ease (about 2 inches more than the measurement of each side).

Measure and Cut Fabric Assemble the Slipcover Top and Sides
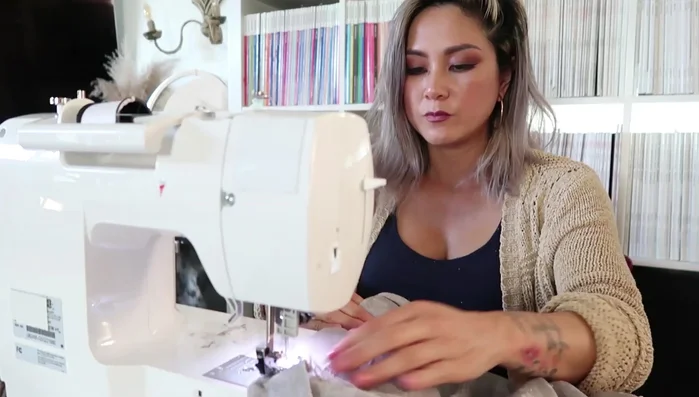
- Sew together the fabric squares to create the top and sides of the slipcover. Sew the sides to the top panel.
Fit and Hem
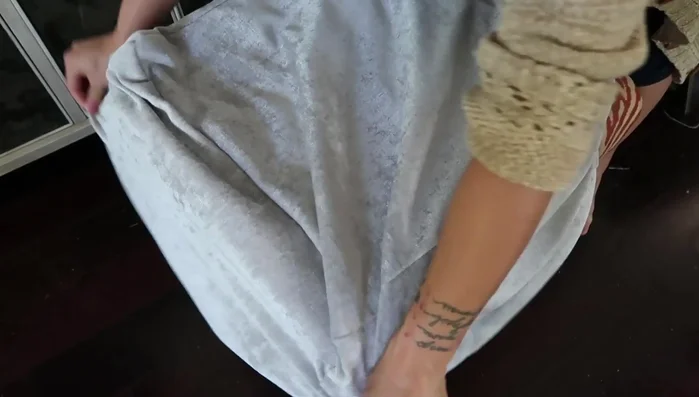
- Try the slipcover on the ottoman to ensure a proper fit. Mark the base of the ottoman to determine how much fabric to hem at the bottom.
- Hem the bottom of the slipcover.
Fit and Hem Final Touches
- Slip the completed slipcover over the ottoman.
Final Touches
Read more: DIY Super Cute Whale Shower Curtain: A Step-by-Step Tutorial
Tips
- For faster cutting, use a healing mat and a rotary cutter.
- Add extra fabric to your measurements for ease of sewing and fitting.
- Personalize your slipcover by adding trim, fringe, or other decorative elements.