Lena the Cat, with her endearingly mischievous expression and fluffy tail, has captured the hearts of countless fans. Her adorable design lends itself perfectly to crafting, making her a delightful project for both seasoned crafters and enthusiastic beginners. This charming feline character transcends screens, offering a heartwarming opportunity to create a cherished companion entirely by your own hands. Imagine the joy of cuddling your very own Lena, a testament to your creativity and patience. Whether you're looking for a fun weekend project or a thoughtful handmade gift, this guide provides all the necessary steps to bring your own Lena to life.
This DIY project will take you through a comprehensive, step-by-step guide to creating your very own Lena the Cat plushie. From gathering the essential materials to the final stitching, we'll provide clear instructions and helpful tips to ensure a smooth and satisfying crafting experience. So, gather your supplies and prepare to embark on this fulfilling journey of creating a cuddly companion – let’s get started!
Preparation and Safety Guidelines
- Fabric
- Felt
- Needle
- Thread
- Pins
- Adult supervision is required, especially when using needles and scissors. Keep small parts away from young children to prevent choking hazards.
- Use only fabric-safe materials and follow the manufacturer's instructions on fabric glues, paints, or other embellishments. Test in an inconspicuous area first.
- Handle sharp tools with care to avoid injury. Work in a well-lit area with a comfortable workspace.
Step-by-Step Instructions
Create Cat Head Shape
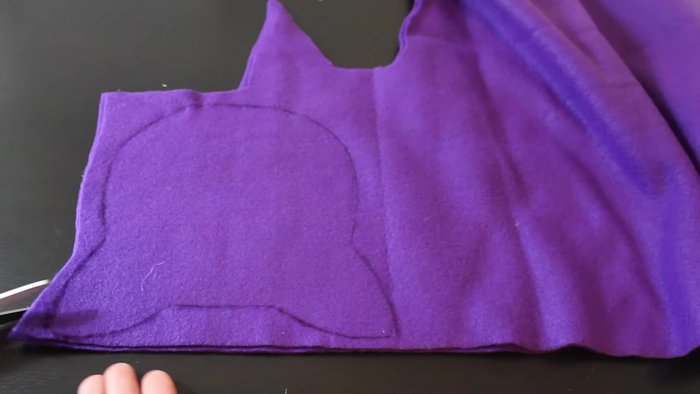
- Trace your pattern onto folded fabric and cut it out symmetrically to create a cat head shape.

Create Cat Head Shape Cut Out Fabric Body
- Trace your design onto folded fabric again, adding a 1/4 inch hem allowance all around, and cut it out.
Cut Out Fabric Body Prepare Felt Facial Features
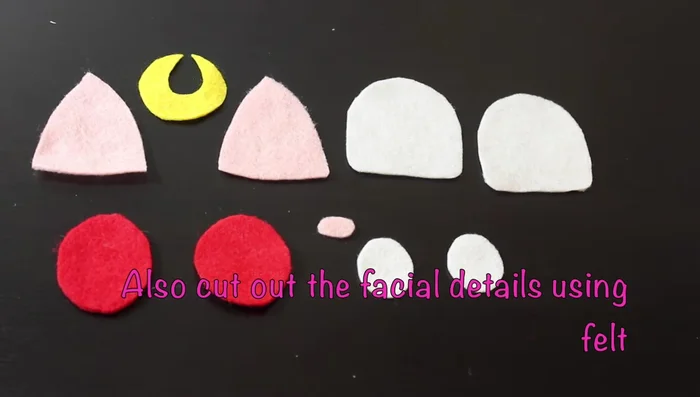
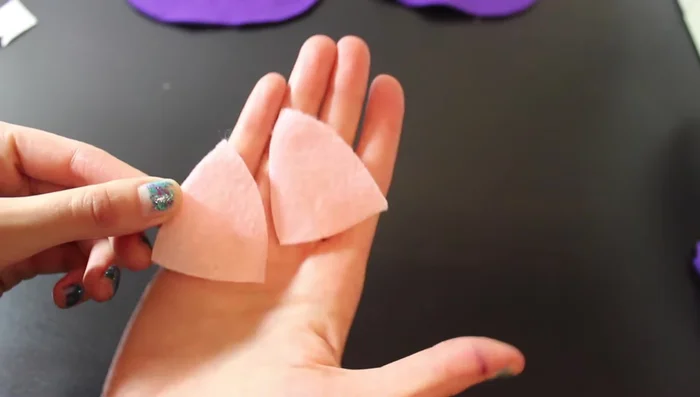
- Cut out facial details (eyes, ears, nose, moon) from felt.
Prepare Felt Facial Features Arrange and Pin Felt Details
- Arrange felt details (large white circles for eyes, smaller pink circles inside, pink ears, moon shape with teardrop cut out, and pink nose) on the front of the fabric.
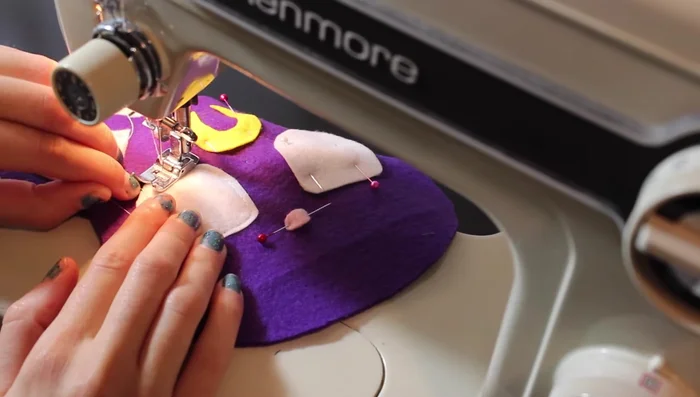
- Pin the felt details to the front of the fabric.
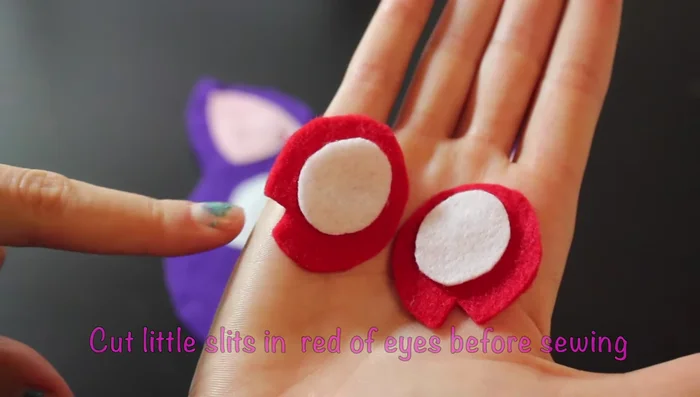
Arrange and Pin Felt Details Prepare Red Eye Circles
- Before sewing on the red circles for the eyes, cut little triangular slits on either end.
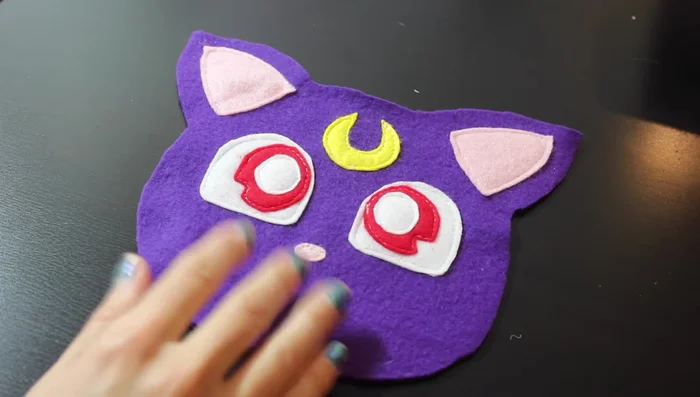
Prepare Red Eye Circles Sew Felt Details
- Sew all felt details in place.
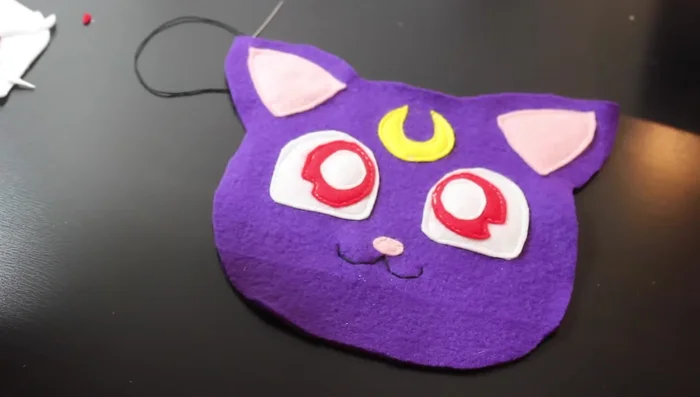
Sew Felt Details Embroider Facial Details
- Sew on the mouth, whiskers, eyebrows, and eyelashes using needle and thread.
Embroider Facial Details Sew and Stuff the Plushie
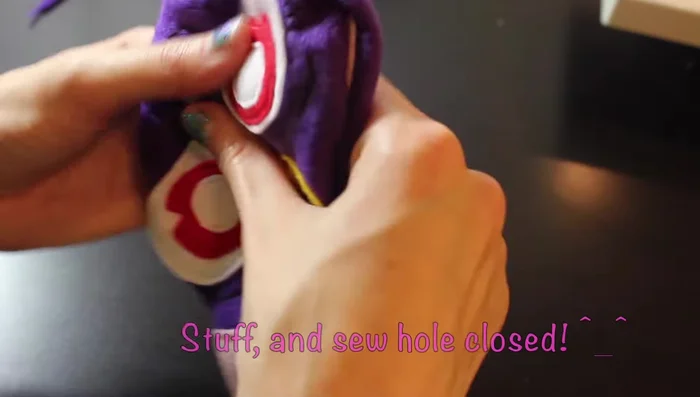
- Place the front and back pieces together, right sides facing, and pin them.
- Sew around the pinned line, leaving a hole to turn the plushie right side out, stuff it, and sew the hole closed.
Sew and Stuff the Plushie


Read more: DIY Fluffy Duck Plushie Tutorial: A Step-by-Step Guide
Tips
- N/A