Leather skirts exude confidence and style, but the price tag often reflects their luxurious appeal. If you're craving a bespoke leather skirt without the designer price, this DIY project is for you! We’ll guide you through creating a perfectly fitted leather skirt using a revolutionary clip method, eliminating the need for complex sewing and expensive alterations. This technique allows for incredible precision and customization, ensuring the final product fits your body like a dream. Forget frustrating fitting issues and embrace the empowering experience of crafting your own wardrobe staple.
This innovative approach utilizes readily available clips to meticulously shape and adjust the leather throughout the process. Say goodbye to guesswork and hello to a flawlessly tailored garment! Ready to transform a piece of leather into your new favorite skirt? Let's dive into the step-by-step instructions to create your perfect DIY leather skirt using the simple yet effective clip method.
Preparation and Safety Guidelines
- Faux leather fabric
- Thread
- Tape measure
- Buckle
- Exposed zip
- Clips
- Fabric scissors
- Pattern weights
- Sewing machine
- Eyelet pliers
- Eyelets
- Leather is a strong material. Use sharp, heavy-duty scissors or a rotary cutter to avoid injury and ensure clean cuts. Always cut away from yourself.
- Leather can be slippery. Use clips that provide a firm grip to prevent shifting during the fitting and sewing process. Consider using extra clips or weights to secure larger pieces.
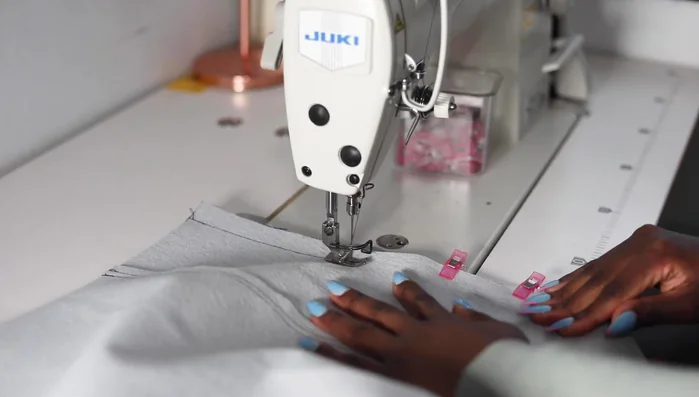
- Test your stitching on scrap leather before working on your skirt. This allows you to adjust your tension and stitch length to best suit the material and prevent breakage.
Step-by-Step Instructions
Cutting the Pattern
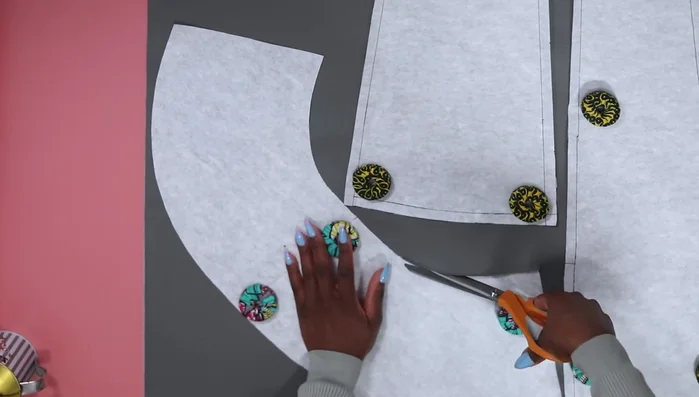
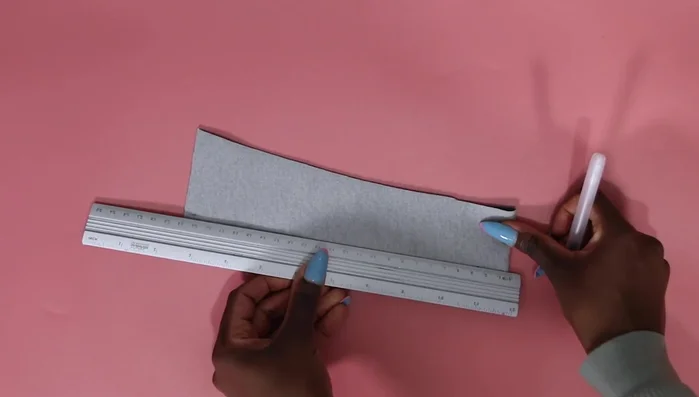
- Cut the skirt pattern pieces using pattern weights to hold the fabric in place. Cut carefully with fabric scissors or rotary cutters.

Cutting the Pattern Assembling the Front
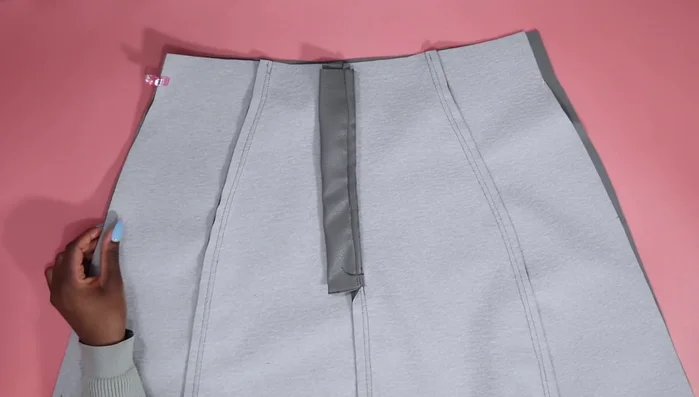
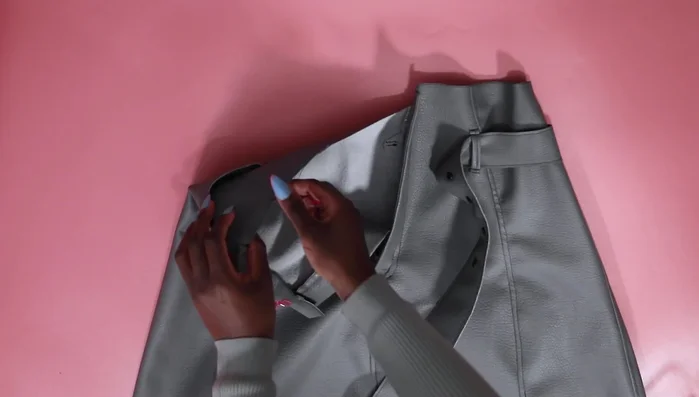
- Sew the fly front zipper, using clips to hold the pieces together. Sew from top to bottom.
Assembling the Front Attaching the Peplum
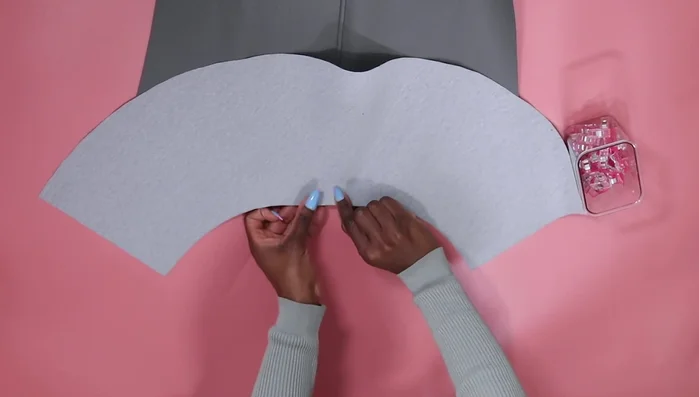
- Attach the peplum to the bottom of the skirt, using clips to hold the pieces together. Sew and top stitch the seam.
Attaching the Peplum Attaching Side Panels
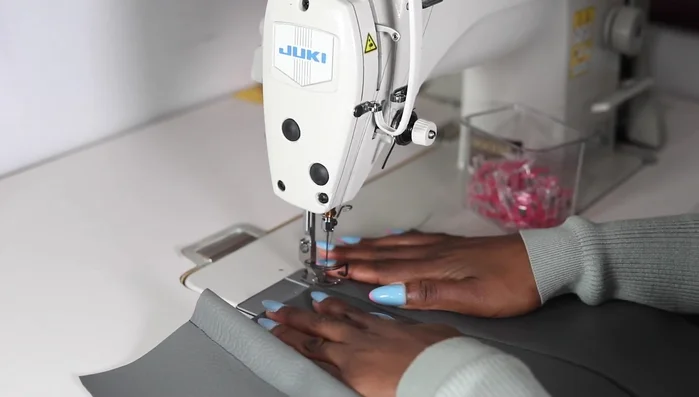
- Attach the side panels, placing the fabric right sides together and using clips. Sew the side seams together, gently guiding the fabric and keeping it flat.
- Top stitch the side seams to secure them.
Attaching Side Panels Joining Front and Back
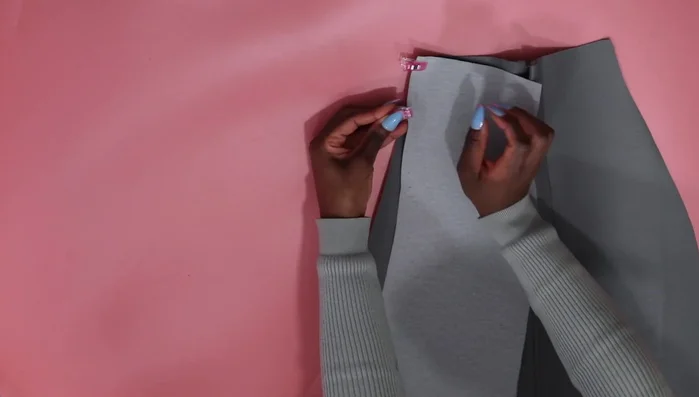
- Sew the front and back skirt pieces together at the side seams, using clips.
Joining Front and Back First Fitting and Adjustment
- Leather is difficult to unpick, so try to get it right the first time!).
First Fitting and Adjustment Adding Belt Loops
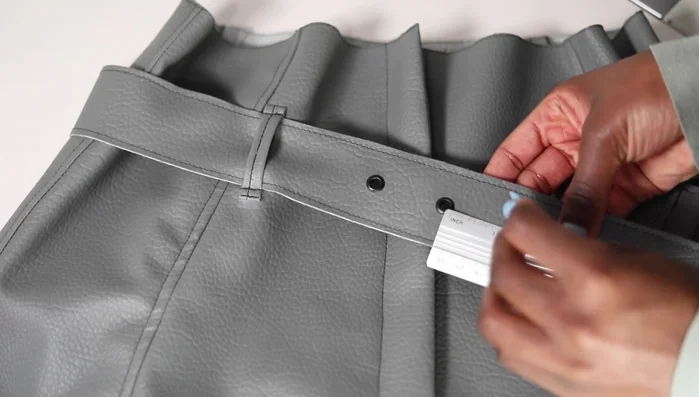
- Cut and sew belt loops, top stitching them onto the skirt.
Adding Belt Loops Attaching Eyelets
- Attach eyelets to the belt using eyelet pliers.
Attaching Eyelets Finishing the Waistline
- Finish the waistline by turning in the edge and using clips to secure. Top stitch.
Finishing the Waistline

Read more: Raglan Sleeve Sewing Tutorial: A Step-by-Step Guide
Tips
- Use pattern weights instead of pins to avoid marking the leather.
- Use clips to hold pieces together while sewing, especially helpful with leather.
- Take your time and sew slowly, especially when working with leather.
- Gently guide the fabric to ensure it lays flat while top stitching.
- Don't forget to backtack your stitches for extra security.