Transform your blank walls into vibrant, personalized masterpieces without breaking the bank! DIY fabric wall art panels offer a fantastically affordable and stylish solution for decorating any room, especially those frequented by little ones. Forget expensive prints and potentially hazardous materials; this project utilizes simple, safe fabrics, readily available supplies, and a surprisingly simple technique to create stunning, unique wall art. The result is a beautiful and kid-friendly addition to your home that reflects your personal style and adds a touch of handmade charm.
This project is perfect for all skill levels, offering a fun and rewarding crafting experience for adults and older children alike. From choosing your fabrics to proudly displaying your finished panels, we'll guide you through every step of the process, ensuring you achieve professional-looking results. Ready to get started? Let's dive into the step-by-step instructions and create some gorgeous fabric wall art!
Preparation and Safety Guidelines
- Fabric
- Canvas stretchers
- Staple gun
- Always supervise young children around the project and finished art, especially if using scissors or potentially hazardous materials like hot glue.
- Choose fabric dyes and paints that are non-toxic and specifically labeled as safe for children. Avoid using fabrics treated with harsh chemicals.
- Ensure all hardware used for hanging the panels (nails, hooks, etc.) is securely fastened to prevent accidental falls and injuries.
Step-by-Step Instructions
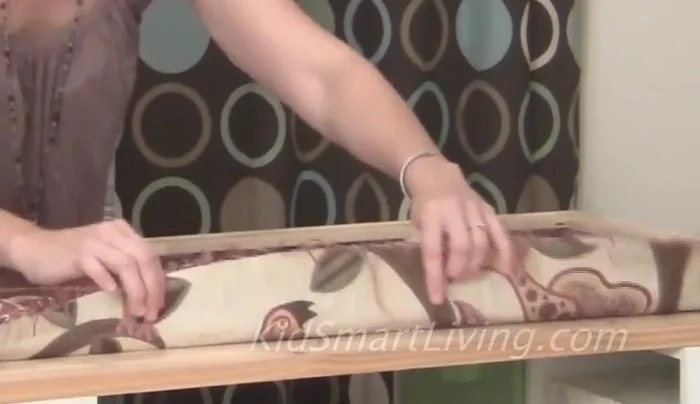
Prepare Fabric and Frame
- Lay fabric face down and position the pre-assembled canvas stretcher frame on top.
Cut and Secure Fabric
- Trim excess fabric, ensuring enough overhang to staple.
- Staple the fabric to the frame, starting with opposite sides and working your way around. Secure the center first.
- Work from the middle of each side towards the corner to maintain tension and a smooth finish.

Cut and Secure Fabric Finish Corners
- Fold and secure the corners neatly, using two staples per corner if needed to prevent puckering.
- Add extra staples to reinforce corners and ensure a secure hold.
Finish Corners


Read more: DIY Super Cute Whale Shower Curtain: A Step-by-Step Tutorial
Tips
- Use canvas stretchers for a frame; they stay straight and have mitered corners for an easy fit.
- Tack a few staples to hold the frame together temporarily while stapling the fabric.
- Work on the corners last, after stapling the main sections.
- If puckering occurs, adjust the fabric before adding final staples to the corners.