Tired of that worn-out stool in your kitchen or drab extra seating in your living room? A simple, yet impactful update is within reach with a DIY drawstring stool cover! This inexpensive project transforms a tired piece of furniture into a stylish accent, injecting personality and freshness into your space. Whether you're aiming for a rustic farmhouse look, a vibrant bohemian vibe, or something sleek and modern, a custom-made drawstring cover offers endless possibilities for personalization. You can easily tailor the fabric, color, and pattern to match your existing décor, creating a cohesive and inviting atmosphere.
This project is surprisingly straightforward, requiring minimal sewing skills and readily available materials. Ready to breathe new life into your old stool? Let's dive into the step-by-step process and create a beautiful, functional, and completely customized drawstring stool cover.
Preparation and Safety Guidelines
- Non-skid liner
- Drawstring
- Fabric
- Foam or batting
- Always use sharp scissors and handle them with care to prevent accidental cuts. Keep them away from children.
- Ensure the drawstring is strong enough to support the weight of the stool and any items placed on it. Test the strength before using the cover.
- If using fabric with fraying edges, use fabric glue or a zigzag stitch to prevent unraveling and maintain a neat finish.
Step-by-Step Instructions
Gather Supplies
- non-skid liner, drawstring, fabric, foam or batting.

Gather Supplies Plan and Cut Fabric
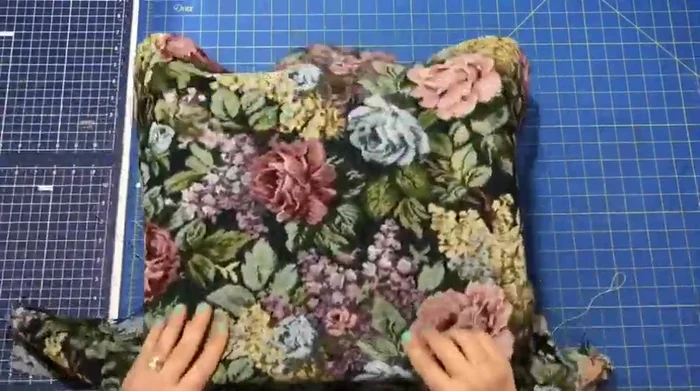
- Cover the stool with fabric to plan the layout and fussy cut if desired.
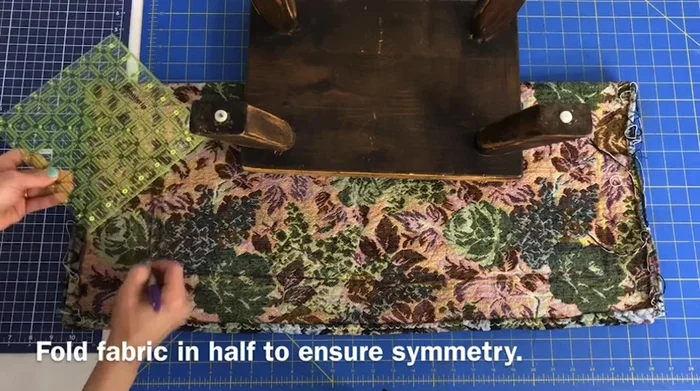
- Fold fabric in half, lay stool on folded fabric, measure 5 inches out, and mark for cutting.
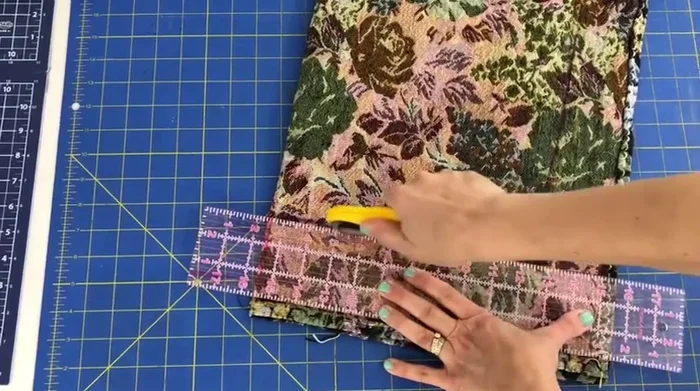
- Cut the excess fabric following the markings.
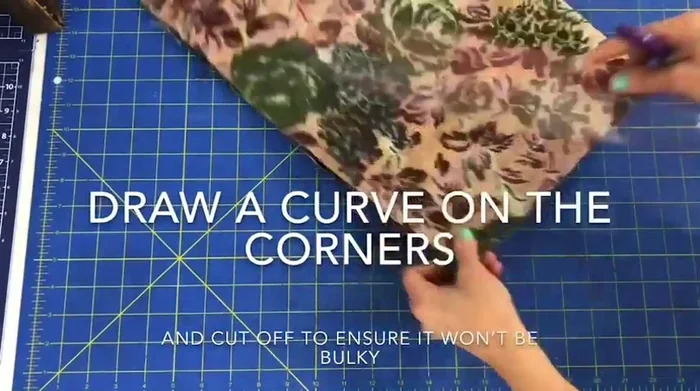
- Fold fabric in half, curve the corners using a ruler or curved object, and cut to reduce bulk.
Plan and Cut Fabric Prepare Fabric Edges
- Serge or zig-zag stitch the edges to prevent fraying.
Prepare Fabric Edges Sew the Cover
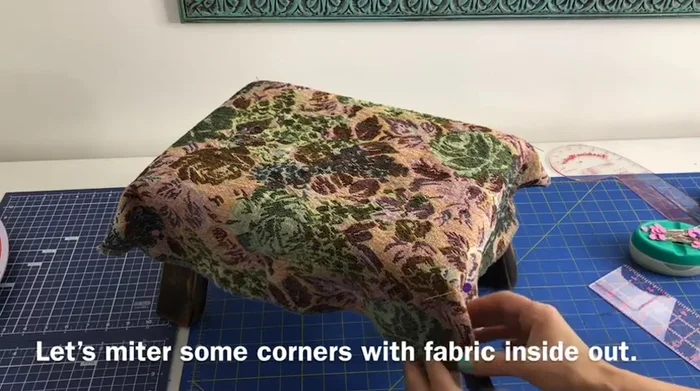
- Miter the corners by turning the fabric inside out, laying it over the stool, pinning, and sewing straight down.
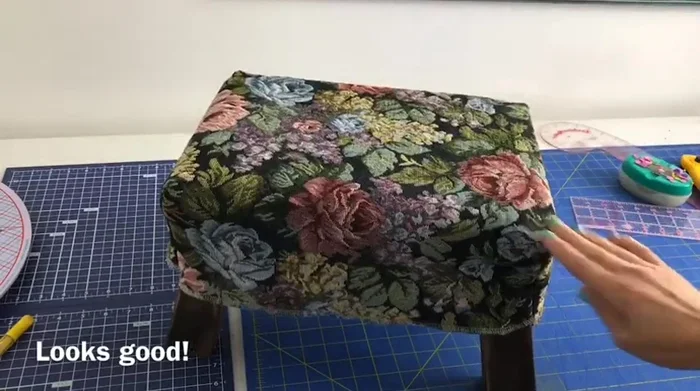
- Try on the cover, cut off excess fabric for a smooth fit.
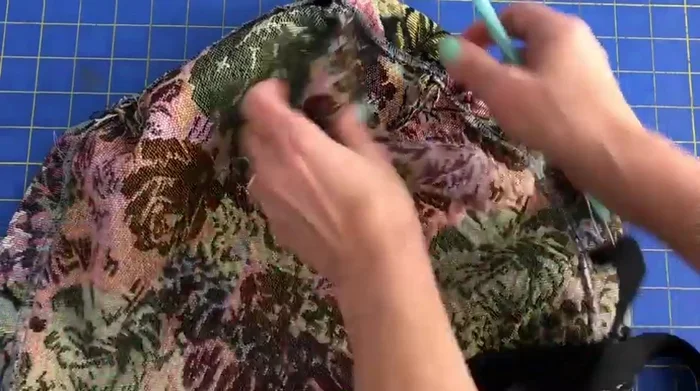
Sew the Cover Create Drawstring Casing
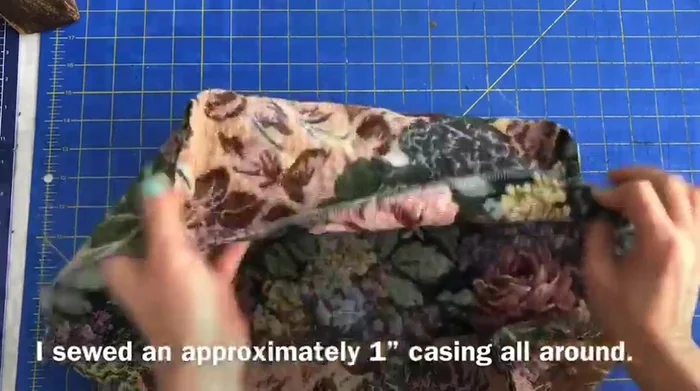
- Create a one-inch casing around the serged edge and sew, leaving a gap for the drawstring.
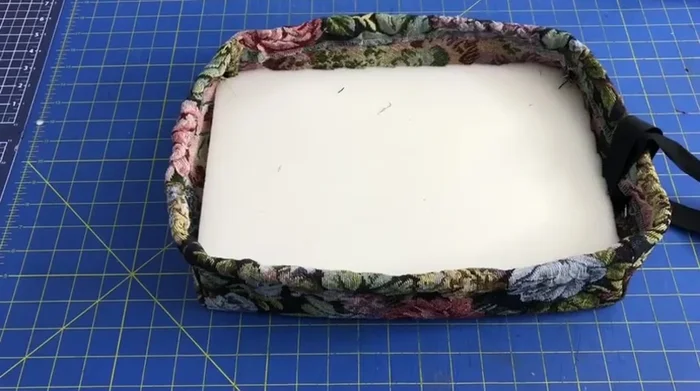
Create Drawstring Casing Prepare Insert Materials
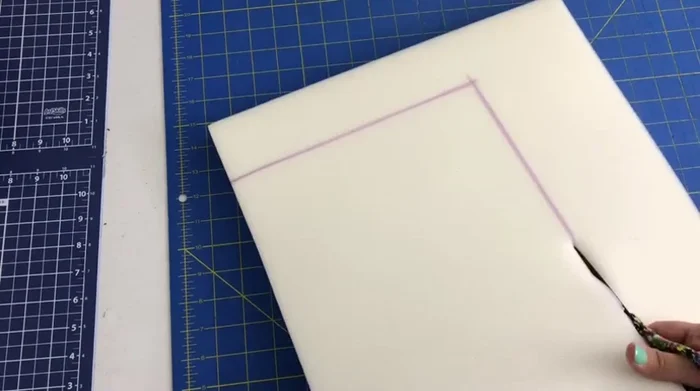
- Cut out foam to fit the stool.
Prepare Insert Materials Insert Drawstring
- Weave the drawstring through the casing using a tool (safety pin attached to a straw).
- Secure the drawstring ends to the cover.
Insert Drawstring Assemble and Finish
- Add foam and non-skid liner inside the cover, insert the stool, tighten the drawstring, and tie a bow.
Assemble and Finish


Read more: DIY Super Cute Whale Shower Curtain: A Step-by-Step Tutorial
Tips
- Use a thicker, more durable fabric like upholstery fabric for the stool cover.
- Don't pinch the corners too tightly when mitering to allow for foam insertion.
- Backstitch at the beginning and end of seams for added durability.
- Use a safety pin attached to a straw to easily weave the drawstring through the casing.
- Consider using cord stoppers for a neater finish to the drawstring.