Transform your ordinary chairs into elegant masterpieces with this easy-to-follow tutorial on creating a stunning double wrap chair sash bow with a side knot! Chair sashes are a versatile and affordable way to instantly elevate the aesthetic of any event, from weddings and galas to birthday parties and holiday celebrations. Forget expensive rentals; with a little fabric and this simple technique, you can create beautiful, personalized chair décor that perfectly complements your chosen theme and color palette. This elegant bow adds a touch of sophistication and charm, transforming even the most basic chair into a focal point.
This step-by-step guide will walk you through the process of creating this exquisite double wrap chair sash bow, complete with a charming side knot for an added touch of flair. Get ready to impress your guests and add a professional touch to your next event with this remarkably simple DIY project! Let's begin!
Preparation and Safety Guidelines
- Standard banquet chair
- Stretch satin chair cover
- Satin chair sash
- Rhinestone brooch (optional)
- Always use sharp scissors to prevent fraying and ensure clean cuts on your fabric. Dull scissors can cause the fabric to tear or become uneven.
- Be mindful of the chair's material when attaching the bow. Avoid using pins or fasteners that could scratch or damage the chair's finish. Consider using fabric tape or clips for a safer and more secure hold.
- When working with long sashes, be careful not to trip over them. Keep the area clear of obstacles and keep the excess fabric neatly arranged to prevent accidents.
Step-by-Step Instructions
Centering and Initial Wrap
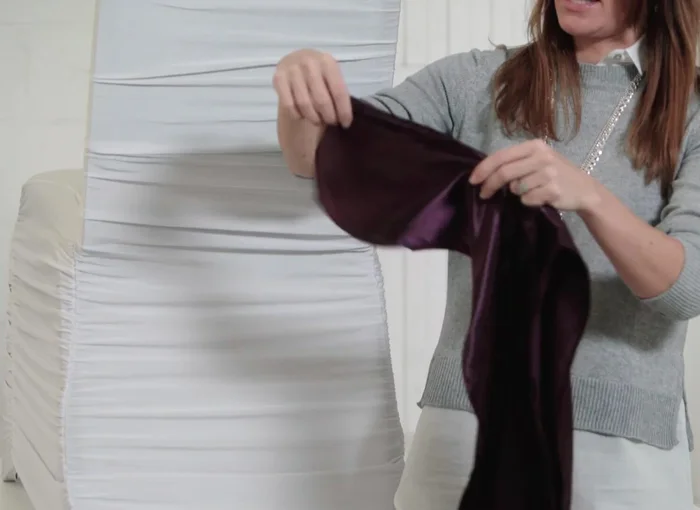
- Fold your sash in half to find the center point.
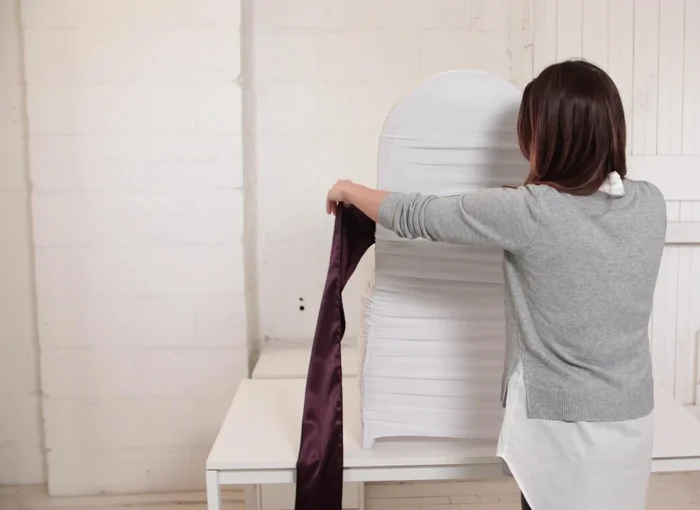
- Wrap the sash around the front of the chair.

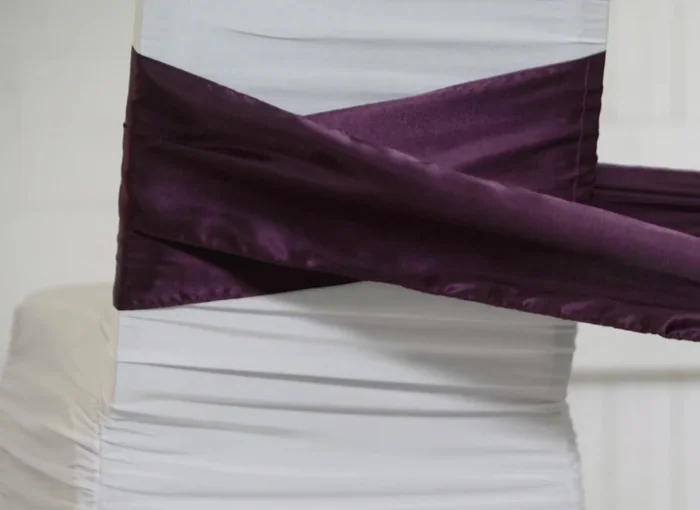
Centering and Initial Wrap Second Wrap and Tail Adjustment
- Wrap the sash around the right side of the chair once.
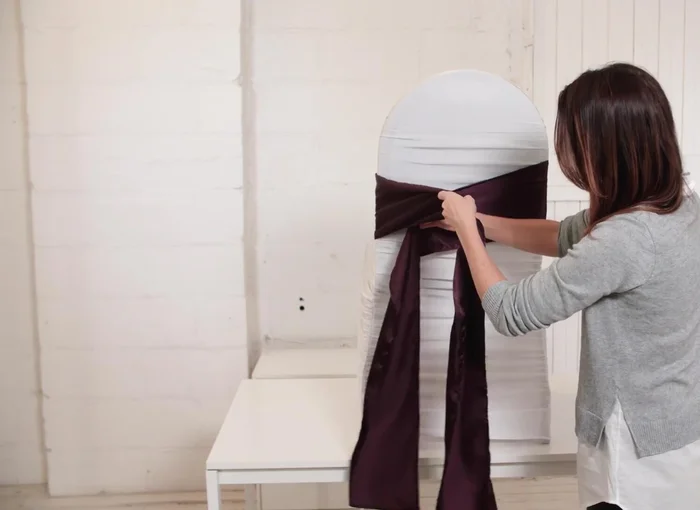
- Bring the sash around to the side, leaving two uneven tails.
- Adjust the tails until they are equal in length.
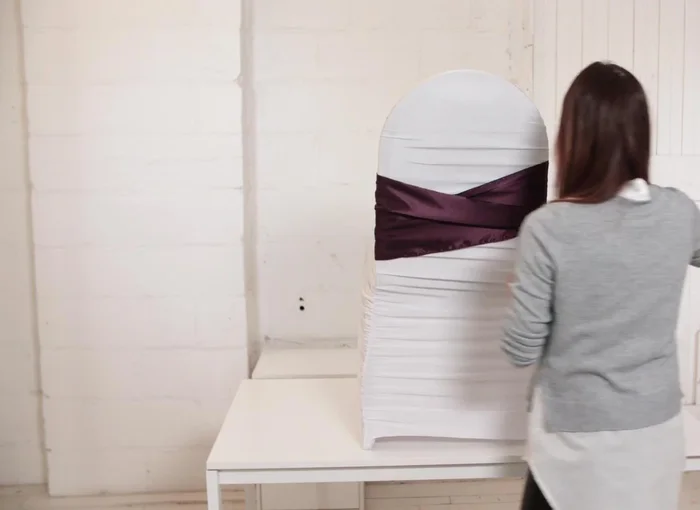
Second Wrap and Tail Adjustment Securing the Bow
- Tie a simple knot on the side to secure the sash.
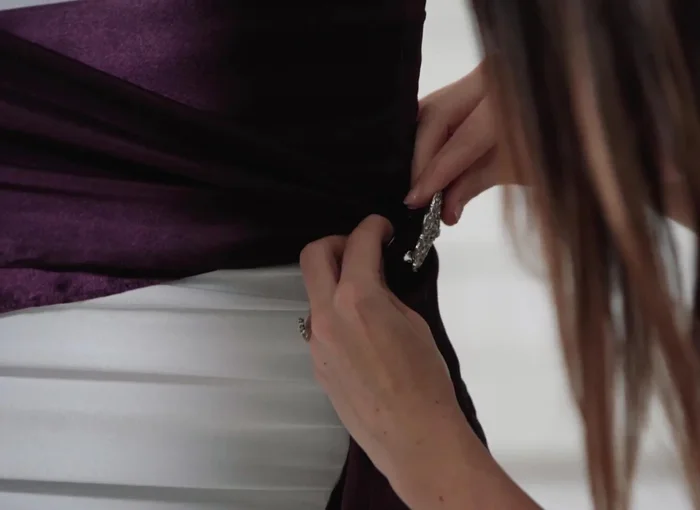
Optional Decoration
- Add a rhinestone brooch (optional) to the corner for extra sparkle.
Optional Decoration
Read more: DIY Super Cute Whale Shower Curtain: A Step-by-Step Tutorial
Tips
- This method works well for a large number of chairs, especially with a team.
- The final look is beautiful, elegant, and quick to achieve.