Tired of juggling your drink while relaxing on the couch? Do you constantly find yourself precariously balancing your coffee mug, risking spills and potential furniture stains? Then you've come to the right place! This simple DIY project will solve that age-old problem with a custom-made couch armrest cup holder, transforming your lounging experience from precarious to perfectly peaceful. Forget expensive store-bought solutions – we'll show you how to create a sturdy and stylish cup holder using readily available materials and basic tools.
This guide offers a practical and accessible solution for enhancing your comfort and convenience. No complicated techniques or specialist skills are required, making this project perfect for beginners. We'll walk you through each step of the process, from gathering materials to securing your finished cup holder, ensuring you have a functional and attractive addition to your living room furniture. Ready to get started? Let's dive into the step-by-step instructions!
Preparation and Safety Guidelines
- 1x8 Pine board
- 1x5 Pine board
- Wood glue
- Double-sided tape
- 3 1/2 inch hole saw
- Forstner bit
- Jigsaw
- Roundover bit
- Sandpaper
- Wood stain
- Pre-stained wood conditioner
- Oil-based polyurethane
- Measuring tape
- Pencil
- Always ensure the cup holder is securely attached to the armrest to prevent accidental spills or the holder detaching and causing injury.
- Use appropriate adhesive or fastening methods suitable for your couch material. Avoid using adhesives that could damage or stain your fabric.
- Test the cup holder's weight capacity before placing heavy or full cups in it to avoid accidents or damage to the holder or couch.
Step-by-Step Instructions
Planning and Material Preparation
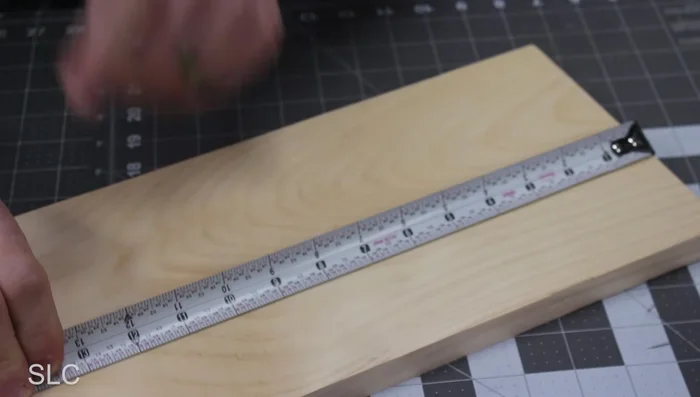
- Take measurements of the armrest.

Planning and Material Preparation Cutting the Wood Pieces
- Cut the 1x8 top board to 12 inches.
- Cut two 1x5 side boards to 12 inches.
- Trim the top boards to 7 inches wide.
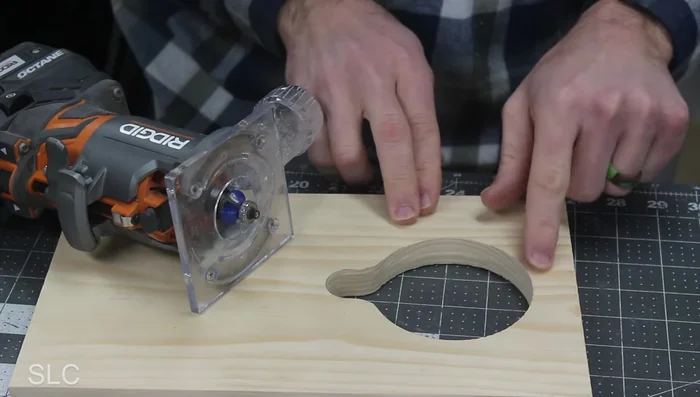
Cutting the Wood Pieces Creating the Cup Holder Opening
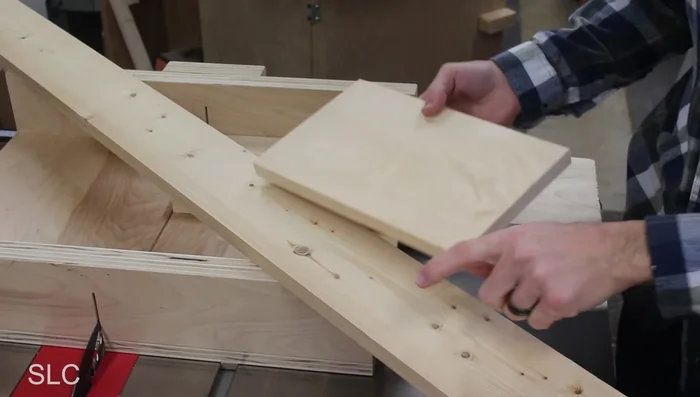
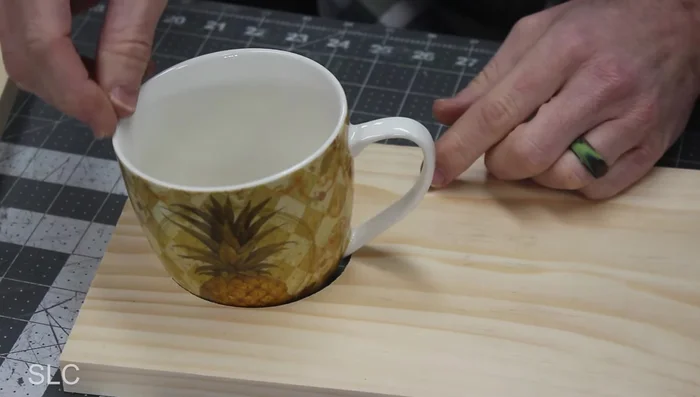
- Mark and cut the hole for the drink using a hole saw.
- Cut out the notch for the coffee cup handle.
Creating the Cup Holder Opening Smoothing the Edges
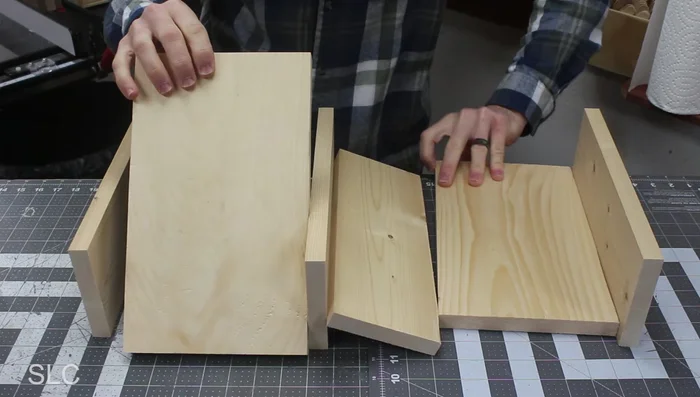
- Round over the sharp edges of the top and side boards.
- Round over the sharp edges of the side boards.
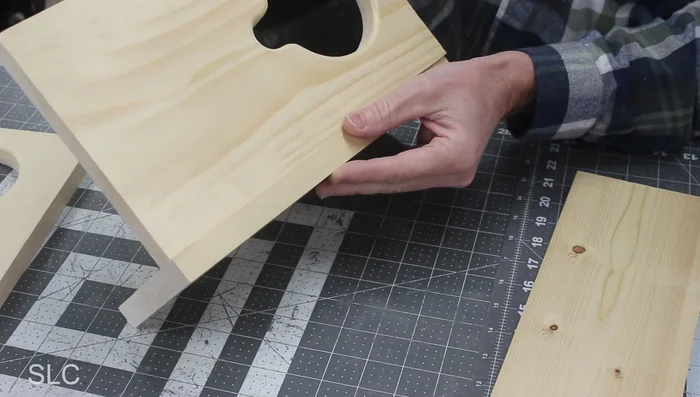
Smoothing the Edges Assembling the Cup Holder
- Attach the side boards to the top board with a 1/8 inch lip.
Assembling the Cup Holder Adding Stability
- Attach a thin plywood backing to the bottom using double-sided tape.
Adding Stability Finishing Touches
- Stain and seal the cup holder.
Finishing Touches Installation
- Attach the cup holder to the couch armrest.
Installation


Read more: DIY Super Cute Whale Shower Curtain: A Step-by-Step Tutorial
Tips
- Use a pre-stained wood conditioner to minimize blotchiness when staining pine.
- Consider using double-sided tape instead of glue for the backing, allowing for easy replacement or cleaning.