Transform your child's bedroom, nursery, or even your own space into a whimsical wonderland with this charming DIY cloud mobile project! Floating clouds, crafted with your own hands, create a dreamy atmosphere that's both aesthetically pleasing and incredibly personal. Forget mass-produced decorations; this project allows you to unleash your creativity and tailor the design to perfectly match your unique style and color palette. Imagine fluffy cotton clouds, painted in pastel hues or vibrant shades, gently swaying above a cozy reading nook or crib. The possibilities are as limitless as the sky itself!
This delightful craft is surprisingly simple to execute, requiring minimal materials and skills. Ready to bring a touch of magical cloudiness to your home? Let's dive into the step-by-step instructions and create your own personalized cloud mobile.
Preparation and Safety Guidelines
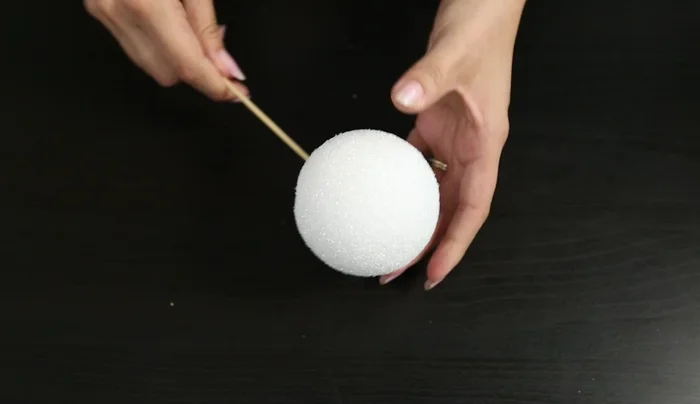
- Styrofoam ball
- Wooden skewers or chopsticks
- Teardrop beads
- Beading wire
- Crimp beads
- Hot glue gun
- Glue sticks
- Batting
- Always supervise young children around the mobile to prevent accidental entanglement or ingestion of small parts.
- Use strong, lightweight materials to avoid the mobile becoming too heavy and potentially causing injury if it falls.
- Ensure the hanging mechanism is secure and will not easily detach or break, especially if placed above a crib or bed.
Step-by-Step Instructions
Prepare the Styrofoam Base
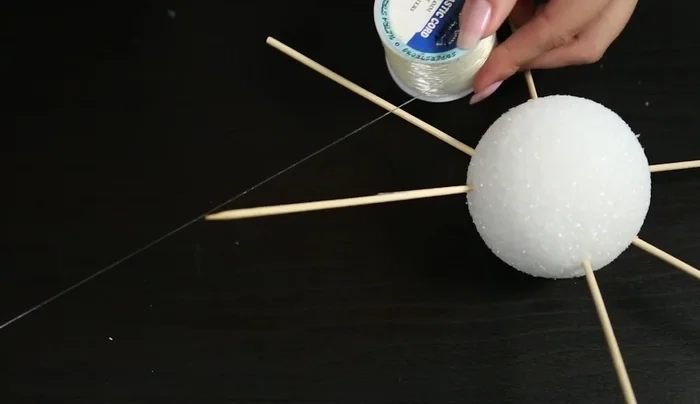
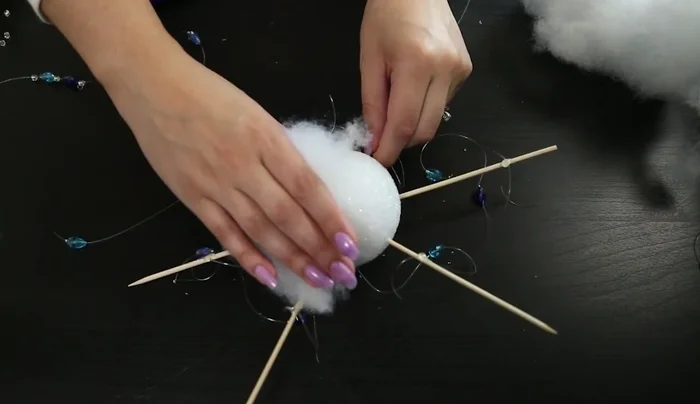
- Stick skewers halfway into the Styrofoam ball.

Prepare the Styrofoam Base Create Beaded Strings
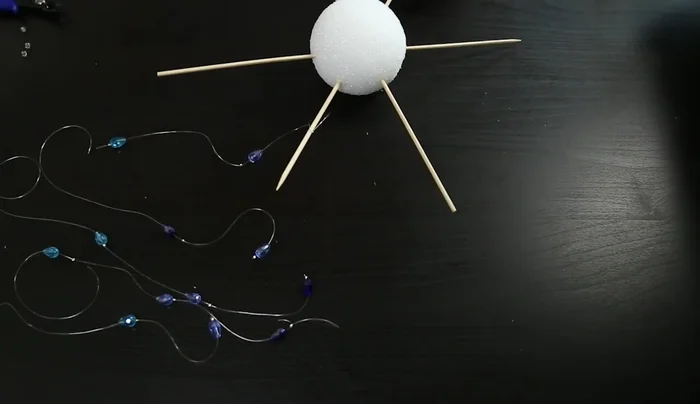
- Attach a crimp bead to one end of the beading wire, add teardrop beads, and crimp another bead at the other end to secure them. Create multiple strings of varying lengths.
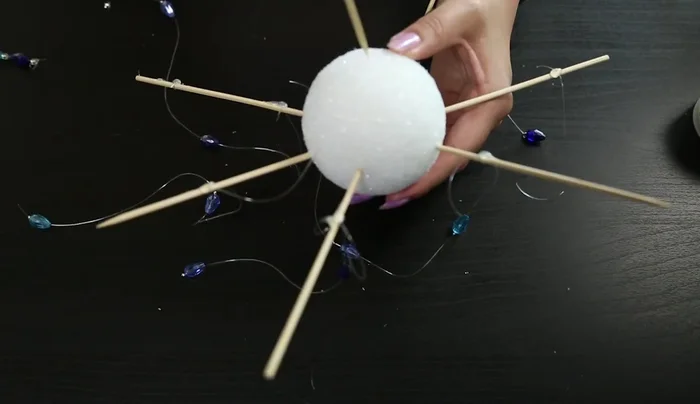
Create Beaded Strings Attach Strings to the Base
- Tie the bead strings onto the skewers, focusing them towards the center. Secure with hot glue.
Attach Strings to the Base Create Hanging Loop
- Create a hole at the top of the Styrofoam ball (ideally beforehand) to insert a longer string for hanging.
Create Hanging Loop Apply and Shape the Batting
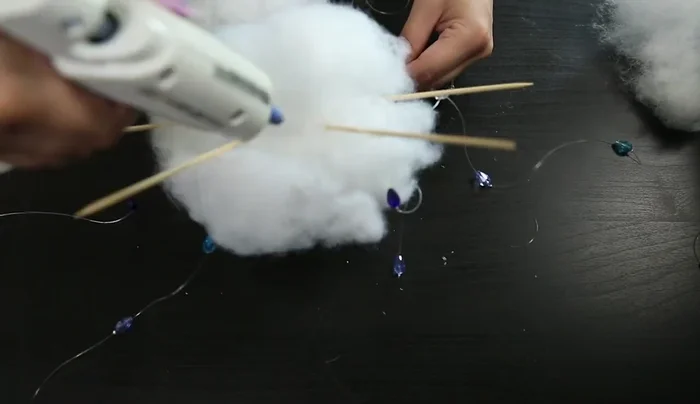
- Apply hot glue generously to the Styrofoam ball. Place the batting over the glue, fluffing it to create a cloud-like appearance.
- Ensure the bead strings remain visible and not glued down. Continue adding glue and shaping the batting around the edges to complete the cloud shape.
Apply and Shape the Batting
Read more: DIY Fluffy Duck Plushie Tutorial: A Step-by-Step Guide
Tips
- Be careful not to stab yourself while inserting the skewers.
- Space the beads on the strings to your preference.
- Make the hole for hanging before attaching the bead strings for easier access.
- Don't push the batting down too hard; keep it fluffy for a realistic cloud look. Use larger pieces of batting instead of many small ones.