Bolster pillows offer luxurious comfort and stylish support, perfectly complementing any bed or seating area. However, commercially-made bolsters can be surprisingly expensive. Why not craft your own, perfectly tailored to your desired size, fabric, and fill? This DIY project allows for complete customization, letting you express your personal style while saving money. You’ll be amazed at how easily you can achieve professional-looking results with readily available materials and a little patience.
This guide provides a precise, step-by-step approach to creating your own bolster pillow, focusing on accurate cutting and sewing techniques to ensure a beautifully finished product. From choosing the right fabric and filling to mastering the crucial seam allowances, we'll walk you through every stage of the process, equipping you with the knowledge and confidence to create a stunning bolster pillow you'll be proud of. Let's begin!
Preparation and Safety Guidelines
- Fabric
- Sewing Machine
- Scissors
- Measuring Tape
- Use sharp scissors or a rotary cutter for precise fabric cuts to avoid frayed edges and ensure a clean finish.
- Always handle your sewing machine with care and follow the manufacturer's instructions. Never put your fingers near the needle while the machine is running.
- When using a filling material like kapok or buckwheat hulls, avoid inhaling the dust. Work in a well-ventilated area and consider wearing a dust mask.
Step-by-Step Instructions
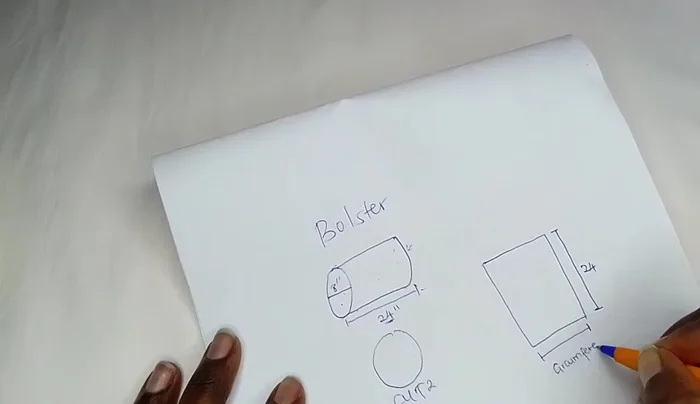
Determine Bolster Dimensions
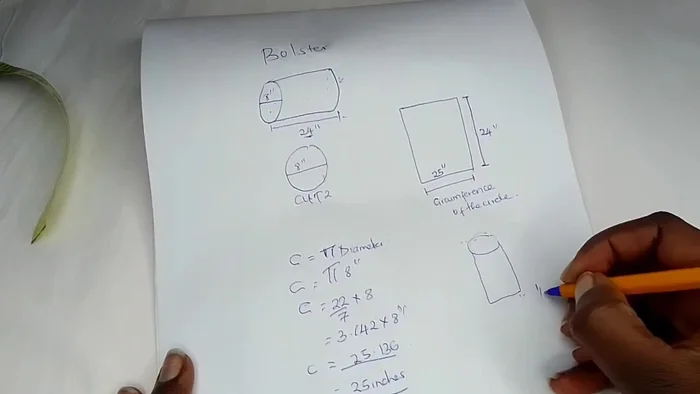
- Decide on the desired diameter (8 inches in this example) and length (24 inches).

Determine Bolster Dimensions Calculate Circumference
- Use the formula πd (where d is the diameter) to find the circumference of the circular ends. (π ≈ 3.142)
Calculate Circumference Calculate Rectangular Piece Dimensions
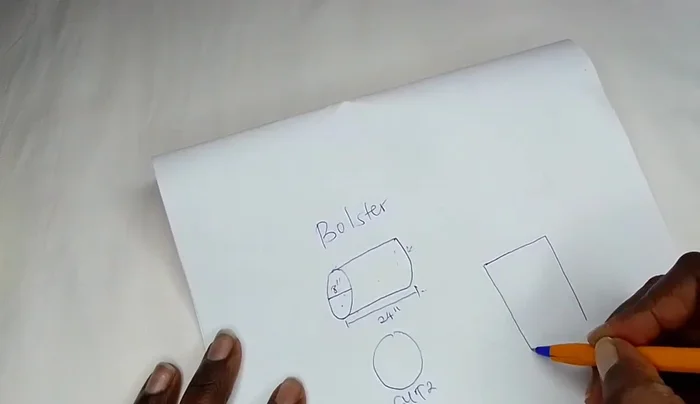
- The rectangular piece will have a length equal to the bolster's length (24 inches) and a width equal to the calculated circumference (approximately 25 inches in this case).
Calculate Rectangular Piece Dimensions Add Seam Allowance
- Add seam allowance (0.5 inches per side in this example) to the rectangular piece's width. This accounts for sewing. The total width becomes 26 inches (25 + 0.5 + 0.5).
Add Seam Allowance Cut Fabric Pieces
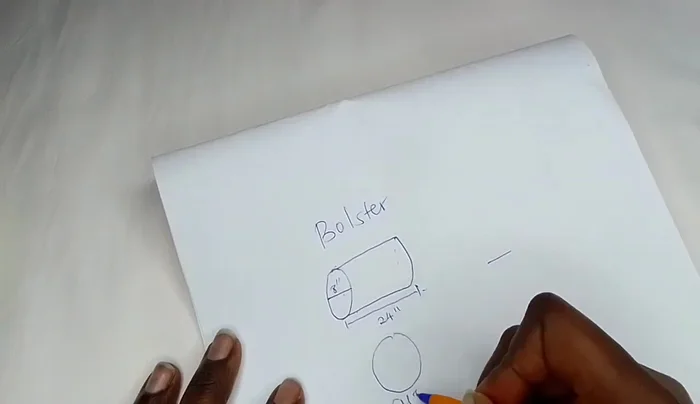
- Cut two circular pieces for the ends and one rectangular piece with the dimensions calculated in steps 3 and 4.
Cut Fabric Pieces Sew Bolster
- Sew the rectangular piece to the two circular pieces. Consider using a zipper for closure (as shown in the video).
Sew Bolster

Read more: King Size Quilt Tutorial: Efficient Chain Piecing Method
Tips
- Use accurate measurements for a well-fitting bolster.
- Always add seam allowance to ensure accurate fitting during sewing.
- Consider adding a zipper for easy bolster cover removal and cleaning.