Bolster cushions offer a touch of luxurious comfort and effortless style to any room, from a cozy reading nook to a sophisticated bedroom. They’re incredibly versatile, perfect for propping up your back while reading, adding a decorative element to your sofa, or even serving as a supportive addition to your meditation practice. However, store-bought bolster cushions can often come with a hefty price tag. Fortunately, crafting your own is surprisingly simple and far more affordable. You can customize the size, fabric, and filling to perfectly match your personal aesthetic and comfort preferences.
This DIY project allows you to unleash your creativity and enjoy the satisfaction of creating something beautiful and functional for your home. Forget expensive retail options – let’s dive into the straightforward, step-by-step process of making your own stunning bolster cushion. Ready to get started? Let’s begin!
Preparation and Safety Guidelines
- Foam pipe insulation
- Polyester filling
- Fabric
- Buttons (large)
- Strong cord (jewelry cord, beading cord, etc.)
- Fabric glue
- Sewing machine
- Scissors
- Pins (optional)
- Measuring tape
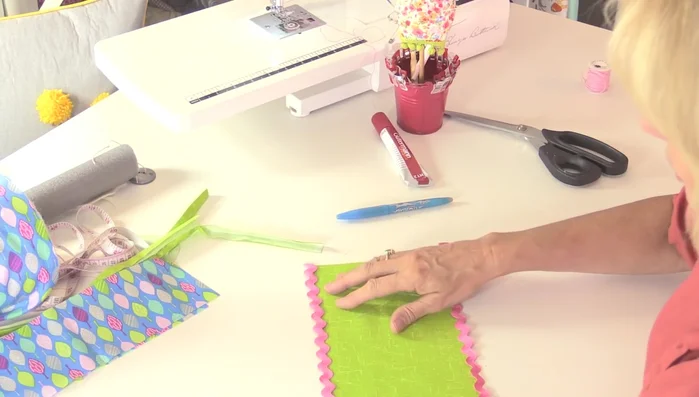
- Rickrack (optional)
- Always use a strong, durable fabric that can withstand the weight and pressure of the cushion. Avoid fabrics that are easily ripped or torn.
- Ensure your chosen filling material is hypoallergenic and safe for skin contact, especially if the bolster will be used for sleeping or resting. Check for any potential allergies before use.
- Securely sew all seams to prevent the filling from leaking out. Double stitching in high-stress areas is recommended.
Step-by-Step Instructions
Prepare the Cushion Core
- Cut foam pipe insulation to desired length. Wrap with polyester filling, slightly longer than the foam, creating layers for a smooth finish. Glue the layers in place.
Prepare the Core Fasteners
- Thread strong cord through the center of the foam core, using a weight to guide it. Attach large buttons to both ends of the cord. Cover the buttons with fabric and wadding for a neat finish.
Cut Fabric Pieces
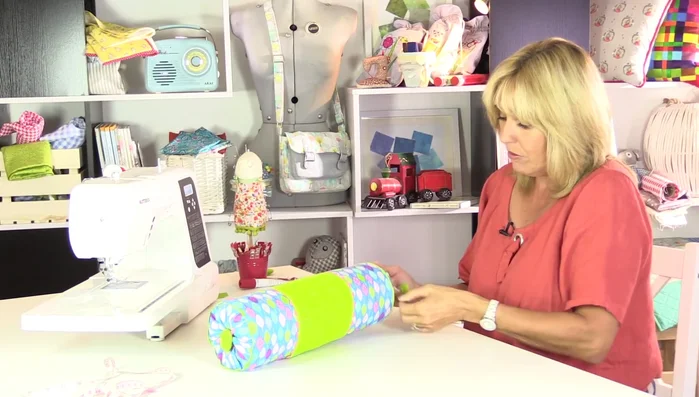
- Cut one piece of fabric for the main bolster cover, 15.5 inches long and wide (allowing for seam allowance). Cut another piece 15.5 inches wide and 3.5 inches deep for each end (allowing for seam allowance and gathering). Cut additional fabric strips for decorative borders (optional).
Add Optional Rickrack Trim
- Sew rickrack to the decorative fabric strips, then fold over and topstitch for a frilled effect.

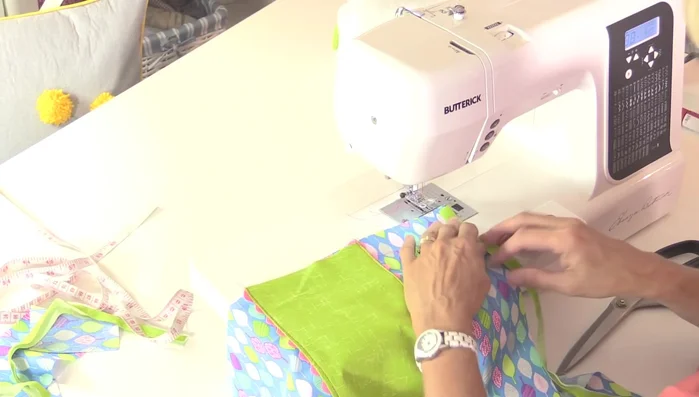
Add Optional Rickrack Trim Assemble Bolster Cover Panels
- Sew the decorative panels to the main fabric. Sew the end pieces to the main fabric, trapping the decorative trim between.
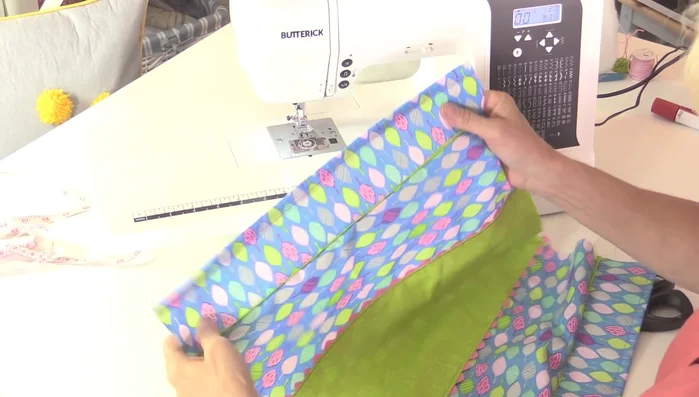
Assemble Bolster Cover Panels Create Fabric Tube
- Sew the main fabric piece into a tube, leaving a gap at one end for gathering.
Create Fabric Tube Hem End Pieces
- Fold over the raw edges of the end pieces by 1/2 inch, then stitch close to the edge to create a gathering channel.
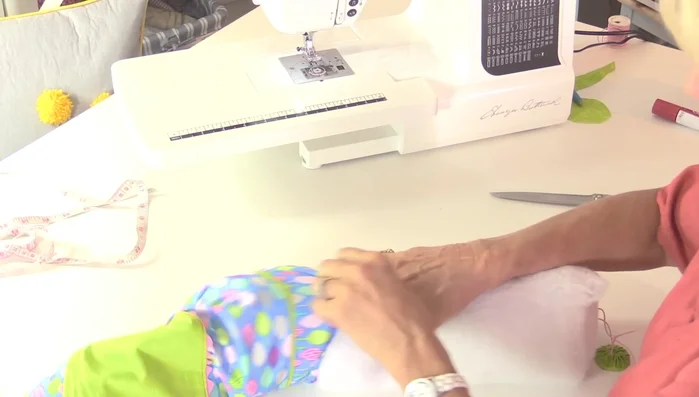
Hem End Pieces Insert Core and Gather Ends
- Insert the foam core into the tube. Thread a cord through the gathering channels at both ends. Pull the cords to gather the ends and tie off securely.
Insert Core and Gather Ends Final Shaping and Finishing
- Tuck the ends of the cord and create the final shape by pulling the buttons to create a snug fit.
Final Shaping and Finishing

Read more: King Size Quilt Tutorial: Efficient Chain Piecing Method
Tips
- Use layers of polyester filling to create a smooth bolster shape.
- Use large buttons that can cover the hole created when gathering the ends.
- Use strong cord for gathering; it won't snap easily.
- Add a decorative border for extra visual appeal.
- Use a sewing machine and a small stitch length for neat seams and prevent fraying.