Charm packs offer a delightful shortcut to quilting projects, and these adorable 5-inch square envelope cushions are no exception! Imagine transforming a collection of your favorite fabrics into a set of charming little pillows, perfect for adding a touch of handmade coziness to your home or giving as unique gifts. This tutorial makes the process unbelievably simple, even for beginner sewists. No complex cutting or intricate piecing is required, making it a perfect weekend project that yields impressive results. Forget hours of tedious work; these cushions are quick, easy, and bursting with personality.
Using just a handful of charm squares and some basic sewing skills, you can create these delightful miniature cushions in a surprisingly short amount of time. Ready to dive into the satisfying process of transforming fabric scraps into beautiful, functional decorations? Let’s get started with the step-by-step instructions below!
Preparation and Safety Guidelines
- 5-inch fabric squares
- 16x16 inch batting
- two 1-inch fabric strips (cut across width)
- 18 1/2 x 15 inch backing fabric
- sewing machine
- ruler
- scissors
- iron
- pins
- friction pen
- Always use a sharp rotary cutter and cutting mat to ensure clean cuts and prevent injury. Dull blades increase the risk of slipping and accidents.
- When using a sewing machine, keep your fingers away from the needle and presser foot. Use a finger guard if necessary.
- Handle your fabric carefully to avoid snags or tears, especially when working with delicate fabrics. Pre-wash your fabric if possible to prevent shrinkage after the cushion is completed.
Step-by-Step Instructions
Prepare the Cushion Top
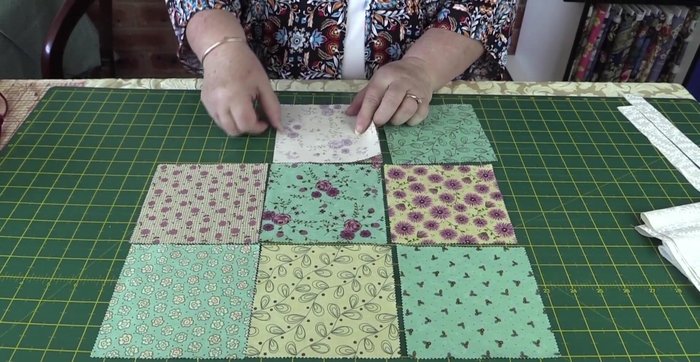
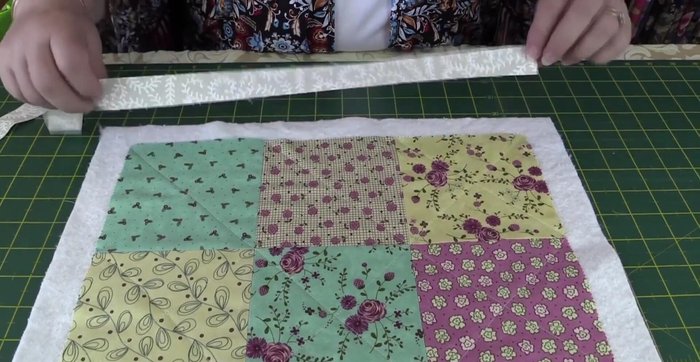
- Lay out your nine 5-inch squares as desired.
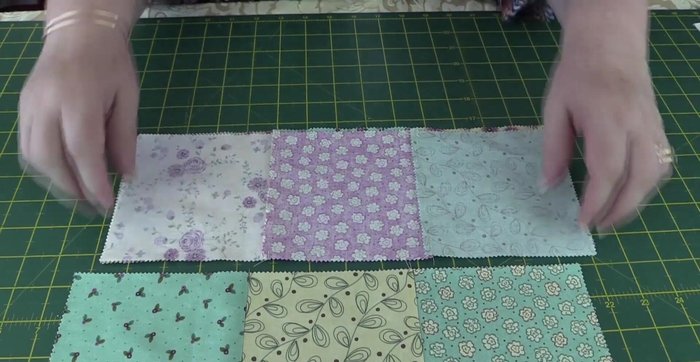
- Sew the squares together in rows using a 1/4-inch seam, pressing the seams open after each row.
- Sew the rows together, pressing the seams open, ensuring the middle rows are pressed opposite to the top and bottom rows for a flat finish.
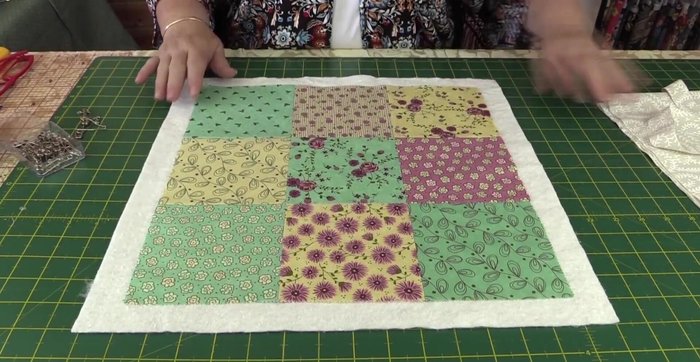
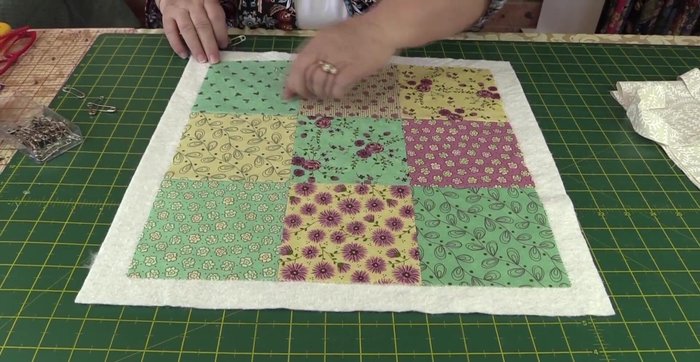
- Place the finished square piece on top of the batting, and pin in place.

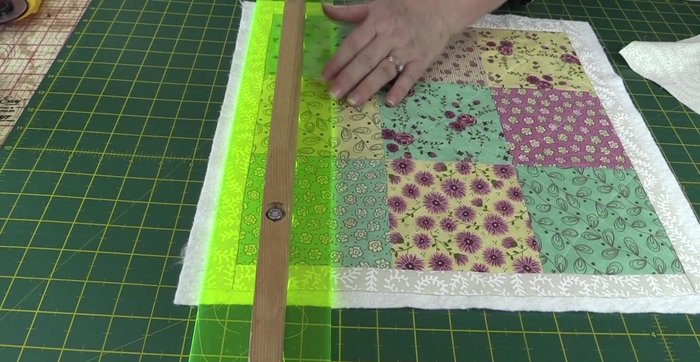
Prepare the Cushion Top - Top stitch diagonal lines across each square to create a cross pattern.
Prepare the Cushion Top Add Borders to the Top
- Attach the 1-inch border strips to the top and bottom edges, using a 1/4-inch seam and pressing seams open.
- Trim the excess batting, ensuring it aligns with the edges of the squares and border.
Add Borders to the Top Prepare the Backing Pieces
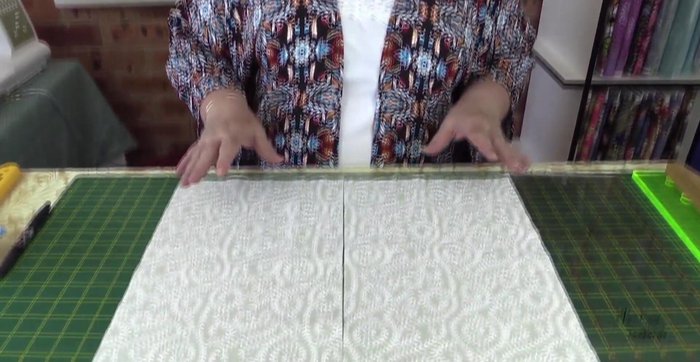
- Cut the backing fabric in half (9 1/4 x 15 inches each piece). On each piece, measure and draw two lines 1/4-inch apart, creating a 1/2-inch fold. Fold and press along these lines to create a clean, flat edge.
- Top stitch along the edges of both backing pieces, as close to the fold as possible.
Prepare the Backing Pieces Assemble the Cushion Cover
- Lay the two backing pieces right sides together, matching the edges, creating an envelope closure. Sew a 1/4-inch seam along all four sides.
- Clip the corners to reduce bulk, turn the cover right side out, and insert the cushion insert.
Assemble the Cushion Cover


Read more: King Size Quilt Tutorial: Efficient Chain Piecing Method
Tips
- Use a friction pen instead of a ballpoint pen to mark the fabric.
- Ensure that your seams are pressed open to minimize bulk when top stitching.