Frustrated with uneven necklines and messy armholes that ruin an otherwise perfect garment? Sewing these delicate areas can be a real challenge, often leaving us with puckers, stretching, and an overall unfinished look. But what if there was a simple, yet incredibly effective method to achieve a professional, clean finish every time? Enter the "Burrito Method," a clever technique that transforms the daunting task of finishing necklines and armholes into a surprisingly straightforward process. This ingenious method allows for a beautiful, even finish without the need for complicated techniques or specialized tools.
Forget wrestling with bias tape or struggling with tricky blind hems. The Burrito Method offers a neat, secure finish that enhances the overall quality of your garment. Ready to learn this game-changing technique and elevate your sewing skills? Let's dive into the step-by-step process, complete with clear instructions and helpful illustrations, to achieve that flawless neckline and armhole you've always dreamed of.
Preparation and Safety Guidelines
- sewing machine
- fabric
- lining
- scissors
- iron
- pins
- Always use sharp, clean scissors. Dull scissors can cause fabric to fray or pull, ruining the finished look and potentially injuring yourself.
- Avoid stretching the fabric excessively while trimming or finishing the neckline/armhole. This can distort the garment's shape and lead to an uneven finish.
- Test your chosen finishing method (e.g., serger, zigzag stitch) on a scrap of the same fabric first to ensure the settings are correct and you achieve the desired result before working on the garment itself.
Step-by-Step Instructions
Prepare Bodice
- Sew the shoulders together of both your main fabric and lining pieces. Press seam allowances open.
- Match the main fabric and lining fabric together at the neckline with right sides together. Make sure your shoulder seams are aligned. Stitch around the neckline with a straight stitch. Trim and grade your seam allowances. Clip the curved areas (or snip into the center point for a V-neck).

Prepare Bodice Understitch and Turn
- Understitch the seam allowances of the main fabric bodice to the lining bodice about 1/8 inch away from the stitching line.
- Turn the bodice right side out and press.
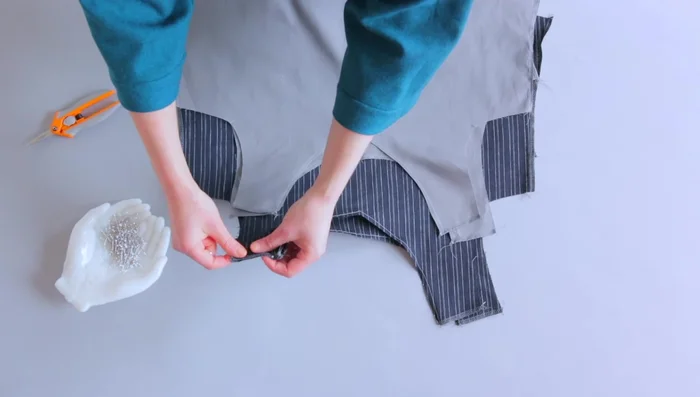
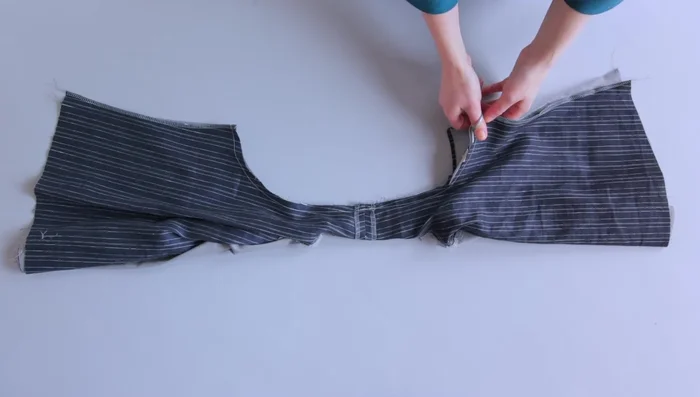
Understitch and Turn Burrito Roll
- Lay your bodice flat with the main fabric facing upwards. Starting at one armhole, roll the entire bodice (main fabric and lining) towards the other armhole. Flip the lining under the rolled bodice to meet the main fabric bodice. Align the lining and main fabric armholes with right sides together.
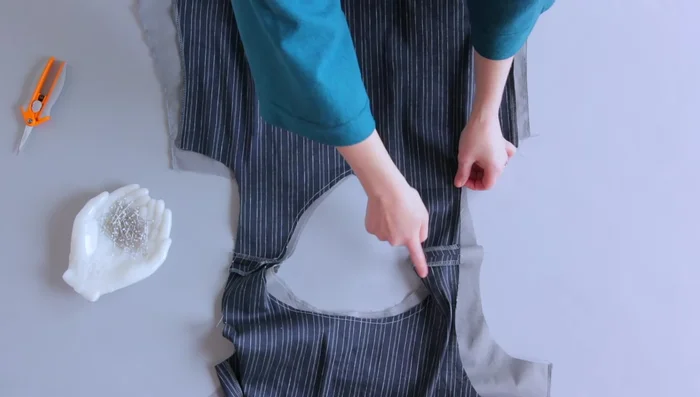
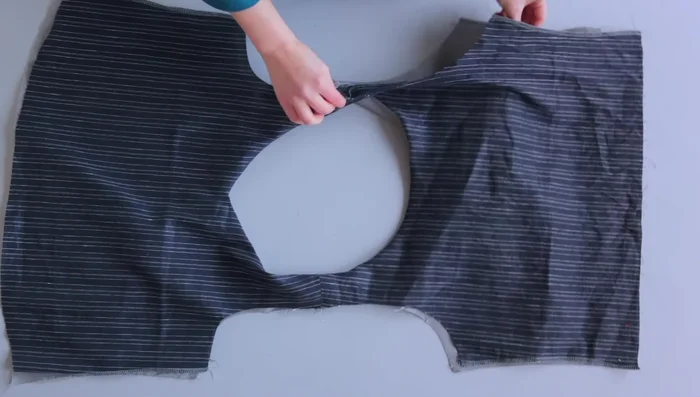
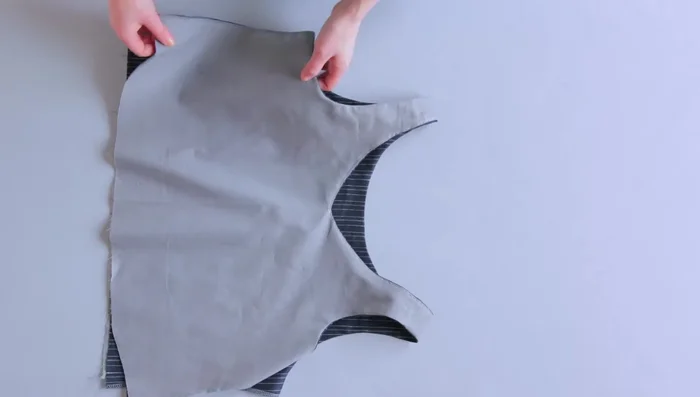
Burrito Roll Sew and Finish Armholes
- Stitch the armhole. Trim and grade the seam allowances, and clip around the armhole. Pull the bodice through the shoulder area to pull it right side out.
- Press the armholes.
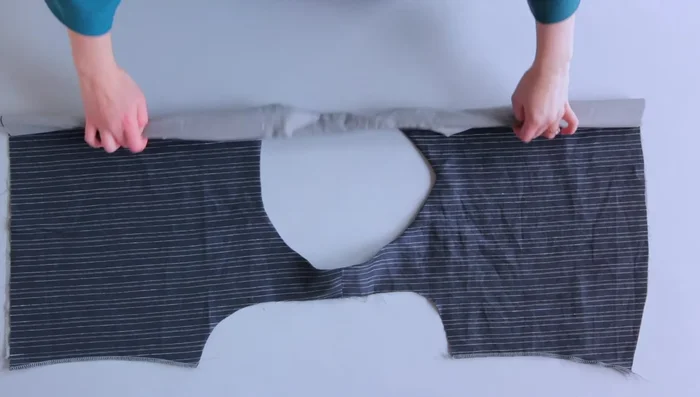
Sew and Finish Armholes Sew Side Seams
- Sew the side seams with right sides together. Pin the side seam of the lining and the main fabric bodice. Stitch in one go from the lining through to the main fabric bodice. Press seam allowances open and repeat for the other side.
Sew Side Seams


Read more: Raglan Sleeve Sewing Tutorial: A Step-by-Step Guide
Tips
- Pressing seam allowances open is crucial for a clean finish.
- Clipping curved areas helps to prevent puckering.
- Understitching helps to keep the lining in place.