Dive into the mesmerizing world of ocean crafts with this delightful DIY project: creating your own beaded jellyfish! These whimsical decorations are surprisingly easy to make, requiring only a few simple materials and a touch of creativity. Imagine a charming, shimmering jellyfish hanging in your window, catching the light and adding a unique touch to your home décor, or perhaps a collection adorning a child's bedroom. The delicate beauty of these handcrafted jellyfish belies their simple construction, making them a perfect project for crafters of all skill levels, from seasoned artisans to enthusiastic beginners.
This step-by-step guide will walk you through each stage of the process, from gathering your supplies to completing your stunning, beaded jellyfish. Prepare to be amazed at how quickly and easily you can transform ordinary beads into these enchanting underwater creatures, perfect for adding a touch of ocean magic to any space. Let's get started!
Preparation and Safety Guidelines
- small beaded strand
- big beaded strand
- purple piece
- pink yarn
- pink thread
- scissors
- cotton
- binder clips (optional)
- clasp
- Adult supervision is required, especially for younger children. Small beads pose a choking hazard.
- Use strong, clear adhesive that is non-toxic and suitable for use with craft materials. Always follow the manufacturer's instructions.
- Avoid working near open flames or heat sources when using glue or other potentially flammable materials.
Step-by-Step Instructions
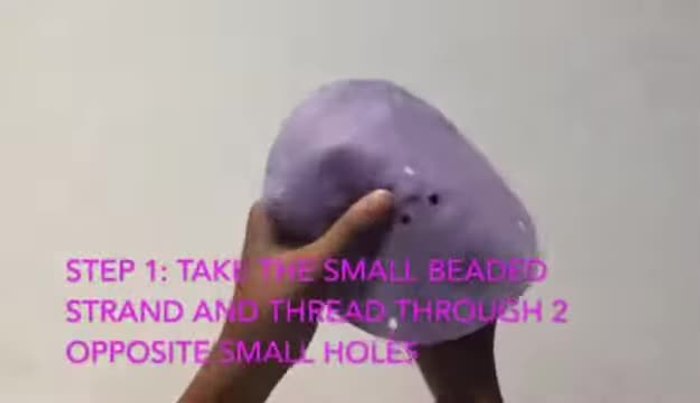
Prepare the Tentacle Clasp
- Thread the small beaded strand through two small holes, add a clasp, and pull through.

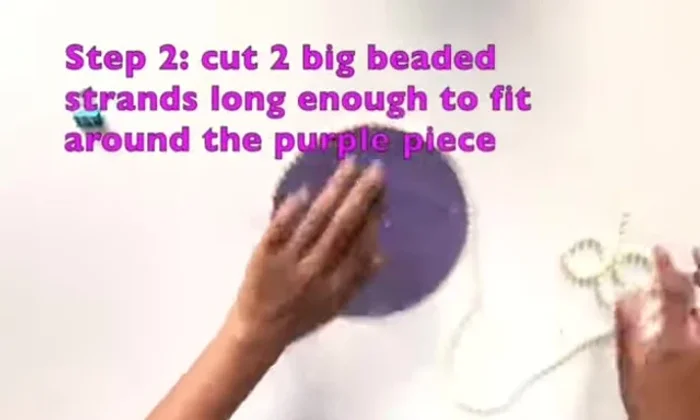
Prepare the Tentacle Clasp Attach the Large Beaded Strands
- Measure the big beaded strand around the edge of the purple piece and cut two strands.
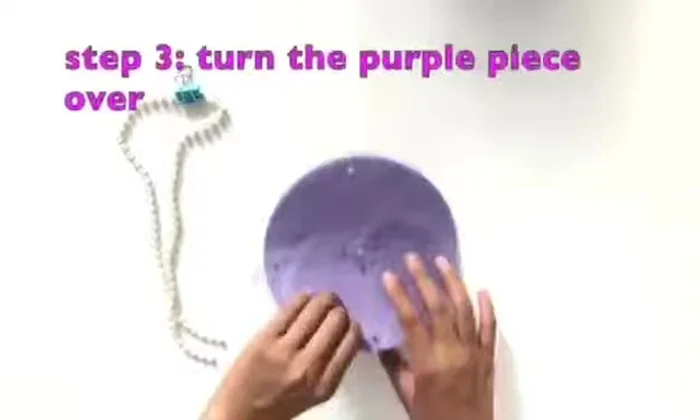
- Turn the purple piece over and thread the big beaded strands through the holes across from each other in the center, then feed the strands through the outside holes. Repeat with the second strand.
Attach the Large Beaded Strands Prepare the Jellyfish Mane
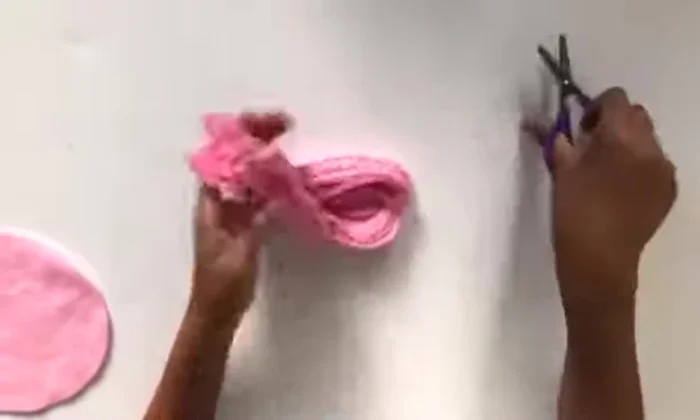
- Wind pink yarn around the instruction book 15 times, slide it off, and tie the top with pink thread. Cut the other side.
Prepare the Jellyfish Mane Attach the Mane to the Pink Piece
- Sew the yarn onto the pink piece using the three pre-punched holes on each side. Knot the yarn after securing it.
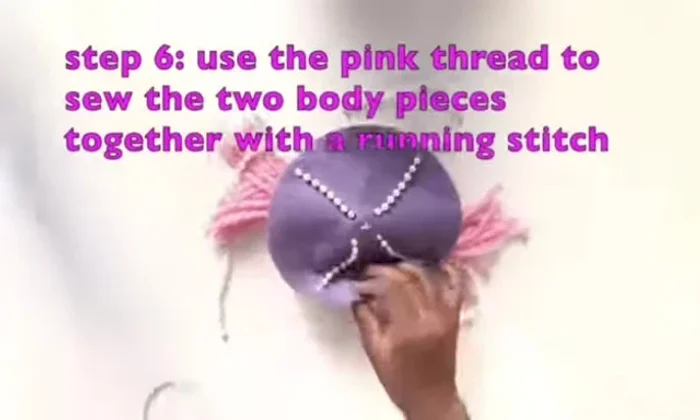
Attach the Mane to the Pink Piece Sew the Body Together
- Sew the purple and pink pieces together with a running stitch, leaving an opening for stuffing.
Sew the Body Together Stuff and Close the Jellyfish
- Stuff the jellyfish with cotton. (Binder clips are optional for easier sewing.) Sew the opening closed.
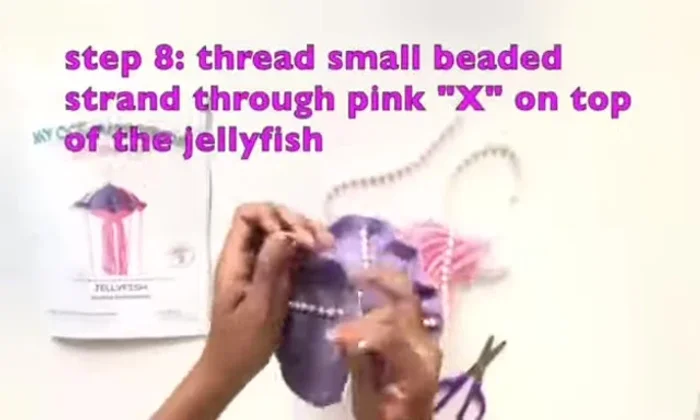
Stuff and Close the Jellyfish Attach the Top Beaded Strand
- Cut the small beaded strand to fit the instruction book top to bottom. Thread it through the pink X on top of the jellyfish and connect the ends with a clasp.
Attach the Top Beaded Strand

Read more: DIY Fluffy Duck Plushie Tutorial: A Step-by-Step Guide
Tips
- Binder clips can make sewing easier.