Tired of the same old belts? Yearning for a unique accessory that reflects your personal style and minimizes textile waste? Then get ready to unleash your inner fashionista with this exciting DIY project! We'll show you how to transform an old pair of jeans into a stylish, functional belt featuring handy pockets – perfect for carrying your essentials while adding a touch of edgy, upcycled flair to any outfit. This tutorial is ideal for beginners, requiring only basic sewing skills and a few readily available tools. Forget fast fashion and embrace sustainable style with this fun and rewarding craft.
This upcycled jean belt project offers a fantastic way to breathe new life into your unwanted denim and create a truly personalized accessory. From choosing the perfect jeans to adding finishing touches, we'll guide you through each step of the process, ensuring a polished and wearable result. Let's dive into the step-by-step instructions and start crafting your own unique, pocket-ready jean belt!
Preparation and Safety Guidelines
- Pair of old jeans
- Scissors
- Needle
- Thread (clear)
- Hot glue gun
- Gorilla Glue
- Button
- Use sharp scissors or rotary cutter with extreme caution to avoid injury. Always cut away from yourself.
- When using a sewing machine, keep fingers clear of the needle and moving parts. Never sew over pins.
- If using a belt buckle with sharp edges, handle it carefully and consider adding padding or covering to prevent scratches or snags on your clothing.
Step-by-Step Instructions
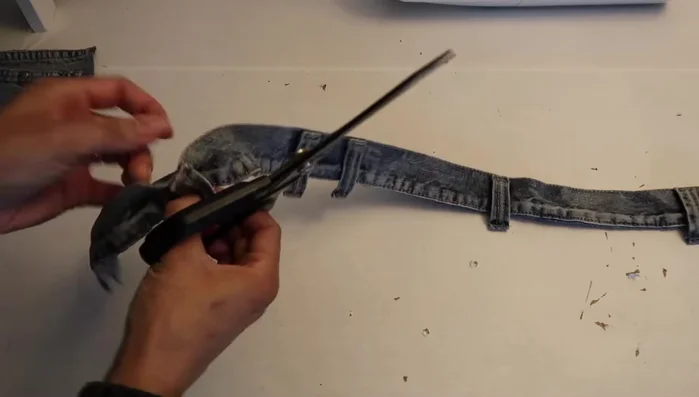
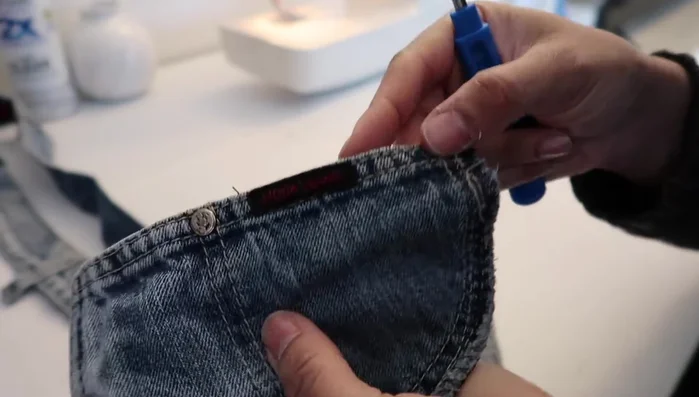
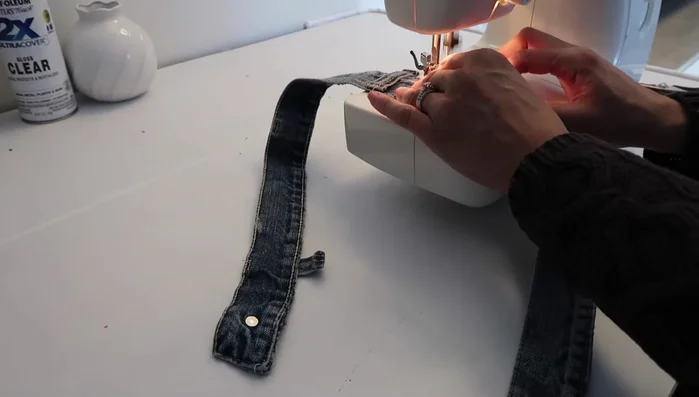
Prepare the Waistband
- Detach the waistband from the rest of the jeans.
- Cut off the belt loops.
- Remove the label from the jeans.
- Cut off excess belt loop ends.

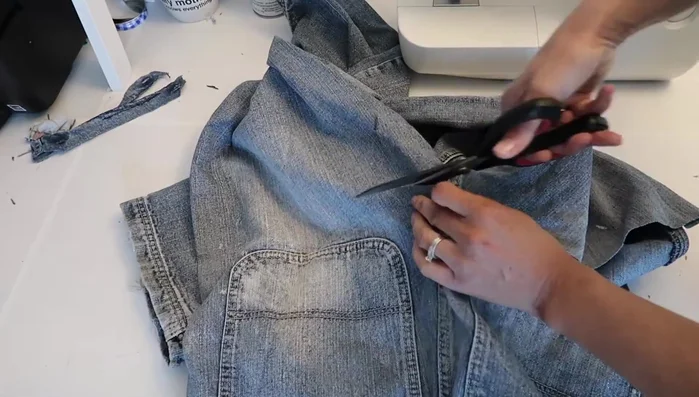
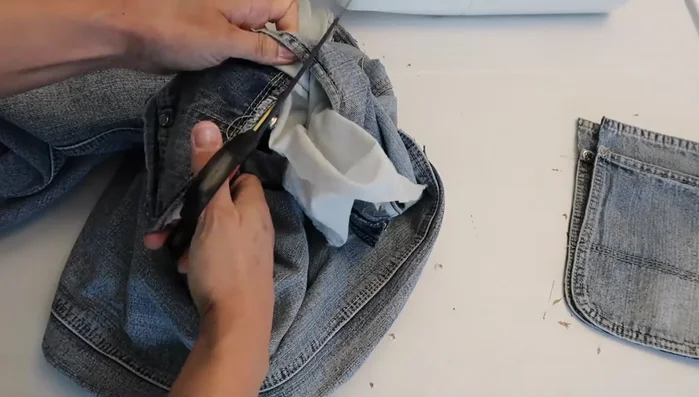
Prepare the Waistband Prepare the Pockets
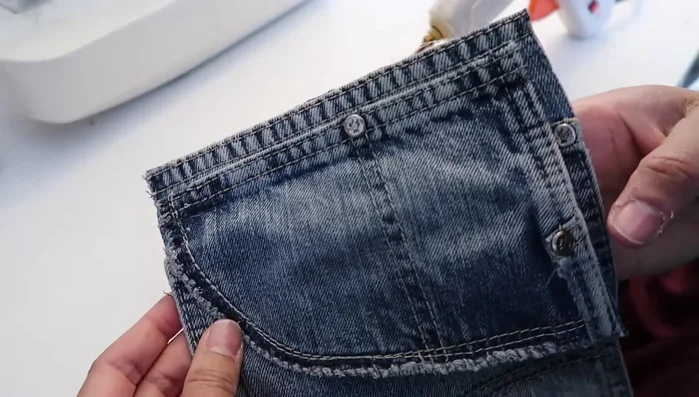
- Cut off the back pockets.
- Cut off the inside of the front pockets and use them as flaps for the back pockets.
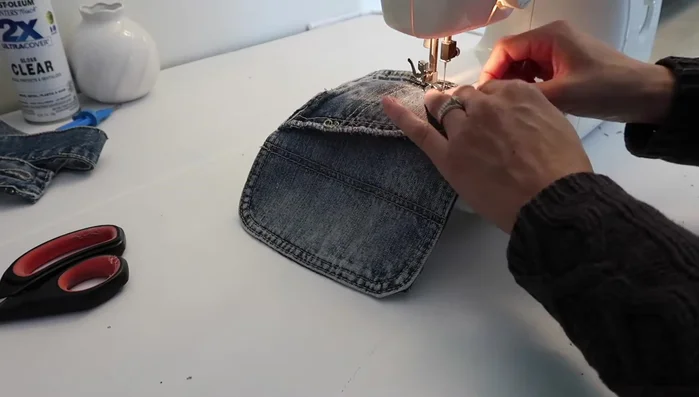
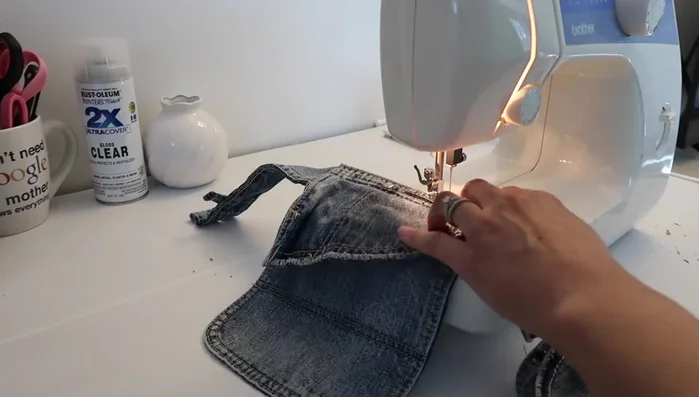
Prepare the Pockets Attach Pockets to Waistband
- Sew the flaps onto the back pockets.
- Hot glue the little piece (from step 3) onto the pocket.
- Hot glue along the top of the pocket to keep everything flat.
- Sew the pockets onto the waistband.
Attach Pockets to Waistband Attach Belt Loops
- Sew the belt loops to the waistband.
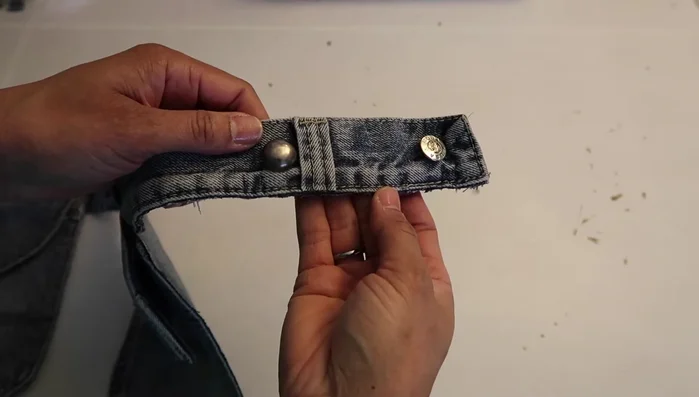
Attach Belt Loops Add Closure
- Add a button to tighten the belt.
Add Closure


Read more: DIY Stretchy Fingerless Gloves: Easy Sewing Tutorial
Tips
- Be careful when cutting, you never know what you might be able to reuse.
- Use clear thread to hide stitching.