Cold weather doesn't mean sacrificing dexterity! These DIY stretchy fingerless gloves are the perfect solution for keeping your hands warm while maintaining the freedom to type, paint, or simply enjoy the tactile world around you. Forget bulky mittens and expensive store-bought options; this easy sewing tutorial will guide you through creating your own custom-fit pair, tailored to your exact preferences in color, fabric, and length. You can choose from a wide variety of materials, making these a fun and adaptable project for any skill level.
This project is surprisingly simple, even for complete beginners. With just a few basic supplies and minimal sewing experience, you'll be amazed at how quickly you can whip up a pair of stylish and functional fingerless gloves. Ready to get started? Let's dive into the step-by-step instructions!
Preparation and Safety Guidelines
- Paper
- Pencil
- Ruler
- Fabric (stretchy)
- Chalk
- Scissors
- Sewing Machine (optional)
- Needle and Thread
- Use sharp scissors and needles to avoid accidental pricks and cuts. Always point scissors away from yourself and others when cutting.
- If using a sewing machine, ensure your fingers are kept clear of the needle at all times. Use a seam ripper carefully to avoid damaging your fabric.
- Choose a stretchy fabric suitable for gloves, such as spandex or jersey knit. Avoid fabrics that are too stiff or thick, which will make the gloves uncomfortable to wear.
Step-by-Step Instructions
Create the Pattern
- Draw a straight line on a piece of paper, place your hand next to the line with your index finger aligned with it and thumb spread out. Trace around your hand, stopping where you want the fingerless part to end.

Create the Pattern Mark Key Points
- Mark the base of your fingers, the base of your thumb and the length you want your glove to be.
Mark Key Points Refine the Pattern
- Draw lines to connect points. Add 90-degree lines and curves to complete the shape of your fingerless gloves.
Refine the Pattern Add Allowances
- Add 0.3cm movement allowance to the thumb area and side of glove. Add hem allowances (1cm for the top and bottom; 0.5cm for the thumb). Add seam allowance (0.3cm) to the edges that will be sewn together.
Add Allowances Cut Pattern & Fabric
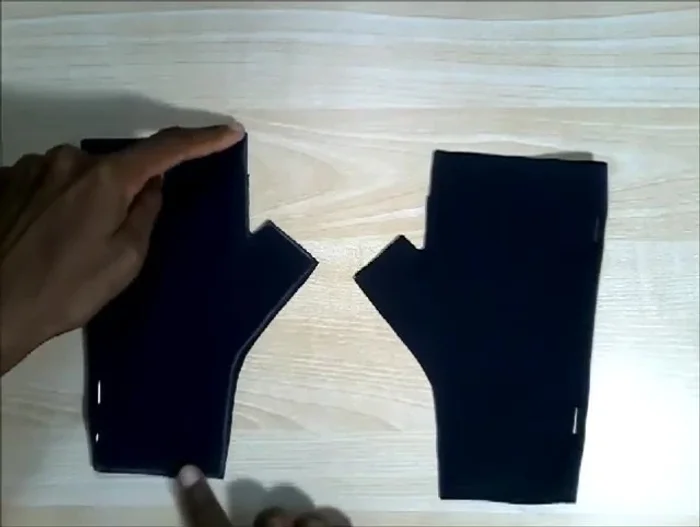
- Cut out the pattern. Fold your fabric in half, place the pattern on the fold and trace it, then cut out two glove pieces from the fabric.
Cut Pattern & Fabric Sew the Gloves
- Sew the two pieces of each glove together using a 0.3cm seam allowance, leaving the top of the thumb area and the bottom open.
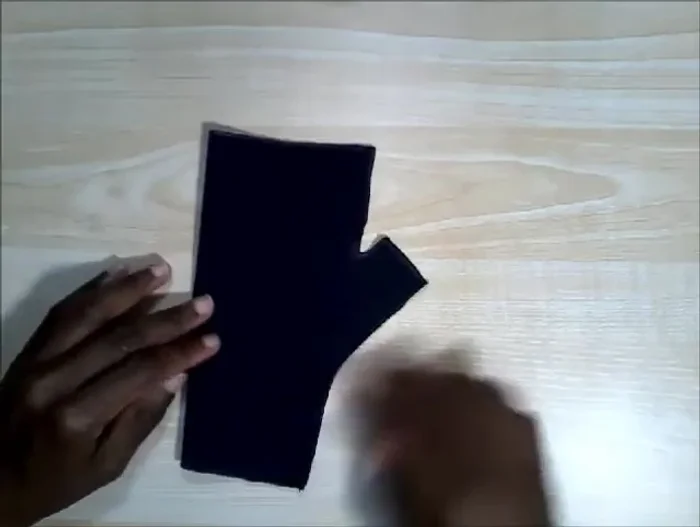
Sew the Gloves Clip Curves & Turn
- Trim the corners of your fabric to ease turning. Turn the gloves right-side out.
Clip Curves & Turn Hem the Gloves
- Hand-stitch the hems using backstitch, stretching the opening wide while stitching and keeping stitches loose to maintain stretch.
Hem the Gloves


Read more: Easy Chunky Knit Scarf: A Beginner's Guide to Cozy Winter Warmth
Tips
- Use stretchy fabric for comfortable gloves.
- When hemming with non-stretchy thread on stretchy fabric, stretch the fabric while stitching and keep the stitches loose to allow for stretch.