The humble shoe, a seemingly simple object, often hides intricate craftsmanship, particularly in its construction. One such detail, easily overlooked but crucial for both durability and appearance, is the toe cap. Over time, wear and tear can lead to separation or damage of this vital component, leaving your favorite shoes looking worn and potentially compromising their structural integrity. This is where the skill of restitching comes in, a process that can significantly extend the life of your footwear and restore its pristine look.
Fortunately, restitching a shoe's toe cap isn't as daunting as it might initially seem. With the right tools and a little patience, even a beginner can achieve professional-looking results. This step-by-step guide will walk you through the entire process, from preparing your materials to completing the final stitch, providing clear instructions and helpful tips along the way.
Preparation and Safety Guidelines
- Sewing awl
- Wrench
- Needles (different gauges)
- Thread
- Beeswax
- Use a sharp, appropriate needle and strong thread designed for leather or a similar durable material. Dull needles can damage the leather and weaken the stitch.
- Take your time and use small, even stitches for a strong and aesthetically pleasing repair. Rushing can lead to uneven stitching and a weakened toe cap.
- If you are unsure about any step or lack experience with leatherwork, it's best to consult a professional cobbler or watch detailed video tutorials before attempting the repair. Incorrect stitching can permanently damage your shoes.
Step-by-Step Instructions
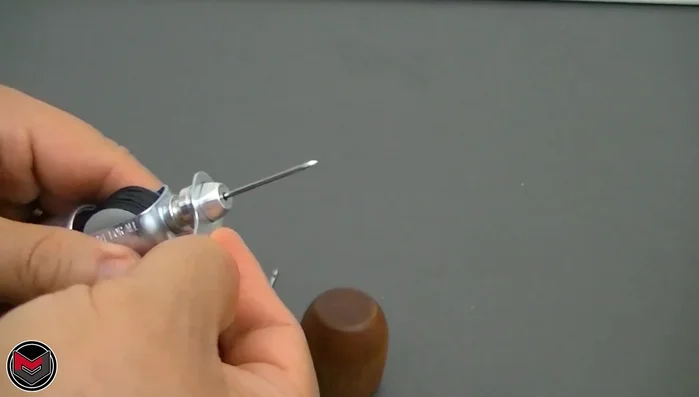
Prepare the Sewing Awl
- Change the needle on the sewing awl using the wrench. Unscrew the nut, remove the old needle, insert the new (larger gauge) needle, and tighten the nut.
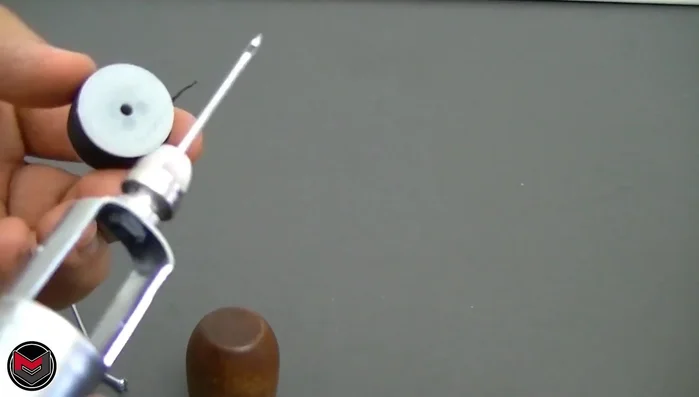
- If using a new spool of thread, unscrew the spool cap to replace the thread. Source thread from fabric shops like Michaels or Joann's.

Prepare the Sewing Awl Thread the Needle
- Thread the needle with the original thread from the shoe or a matching replacement.
- The smaller hole on the awl is not used in this method)
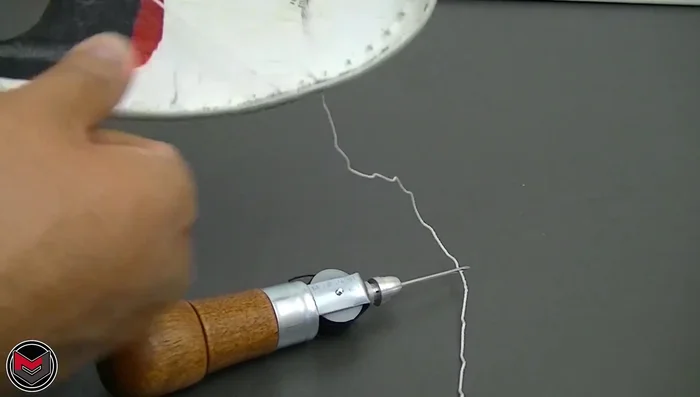
Thread the Needle Start the Stitch
- Begin stitching by inserting the needle into the existing stitch hole. Pull the thread through, leaving a small loop on the inside of the shoe.
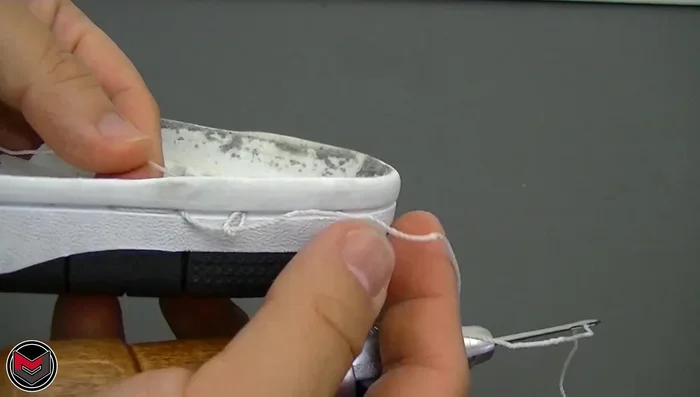
Start the Stitch Continue Stitching
- Insert the needle into the next stitch hole. Pull the thread through, creating a loop.
- Feed the inner loop of thread through the newly created stitch hole using the sewing awl.
- Pull the outer thread to tighten the stitch. Continue this process, stitching around the toe cap.
Continue Stitching Repair a Broken Stitch
- If the thread becomes undone, pull the inner thread back through to re-secure it.
Repair a Broken Stitch


Read more: DIY Reversible Baby Slippers: Easy Sewing Tutorial
Tips
- Use beeswax on your thread to prevent fraying.
- Apply a small amount of saliva to the thread if it starts to fray during stitching.