Sneaker customization is exploding in popularity, allowing for unparalleled self-expression through unique designs and materials. One exciting trend involves adding quilted fabric to the soles of sneakers, creating a striking contrast and adding a touch of unexpected texture. This seemingly daunting task can be surprisingly accessible with the right tools and technique, transforming your everyday footwear into a personalized masterpiece. The process requires precision and patience, but the rewarding results are well worth the effort.
This guide will walk you through precisely how to attach quilted fabric to your sneaker soles using a simple, yet effective tool: the sewing awl. We'll cover everything from preparing your materials and marking your placement to the stitching process itself, ensuring a secure and aesthetically pleasing finish. Get ready to embark on this creative journey and let’s dive into the step-by-step process.
Preparation and Safety Guidelines
- Sewing awl with extra needles and threading tool
- Waxed thread
- Sharp stiletto (or awl needle)
- Fabric shoe upper
- Rubber sole
- Wool mat (optional)
- Use extreme caution with the sewing awl. Its sharp point can easily cause injury. Always work on a stable surface and keep your fingers clear of the awl's path.
- Choose a sturdy, thick-soled sneaker for best results. Thin soles may tear or be difficult to pierce with the awl.
- Test your stitching on a scrap piece of fabric and sole material before working on your actual sneakers to ensure the technique and stitch strength are adequate.
Step-by-Step Instructions
Prepare Materials
- Prepare the shoe upper and sole. Ensure grommets and heel tabs are in place (if applicable). All stitching lines should be completed.

Prepare Materials Prepare the Sewing Awl
- Prepare the sewing awl. Thread the awl using the larger needle provided with the awl. Remove the bobbin/reel for easier threading.
Prepare the Sewing Awl Pre-punch Holes
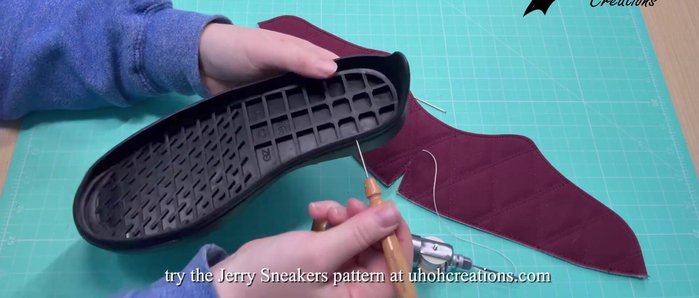
- Pre-punch holes in the sole at the marked locations. Use a stiletto or awl needle; a wool mat underneath the sole makes this easier.
Pre-punch Holes Start the Stitch
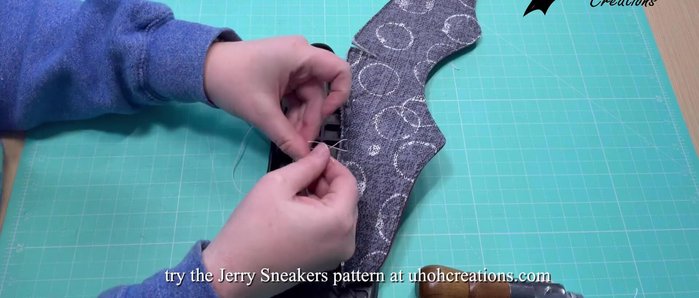
- Start stitching at the marked starting point (arrow on the pattern). Pierce the sole and shoe upper with the awl.
- Pull enough thread through to allow for stitching the entire seam and extra length for knotting.
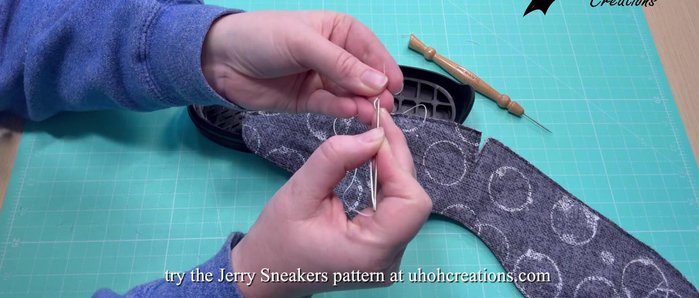
Start the Stitch Secure Initial Thread End
- Secure the thread end by creating small loops close to the end, and then gently pulling tight to create a secure knot. Alternatively, you can use a lighter to melt and fuse the ends after tying a knot. This is for security; the stitches themselves will hold the shoe together.
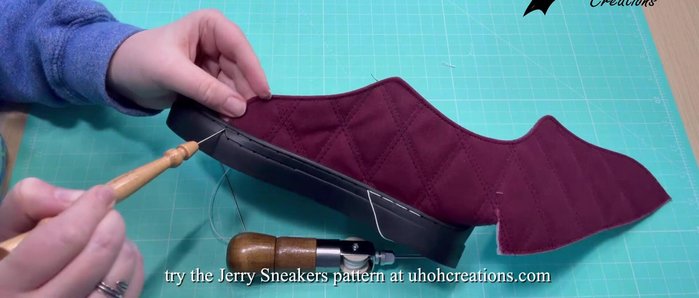
Secure Initial Thread End Stitch the Seam
- Begin stitching. Mimic a sewing machine by using the awl to create lock stitches. Maintain tension on both the upper and lower threads. Keep your finger on the reel to control thread feed.
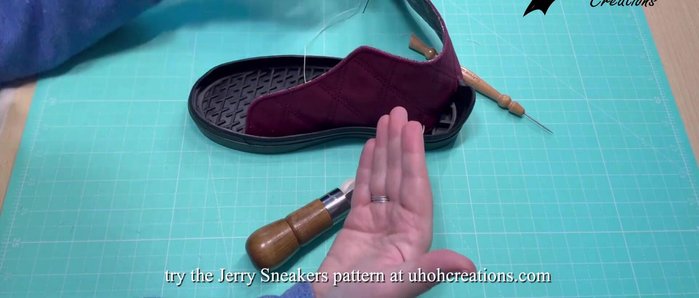
Stitch the Seam Complete the Seam and Backstitch
- Continue stitching until you reach the end of the seam. Backstitch at the end point to secure the stitching.
Complete the Seam and Backstitch Finish and Secure Thread Ends
- Finish the thread ends. Tie off with a knot or use a lighter to melt the ends for a secure finish. Ensure the thread ends are tucked inside the shoe.
Finish and Secure Thread Ends


Read more: DIY Reversible Baby Slippers: Easy Sewing Tutorial
Tips
- Use a wool mat to protect your work surface and make pre-punching easier.
- Keep a finger on the thread reel to control the thread feed and prevent tangling.
- Maintain even tension on both the upper and lower threads throughout the stitching process to ensure a neat and secure seam.
- Use a lock stitch technique to secure each stitch; this is the most secure method shown.
- Backstitch at the beginning and end of each seam for added security.