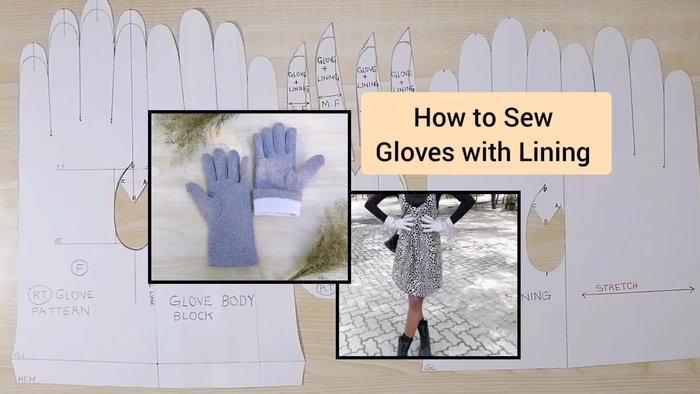
Sewing your own lined gloves offers a rewarding crafting experience, allowing you to create warm, personalized handwear tailored to your exact preferences. From choosing the perfect fabrics to achieving a professional finish, the process combines the satisfaction of handmade artistry with the practicality of functional winter wear. Forget the frustrating search for the right size and style in stores – with a little patience and these easy-to-follow instructions, you can craft gloves that are both stylish and incredibly comfortable. The possibilities are endless, from sleek leather exteriors with cozy fleece linings to playful patterned cotton with soft jersey interiors.
This detailed guide will take you through each step of creating beautifully sewn, lined gloves, from selecting your materials and cutting the patterns to the final stitching and finishing touches. Let's dive into the step-by-step process and learn how to make a pair of gloves you'll treasure for years to come.
Preparation and Safety Guidelines
- sewing machine
- needle
- thread
- scissors
- measuring tape
- Use sharp, appropriately sized needles and pins to avoid pricking yourself. Handle needles with care and store them safely when not in use.
- Always use a fabric that is appropriate for gloves; consider the fabric's drape and stretch for a comfortable fit. Test your chosen fabric with a small sample before cutting your main pieces.
- Take your time and pay close attention to the stitching, particularly around curved areas and the finger seams, to ensure a neat finish and prevent any gaps that could compromise the glove's warmth and protection.
Step-by-Step Instructions
Prepare the Patterns
- Cut out glove and lining patterns. Remember to add seam allowances (0.5cm for glove, 0.5cm for lining). Note fabric grain direction indicated on patterns.

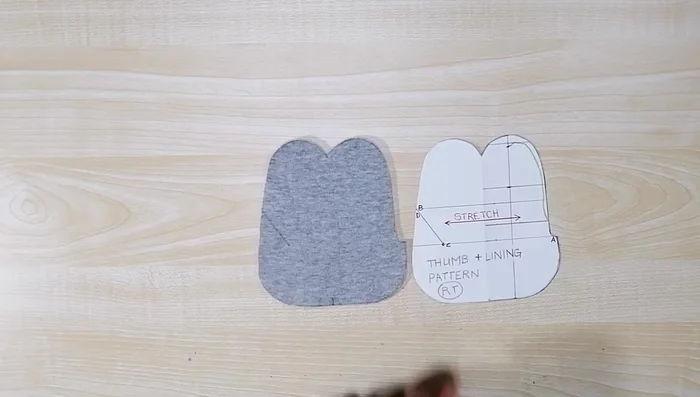
Prepare the Patterns Sew the Thumbs
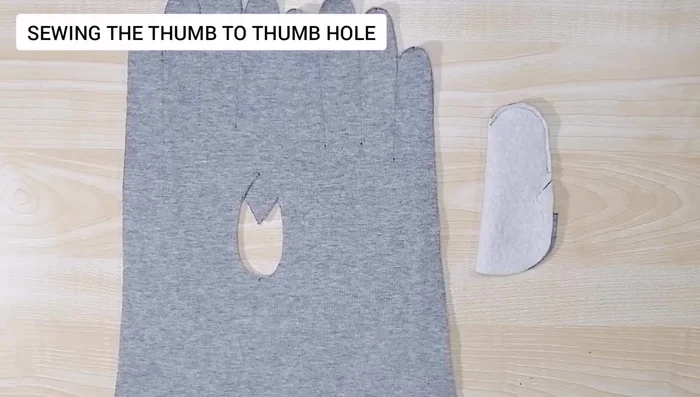
- Sew the thumb pieces. Cut through line D to C on the thumb pattern to match the length on the glove body pattern. Sew the thumb pieces right sides together, leaving a seam allowance open for turning.
- Attach thumb to glove body. Align points B to C and C to D on the thumb piece with corresponding points on the glove body, and sew.
Sew the Thumbs Attach Finger Gussets
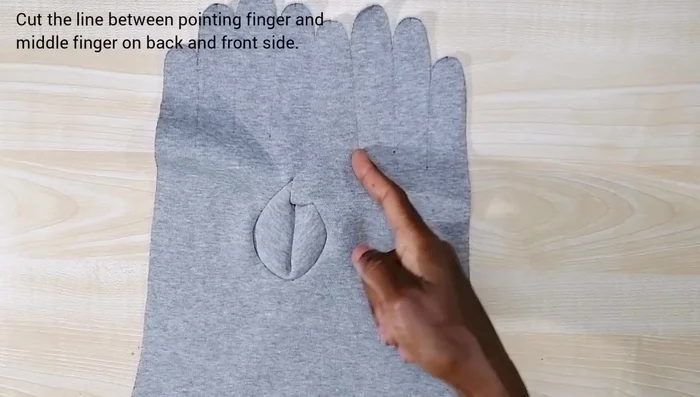
- Sew finger gussets. Cut lines between fingers on both front and back of the glove. Select gussets according to finger side (right or left) and sew right sides together. Attach gussets to glove, starting from the back of the glove and using holding stitches for accurate placement.
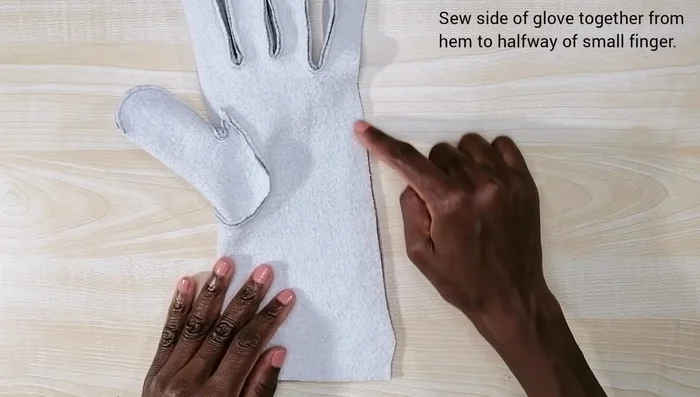
Attach Finger Gussets Sew Side Seams
- Sew side seams. Sew the side seams of the glove, starting from the hem and going up to the middle of the small finger.
Sew Side Seams Fine-tune the Fingers
- Adjust finger tips. Trim and adjust the finger tips to ensure they fit snugly but not too tightly.
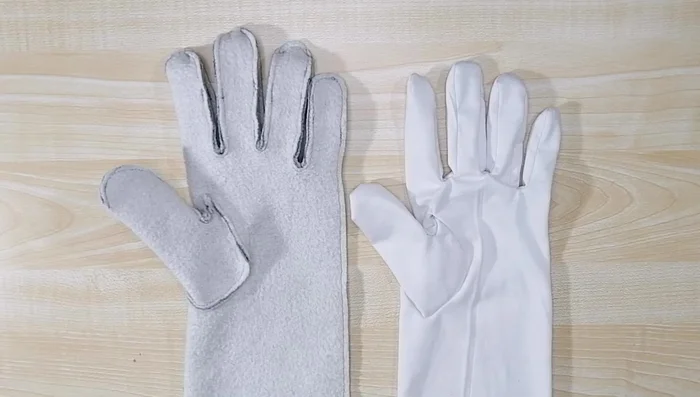
Fine-tune the Fingers Insert and Hem the Lining
- Insert lining. Turn the glove wrong side out and the lining right side out. Insert the lining into the glove, ensuring thumbs align. Remove your hand and sew the hem allowances of the glove and lining together.
Insert and Hem the Lining

Read more: DIY Stretchy Fingerless Gloves: Easy Sewing Tutorial
Tips
- Use stretchy fabric for both glove and lining for better fit and comfort.
- Increase seam allowances if using thicker fabrics like fleece for lining.
- Adjust movement allowances on the glove body pattern for a looser or tighter fit. (2cm for a standard fit, 3cm for a looser fit, 4cm for a fleece lining). Adjust the thumb pattern movement allowance accordingly (2cm for a fleece lining).