Summer's blazing sun doesn't have to mean sacrificing style! This DIY reversible wide-brim sun hat offers the perfect solution for those who crave both sun protection and a fashionable accessory. Forget expensive boutiques and complicated patterns; this tutorial guides you through creating a stunning, two-toned sun hat with surprisingly simple sewing techniques, perfect for beginners and experienced crafters alike. You'll be amazed at how easy it is to transform two pieces of fabric into a chic and functional headpiece.
Imagine turning your hat inside out to instantly change your look, coordinating your headwear effortlessly with different outfits. This project utilizes readily available materials and straightforward steps, making it a rewarding and budget-friendly craft. Ready to get started creating your own reversible sun hat? Let's dive into the step-by-step process below!
Preparation and Safety Guidelines
- Fabric (plain and patterned)
- Interfacing
- Sewing machine
- Scissors
- Pins
- Needle and thread
- Use sharp scissors and pins to avoid accidental pricks and cuts. Handle fabric carefully to prevent snags.
- When using a sewing machine, always keep your fingers away from the needle and presser foot. Use a seam ripper to carefully remove any mistakes.
- If using fabric glue, ensure adequate ventilation and follow the manufacturer's instructions carefully. Glue can be irritating to the skin; avoid contact.
Step-by-Step Instructions
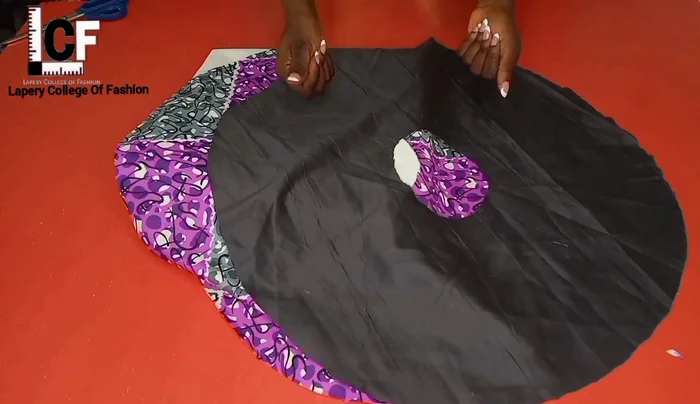
Prepare Fabric and Patterns
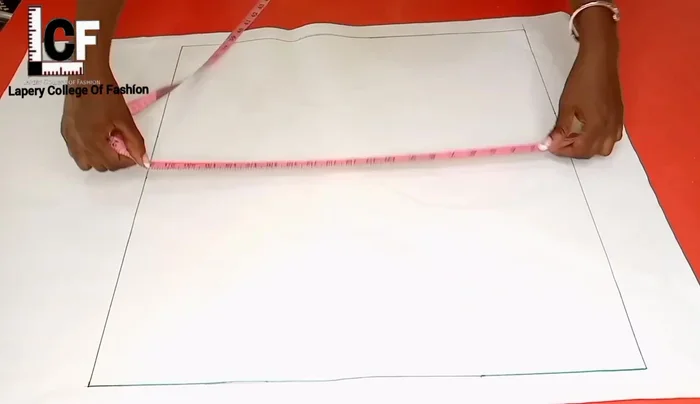
- Cut a 22x22 inch square of fabric.
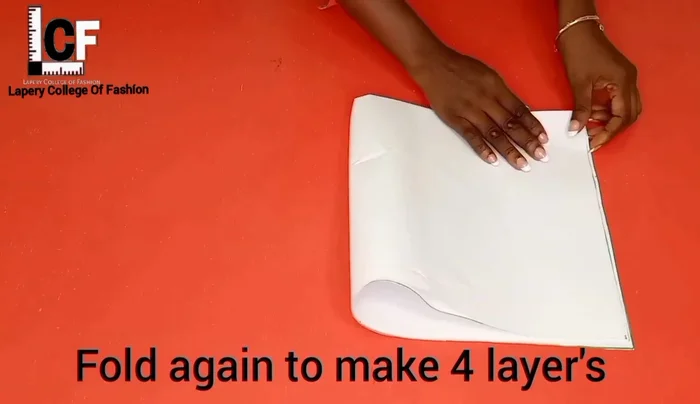
- Fold the fabric in half twice to create four layers. Mark 11 inches on each side and at 45-degree angles at midpoints.
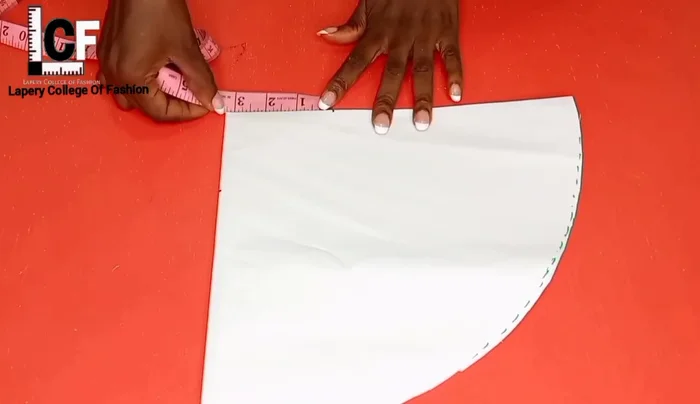
- Cut out the brim shape based on desired head size (3-3.5 inches radius suggested).
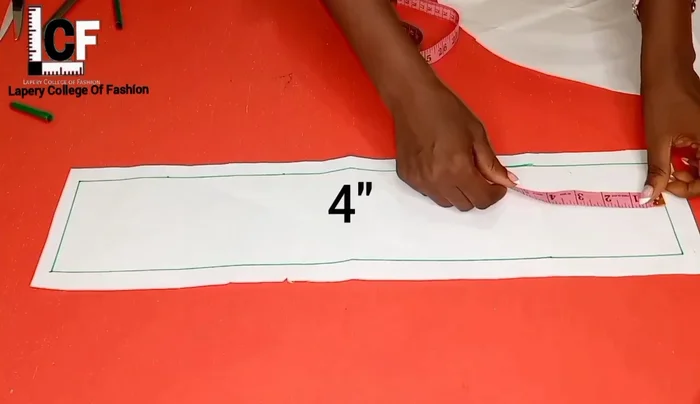
- Draft and cut the crown pattern (4 inches height, 21.5 inches width, plus seam allowance).

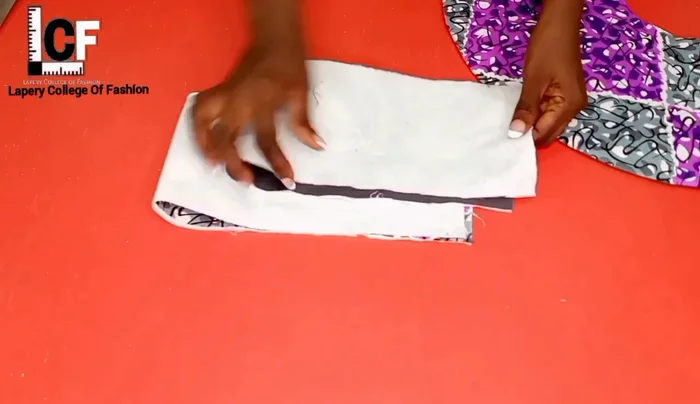
Prepare Fabric and Patterns Fuse Interfacing
- Cut interfacing pieces for both brim and crown, slightly smaller than the fabric pieces. Fuse the interfacing to the fabric.
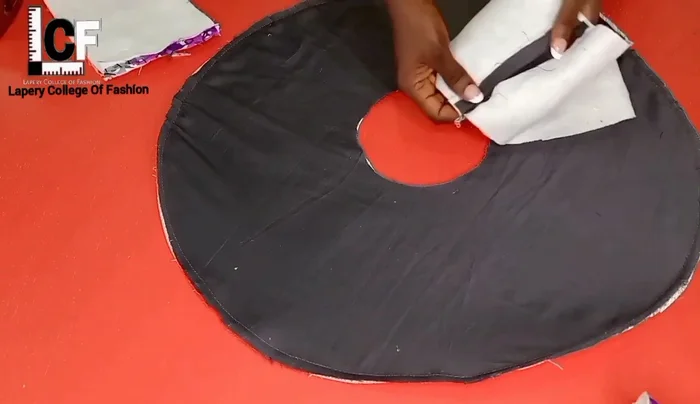
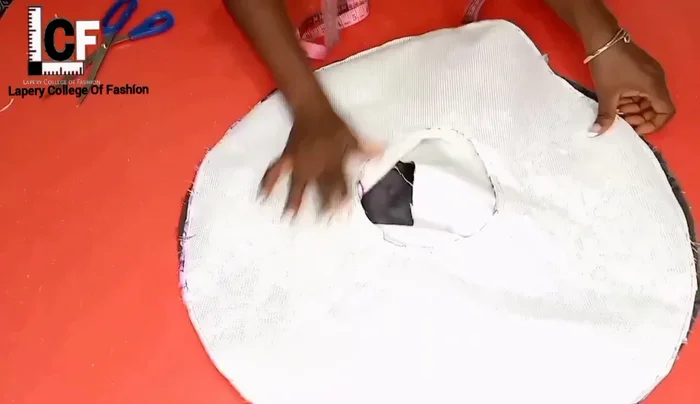
Fuse Interfacing Construct the Brim
- Sew the brim pieces together, leaving a small opening for turning. Press seams open.
Construct the Brim Attach Brim to Crown (First Layer)
- Attach the brim to the crown (plain fabric side first), right sides together, pinning and sewing.
- Trim excess fabric from the seam allowance to reduce bulk.
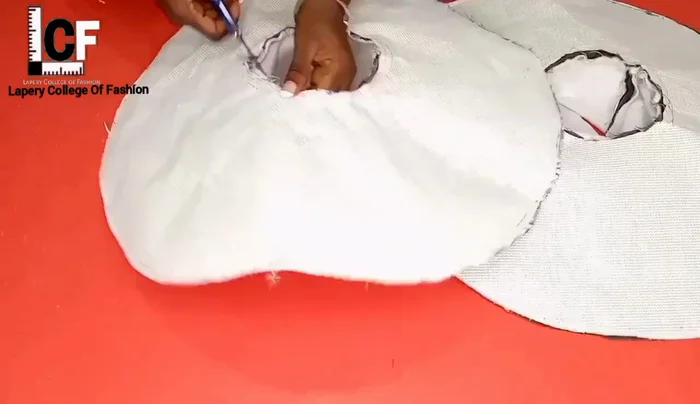
Attach Brim to Crown (First Layer) Attach Crown (Second Layer)
- Place the crown (patterned fabric) over the brim, right sides together, and sew around the edge. Trim seam allowance.
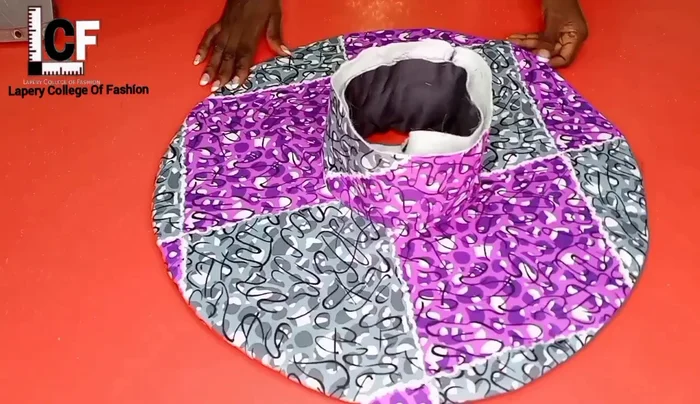
Attach Crown (Second Layer) Finishing Touches
- Turn the hat right side out. Press all seams flat.
- Attach the crown to the patterned brim, leaving a small opening. Sew from one notch to the other, leaving openings.
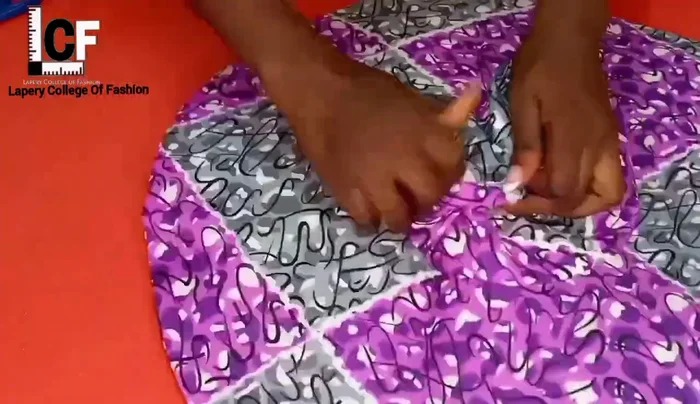
- Close the opening using a blind stitch (ladder stitch).
Finishing Touches

Read more: DIY Stretchy Fingerless Gloves: Easy Sewing Tutorial
Tips
- Add seam allowance to your crown pattern pieces to avoid shortages during sewing.
- Press seams open thoroughly after sewing to create a clean finish.
- Use interfacing to give your hat structure and stability.
- Leave a small opening in the patterned brim to allow for turning and to later stitch the crown.
- Use a blind stitch to close up the opening to keep it invisible.