Love the look of ruffled headbands but intimidated by sewing? Fear not, fashionistas! This tutorial will show you how to craft adorable, no-sew ruffle headbands in minutes, using materials you likely already have at home. Forget fiddly needles and tangled thread – this project is perfect for beginners, busy moms, or anyone who wants a quick and stylish accessory without the fuss. These headbands are incredibly versatile, ideal for adding a touch of whimsy to everyday outfits or dressing up for a special occasion. The possibilities are endless when it comes to fabric choices and ruffle styles.
Ready to get started creating your own stunning, no-sew ruffled headbands? Let's dive into the simple, step-by-step instructions that will guide you through this fun and rewarding project, from choosing your fabric to the final flourish. You’ll be surprised how easy it is to achieve a professional-looking result in just a few short steps!
Preparation and Safety Guidelines
- Fabric (base, ruffle, lace), Ribbon, Needle, Thread, Scissors, Pins, Optional: Beads, Bows, Flowers
- Always supervise young children when using fabric scissors or any sharp objects.
- Be mindful of the type of fabric used; some fabrics may fray easily and require extra care during handling.
- Ensure the headband is not too tight to avoid discomfort or restricted blood flow.
Step-by-Step Instructions
Prepare Fabric Pieces
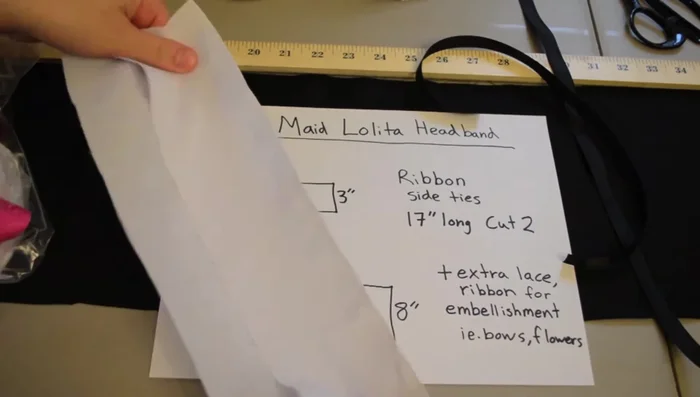
- Two 12 1/2 x 3 inch pieces for the headband base, one 36 x 8 inch piece for the large ruffle, and two 17 inch pieces for the side ties.

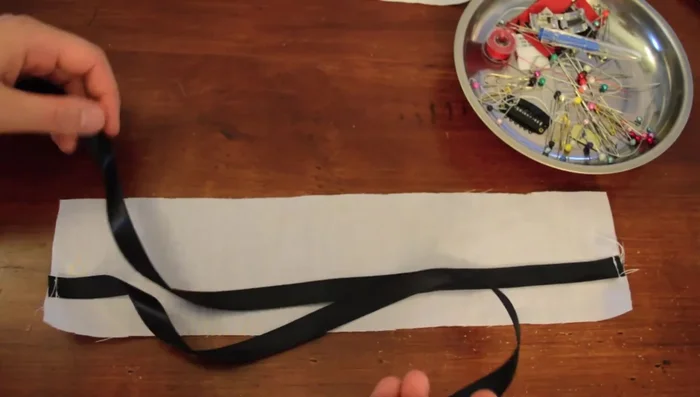
Prepare Fabric Pieces Attach Side Ties
- Sew the side ties to the headband base pieces. Fold the ribbon in half before sewing to avoid catching it in the seam.
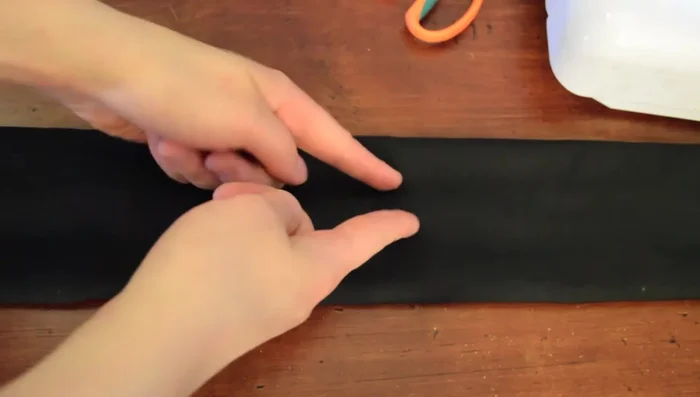
Sew Headband Base
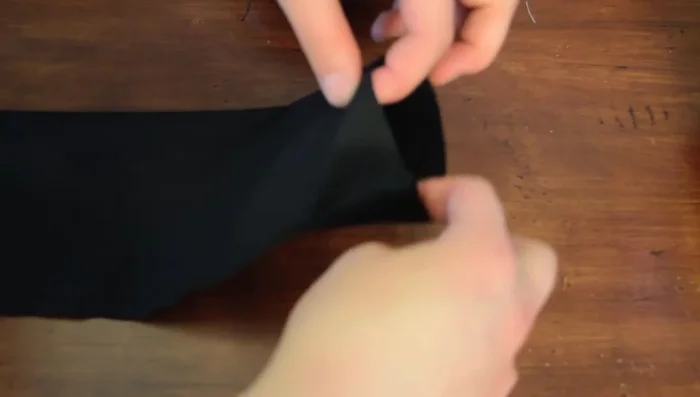
- Sew the two headband base pieces together, leaving a small opening to turn it right side out.
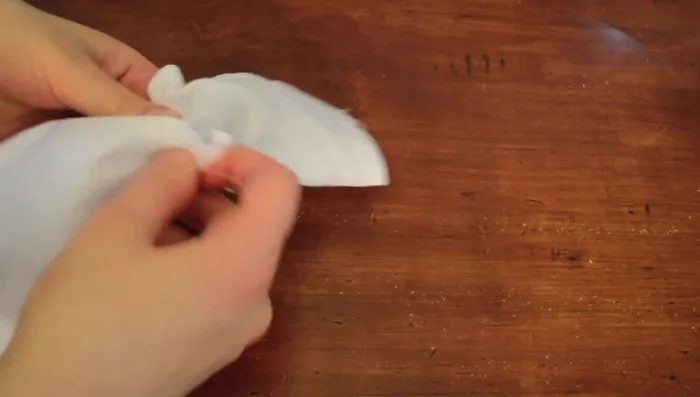
Sew Headband Base Turn and Shape Headband
- Turn the headband right side out and use a tool (pencil or chopstick) to poke out the corners. Leave the opening unclosed for now.
Turn and Shape Headband Prepare Ruffle
- Fold the long ruffle piece in half, right sides together, and sew along the long edge, leaving an opening in the center.
Prepare Ruffle Turn and Shape Ruffle
- Turn the ruffle right side out, clip the seam allowance to ease turning, and press the seam open. Leave the opening unclosed.
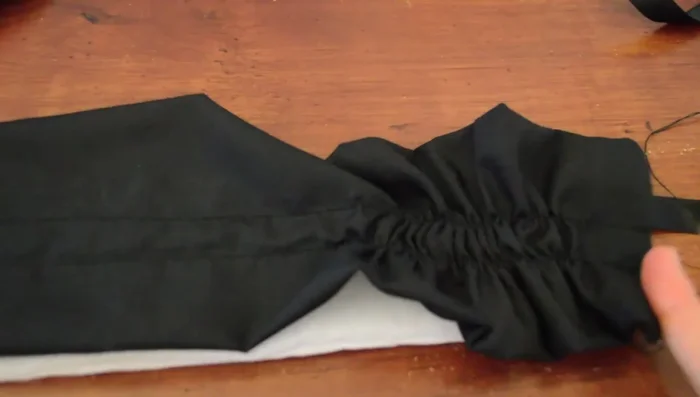
Turn and Shape Ruffle Gather Ruffle
- Gather the ruffle using two rows of stitching along the long edge. Pull the top threads to gather evenly, avoiding pulling the bottom threads.
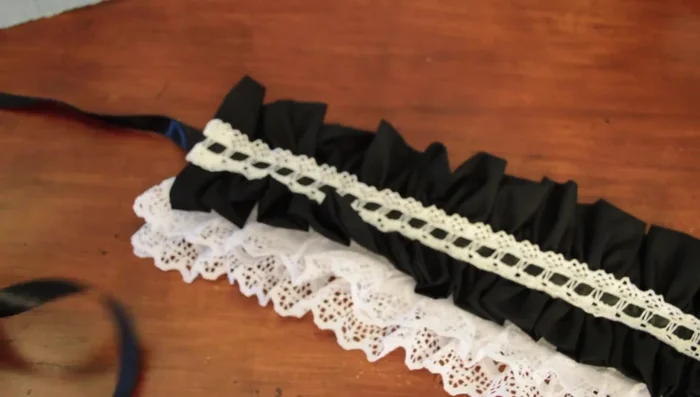
Gather Ruffle Attach Ruffle to Headband
- Pin the gathered ruffle to the headband, positioning it off-center. Zigzag stitch the ruffle to the headband.
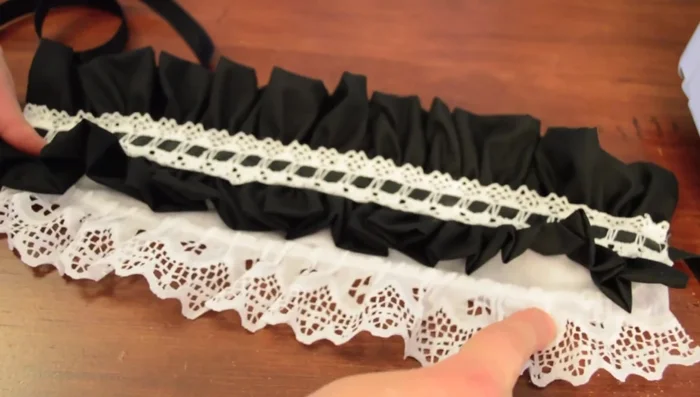
Attach Ruffle to Headband Cover Seams with Lace
- Sew a piece of lace over the stitching to cover the seam and optionally close the opening left in the headband.
Cover Seams with Lace Add Second Lace Layer (Optional)
- Add a second layer of lace to the bottom edge of the headband (optional).
Add Second Lace Layer (Optional) Add Bows
- Make bows from ribbon and hand-sew them to the sides of the headband.
Add Bows

Read more: DIY Stretchy Fingerless Gloves: Easy Sewing Tutorial
Tips
- Use pre-made lace to speed up the process.
- Use a bag of lace scraps from a fabric store to save money on lace and trim.
- Fold the ribbon before sewing it to the headband to prevent it from getting caught in the seam.
- Don't iron the ruffle flat after gathering; leave it slightly puffy.
- Seal the ends of your ribbon with a lighter or candle to prevent fraying.