Tired of those old sandals gathering dust at the back of your closet? Before you toss them, consider the possibilities! Upcycling your old footwear is a fantastic way to express your creativity, reduce textile waste, and create unique, personalized sandals that reflect your individual style. This surprisingly simple process allows you to transform worn-out pairs into stylish and comfortable shoes, breathing new life into forgotten favorites and saving you money in the process. Think vibrant embellishments, striking color combinations, and ingenious design solutions – all achievable with a little imagination and readily available materials.
This guide will walk you through a step-by-step process, transforming your old sandals into eye-catching, one-of-a-kind pieces. From choosing the right materials to adding those finishing touches, we'll cover everything you need to know to upcycle your old sandals and add a touch of personal flair to your summer wardrobe. Let's get started!
Preparation and Safety Guidelines
- Old sandals
- Scissors
- Contact cement
- White pencil
- Rubber
- Always use sharp scissors or a craft knife with caution. Cut away from yourself and keep fingers clear of the blades.
- If using glue, work in a well-ventilated area and follow the manufacturer's instructions carefully. Some glues are flammable or can irritate skin.
- Ensure any embellishments or added materials are securely attached before wearing to prevent them from becoming loose and causing tripping hazards.
Step-by-Step Instructions
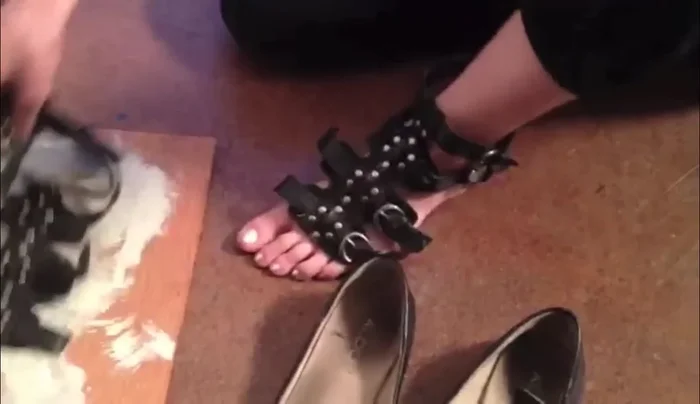
Prepare Old Sandals
- Cut off desired pieces from old sandals.
- Select the ankle pieces from the cut sandals.

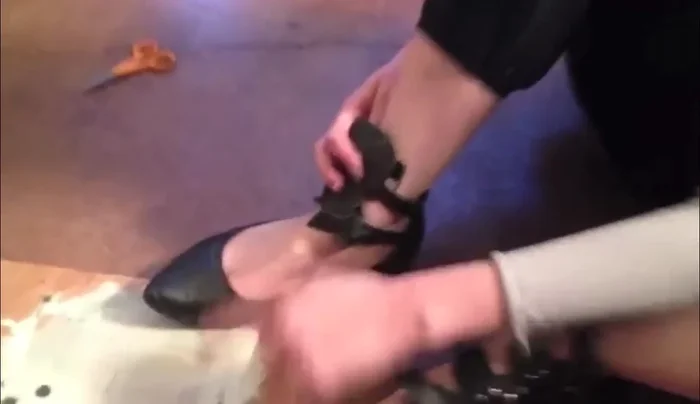
Prepare Old Sandals Position and Mark Ankle Pieces
- Position the ankle pieces onto the new shoe base (obtained from a flea market).
- Mark the placement of the ankle pieces using a white pencil.
Position and Mark Ankle Pieces Attach Ankle Pieces
- Apply rubber to secure the ankle pieces to the base.
- Use contact cement to permanently attach the ankle pieces to the shoe base.
Attach Ankle Pieces


Read more: DIY Reversible Baby Slippers: Easy Sewing Tutorial
Tips
- Choose sandals with easy-to-remove parts.
- Source inexpensive, used shoes as a base for upcycling.
- Ensure a sturdy connection using appropriate adhesive (contact cement).