Are you ready to elevate your style with a handcrafted accessory that's both chic and comfortable? Then look no further than the DIY leather headband! This versatile piece can complement any outfit, from casual jeans and a t-shirt to a more formal ensemble. Forget expensive boutique headbands; with a few simple tools and readily available materials, you can create a stunning, personalized headband in the comfort of your own home. This project is perfect for beginners, requiring minimal sewing experience and offering a satisfying sense of accomplishment once completed.
Leather headbands offer a unique blend of sophistication and practicality, making them a perfect addition to your wardrobe. This step-by-step guide will walk you through each stage of the process, from choosing the right leather to adding your finishing touches, ensuring you achieve a professional-looking result. Let's get started and create your own stylish, custom-made leather headband!
Preparation and Safety Guidelines
- scissors
- ruler
- headband base
- needle
- thread
- melog eco-leather
- two strips of non-crumbling fabric
- Always use sharp, well-maintained tools to avoid injury. Dull tools require more force, increasing the risk of slips and cuts.
- Be mindful of your fingers when working with sharp tools like rotary cutters or scissors, especially when cutting leather close to edges.
- If using any adhesives, ensure adequate ventilation and follow the manufacturer's safety instructions carefully. Some adhesives can be harmful if inhaled.
Step-by-Step Instructions
Prepare the Pattern
- The headband length is 37cm along the outer part. The pattern length will be 37cm + 0.5cm (folded) + allowance (14cm for a smaller knot, 16.2cm for a larger knot). The widest part of the pattern is 8cm, the narrowest is 3cm. Cut out two patterns.
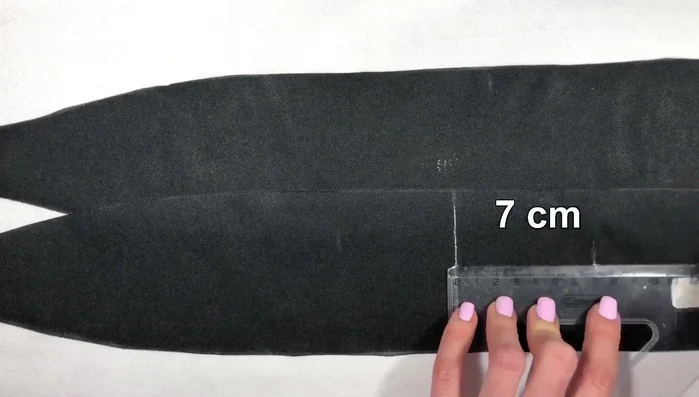
Mark the Pattern
- Measure the middle of one pattern and mark 7cm on each side (for the knot). Measure 19cm from the narrowest part – this is your mark for cutting leather strips.

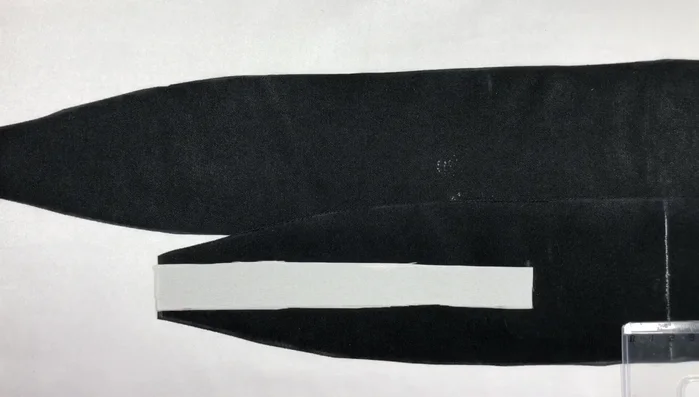
Mark the Pattern Cut Leather Strips
- Cut two strips, 19cm long and 2cm wide.
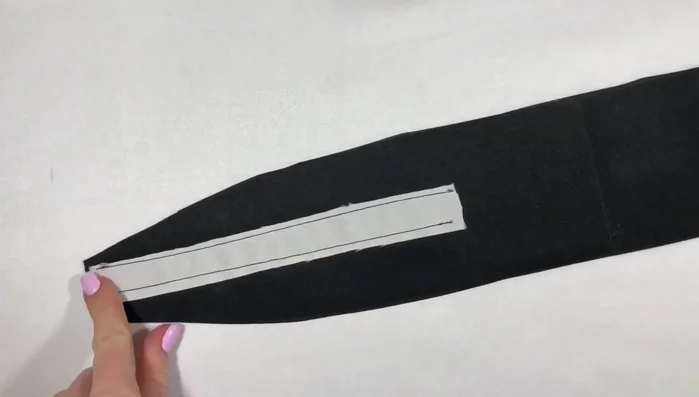
Cut Leather Strips Attach Leather Strips
- Sew the leather strips to the inside of the fabric patterns. The width of the strip (2cm in this case) depends on the headband width.
Attach Leather Strips Sew the Headband Pieces
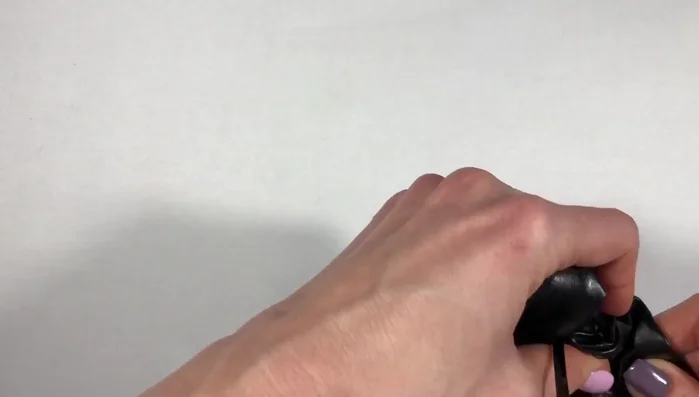
- Connect the two patterns with the front sides facing each other. Bend the leather for the allowance and sew, leaving an opening to turn the fabric inside out.
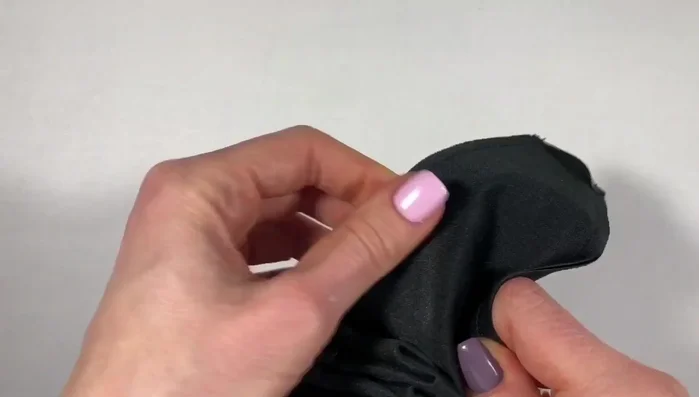
Sew the Headband Pieces Turn Right Side Out
- Turn the sewn fabric inside out using scissors.
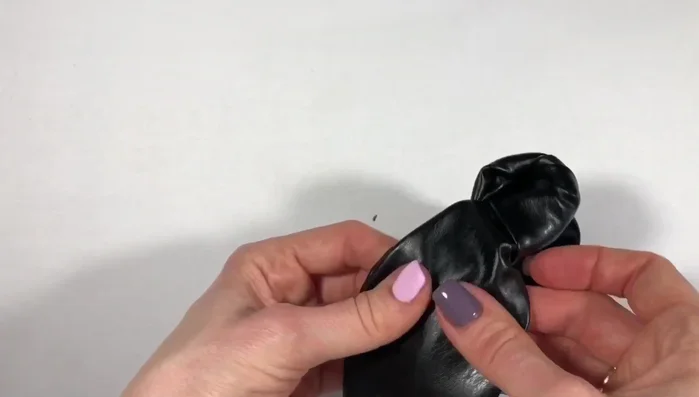
Turn Right Side Out Tie the Knot
- Tie a knot in the middle of the headband.
Thread and Secure the Knot
- Thread the headband through the hole, pass it under the knot, and insert it into the second hole.
Thread and Secure the Knot Close the Opening
- Straighten the leather and sew up the opening using a blind stitch.
Close the Opening

Read more: DIY Stretchy Fingerless Gloves: Easy Sewing Tutorial
Tips
- Adjust the allowance for the knot based on desired volume (14cm or 16.2cm).
- Use a blind stitch to close the opening for a clean finish (refer to the velvet headband masterclass for more details).