Summer's here, and what better way to celebrate the sunshine than with a fun and easy DIY project? Tired of the same old flip-flops? Give your footwear a vibrant makeover with this simple, customizable decorating guide! Transforming plain flip-flops into personalized, stylish beach accessories is easier than you think, requiring minimal materials and even less time. This is a perfect craft for adults and kids alike, providing a creative outlet and a chance to express your individual style. Whether you're looking for a unique accessory for yourself or a thoughtful handmade gift for a friend, this project offers endless possibilities for creativity.
Get ready to unleash your inner artist and personalize your summer wardrobe! This step-by-step guide will walk you through the process of creating stunning, one-of-a-kind flip-flops, using readily available materials and techniques suitable for all skill levels. So grab your favorite embellishments and let's get started on creating the perfect summer flip-flops!
Preparation and Safety Guidelines
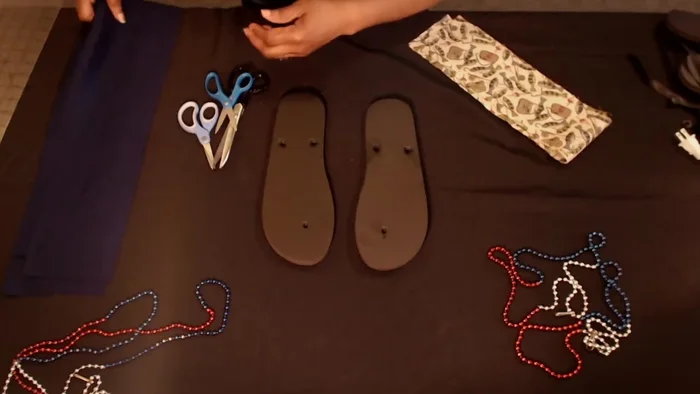
- Flip-flops
- Scissors
- Fabric strips (4.5 x 24 inches)
- Ruler or yardstick
- Glue gun (optional)
- Always supervise children if they are participating in the decorating process, especially when using sharp objects like scissors or hot glue guns.
- Ensure the flip-flops are clean and dry before applying any embellishments to ensure proper adhesion and prevent mold or mildew.
- Use appropriate adhesives for your chosen materials. Read and follow all manufacturer instructions for safe and effective use.
Step-by-Step Instructions
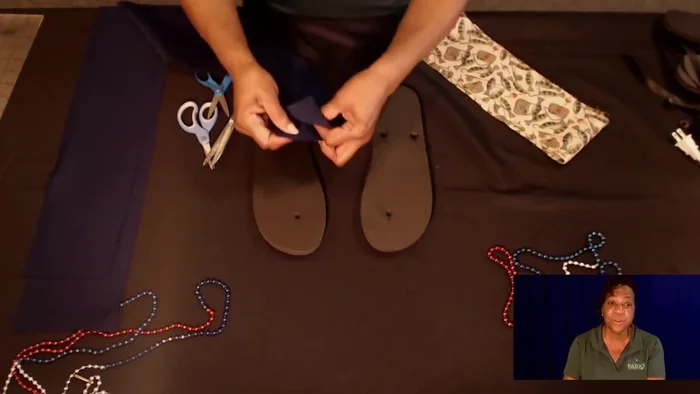
Prepare Flip-Flops
- Cut and remove the inserts from your flip-flops.

Prepare Flip-Flops Prepare Fabric Strips
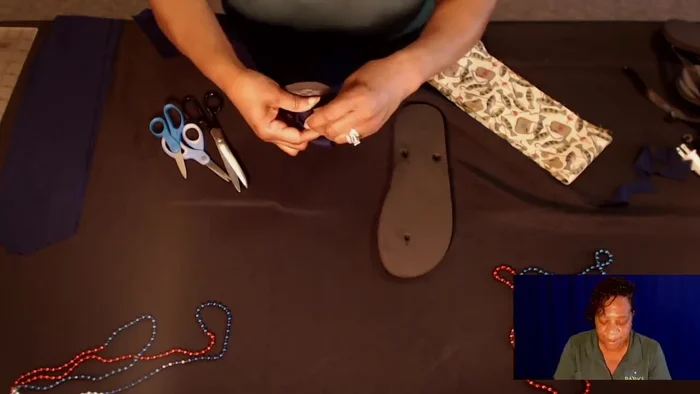
- Cut strips to desired length (24 inches recommended). Create points at the end of each strip.
Prepare Fabric Strips Decorate One Flip-Flop
- Thread the pointed ends of two fabric strips through the holes on one side of the flip-flop, leaving a loop underneath. Repeat on the other side.
- Make two double knots at the bottom of the flip-flop, about 1.5 inches from the end. Then, bring both strips to the front and tie a single knot. Repeat this process for the other side of the flip-flop.
- Tightly tie the knots on the bottom and optionally use a glue gun to secure them further.
Decorate One Flip-Flop Decorate Second Flip-Flop
- Repeat steps 3-5 for the other flip-flop.
Decorate Second Flip-Flop


Read more: DIY Reversible Baby Slippers: Easy Sewing Tutorial
Tips
- Keep extra scissors handy in case one pair breaks.
- Use thinner fabric for easier threading. If using thicker fabric, make a wider hole for easier threading.
- Practice with inexpensive flip-flops before trying this on expensive ones.
- Use old t-shirts or other scrap fabric if you don't have fabric strips.
- Adjust the size of the fabric strips for different sizes of flip-flops. Use 12-inch strips for children's flip-flops.