Winter's chill got you reaching for the warmest layers? Nothing beats the cozy comfort of handcrafted mittens, especially when they're as easy to make as these! This tutorial guides you through creating your own pair of delightfully warm fleece mittens, enhanced with a luxurious faux fur lining for extra snugness. Forget expensive, mass-produced gloves; you'll be surprised at how simple it is to whip up a pair of personalized, perfectly fitting mittens in just a short amount of time. Imagine the satisfaction of wearing something you've made yourself, radiating warmth both literally and figuratively.
These DIY mittens are perfect for beginners, requiring minimal sewing experience and readily available materials. We’ll be using fleece for its softness and ease of handling, and the added faux fur lining elevates them to a level of luxurious comfort you won't find in store-bought versions. Ready to dive in and create your own cozy winter essential? Let's get started with the step-by-step instructions below!
Preparation and Safety Guidelines
- Fleece fabric
- Faux fur fabric
- Scissors
- Fabric marker
- Pins
- Thread
- Hand sewing needle
- Print tape
- Use sharp scissors carefully to avoid cuts. Always cut away from yourself.
- Ensure your sewing machine needle is the correct size for your fleece and faux fur to prevent skipped stitches or broken needles.
- When using hot glue, work on a heat-resistant surface and avoid touching the glue until it has completely cooled.
Step-by-Step Instructions
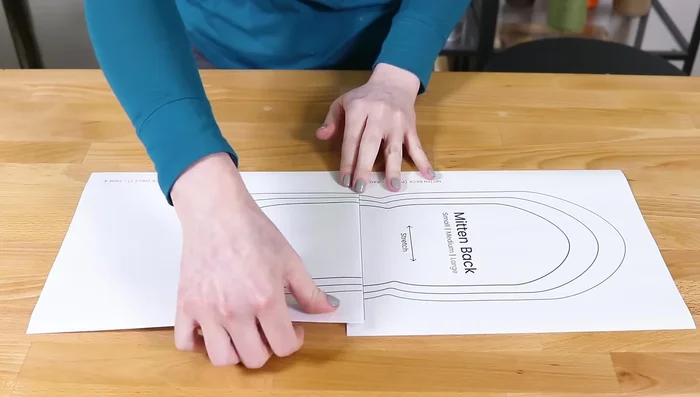
Prepare the Pattern
- Cut out the pattern pieces. A small, medium, and large size are provided, but you can adjust them as needed.

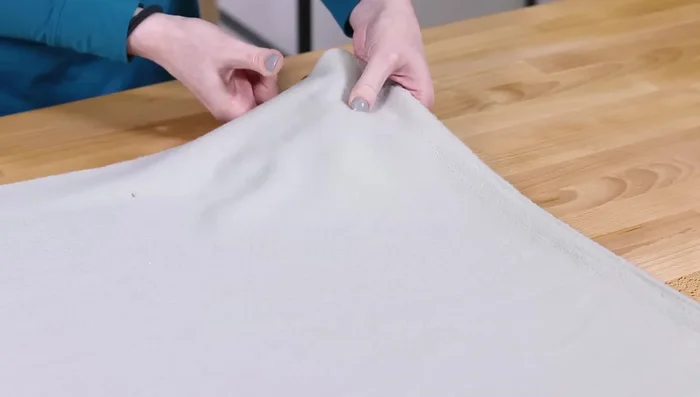
Prepare the Pattern Cut Fleece Pieces
- Lay out the fleece (wrong side up), stretch it to determine the stretch direction, and place the pattern pieces accordingly. Trace and cut out the mitten back piece, upper front, and lower front pieces.
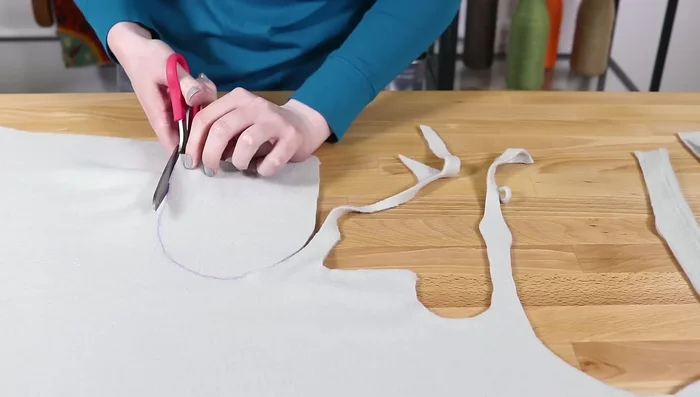
Cut Fleece Pieces Cut Faux Fur Pieces
- Lay out the faux fur (wrong side up). Flip over the pattern pieces and trace. Use short snips when cutting the faux fur to avoid cutting the pile too much.
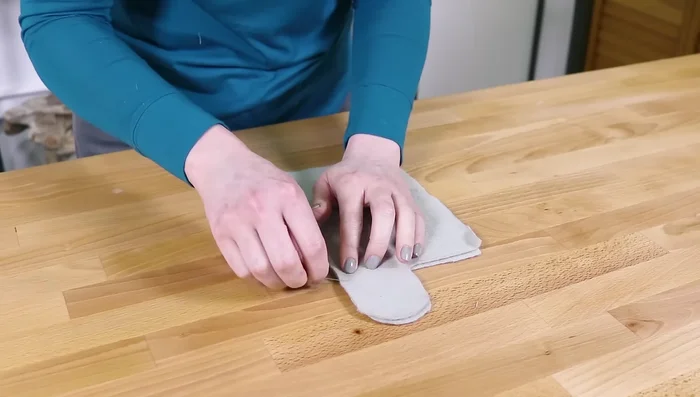
Cut Faux Fur Pieces Sew Fleece Thumb
- Pin together the upper and lower fleece fronts (right sides facing) so the thumbs line up. Sew across and around the thumb with about an ⅛ inch seam allowance. Backstitch at the beginning and end.
Sew Fleece Thumb Sew Fleece Mitten Body
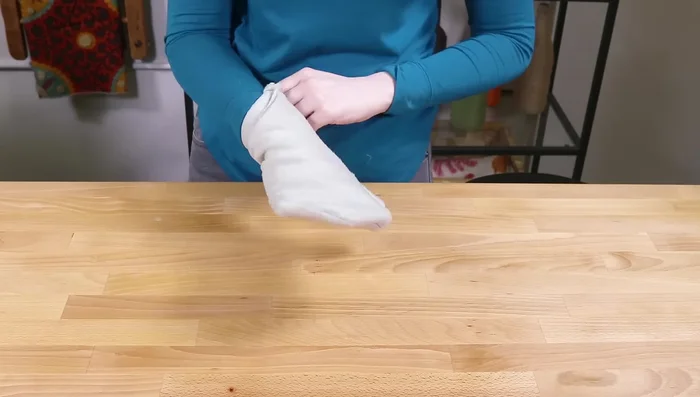
- Pin the front and back fleece pieces together (right sides facing). Sew around the edges, leaving the bottom open until you reach the thumb. Flip the thumb over and continue stitching on the other side. Trim excess fabric.
Sew Faux Fur Lining
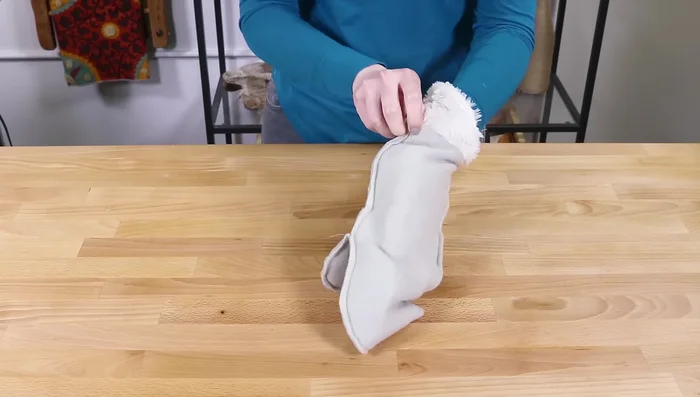
- Turn the fleece mitten right side out. Repeat steps 4 and 5 for the faux fur lining.
Sew Faux Fur Lining Attach Lining to Mitten
- Place the faux fur lining inside the fleece mitten, ensuring a proper fit. Pin around the bottom with a ¼ inch seam allowance, leaving a 2-3 inch gap. Pull the lining through the gap and tuck it inside the fleece.
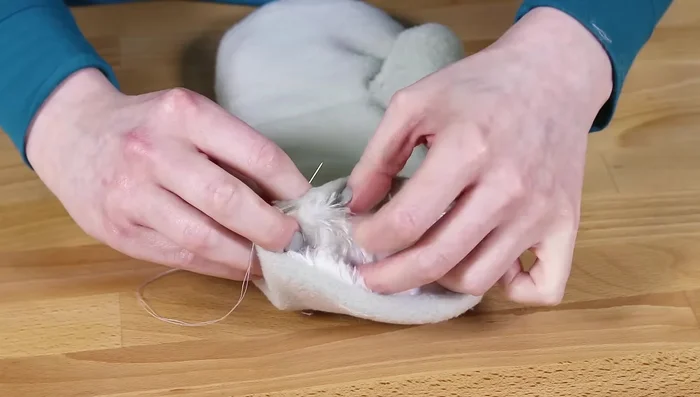
Attach Lining to Mitten Close the Lining Seam
- Hand sew the gap closed using a hidden stitch. Repeat for the other mitten.
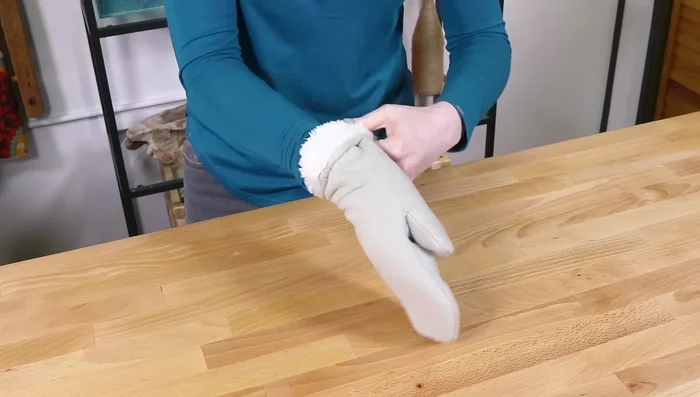
Close the Lining Seam Finish the Cuff
- Fold the bottom of the mittens to your desired length. You can tack it with stitches or leave it adjustable for varying weather conditions.
Finish the Cuff
Read more: DIY Stretchy Fingerless Gloves: Easy Sewing Tutorial
Tips
- Use short snips when cutting faux fur to prevent damaging the pile.
- Remember to flip the pattern pieces for fleece (face down) and faux fur (face up).