Winter's chill can be a formidable foe, but with a little creativity and effort, you can combat the cold in style and comfort. This project guides you through creating your own uniquely cozy winter hat, using the wonderfully soft textures of fleece and faux fur. Forget overpriced store-bought hats; imagine the satisfaction of crafting a warm, personalized accessory that perfectly matches your style and keeps you snug throughout the season. The luxurious feel of faux fur against your skin, combined with the practicality and warmth of fleece, makes this a truly rewarding DIY project, perfect for knitters and sewing novices alike.
This tutorial will walk you through each step, from choosing your materials to the final finishing touches. We'll cover everything from cutting and sewing techniques to adding decorative elements for a truly unique hat. Get ready to embrace the warmth and learn how to create your own custom fleece and faux fur winter hat—a perfect blend of practicality and personalized style. Let's get started!
Preparation and Safety Guidelines
- Fleece
- Faux fur
- Scissors
- Fabric marker
- Pins
- Thread
- Hand sewing needle
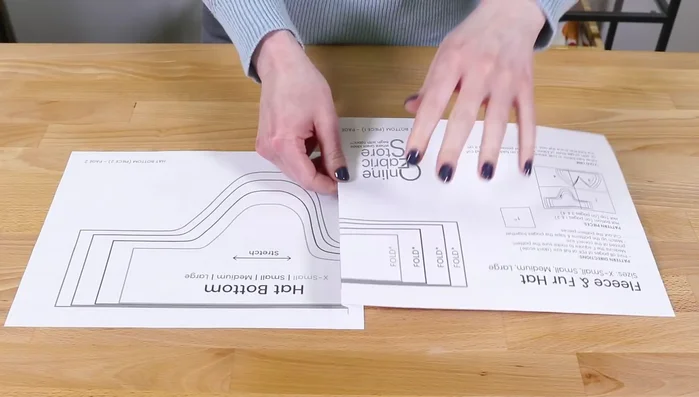
- Print tape
- Pattern pieces
- Always use sharp fabric scissors to cut fleece and faux fur. Dull scissors can cause fraying and make cutting difficult.
- When using a sewing machine, be mindful of your fingers and keep them away from the needle. Work slowly and carefully.
- Ensure your work area is well-lit and free from clutter to avoid accidents while cutting and sewing.
Step-by-Step Instructions
Prepare the Pattern and Fabric
- Print and cut out the pattern pieces for the hat (extra-small for babies, small for children, medium and large for adults).
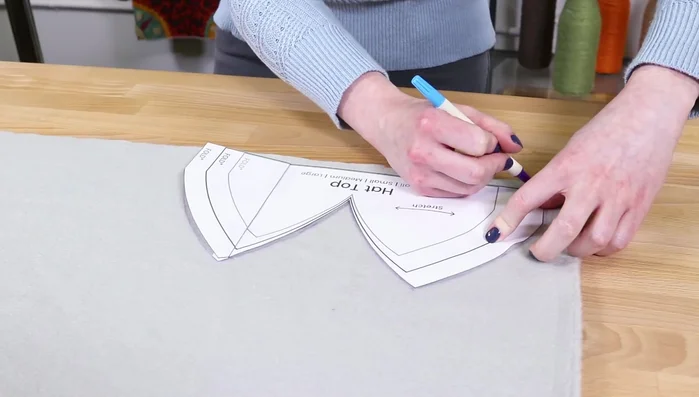
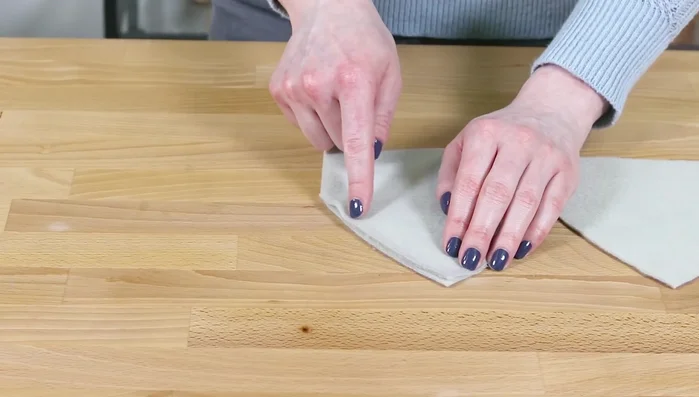
- Lay out the fleece (wrong side up) and stretch it to determine the stretchier side. Place the pattern pieces accordingly and trace around the hat top piece, then flip and trace the rest.
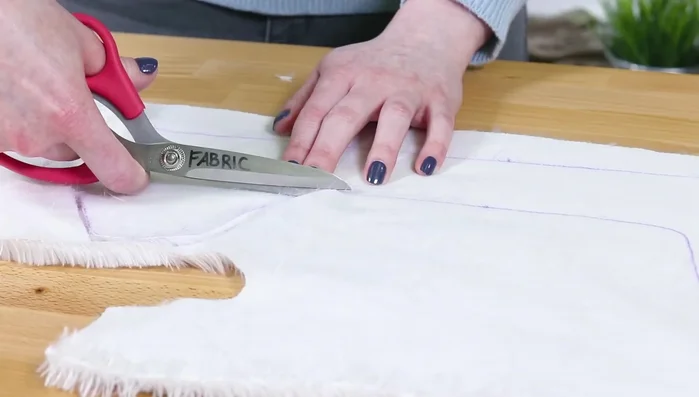
- Cut the fleece and faux fur pieces using short snips for the faux fur to avoid cutting the pile too much.
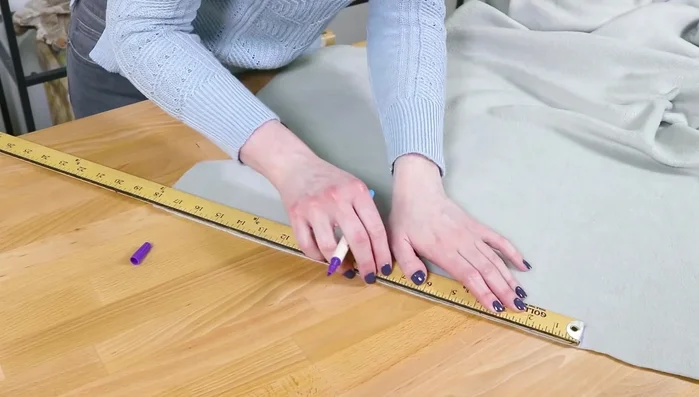
- Cut two 1-inch wide by 18-inch long fleece strips for the ties.

Prepare the Pattern and Fabric Assemble the Fleece Hat
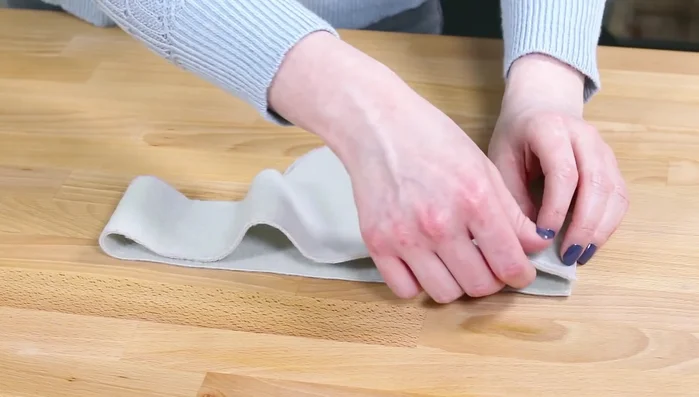
- Sew the triangles of the hat top piece together, creating a circle.
- Sew the ends of the hat bottom piece together.
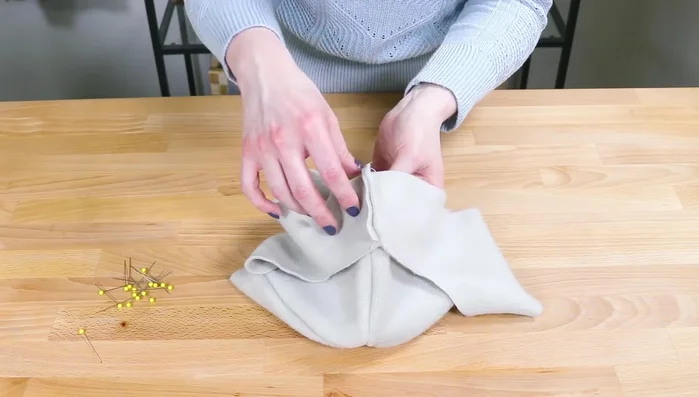
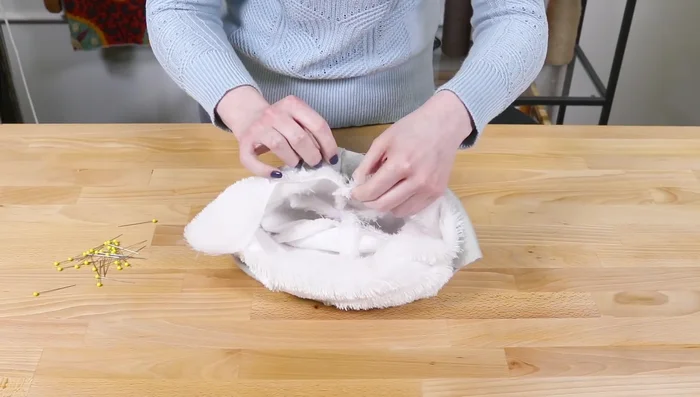
- Pin the top and bottom pieces together (right sides facing), aligning seams and ensuring ear flaps face up. Sew all the way around.
Assemble the Fleece Hat Assemble the Faux Fur Lining
- Repeat steps 7 for the faux fur lining.
Assemble the Faux Fur Lining Make the Hat Ties
- Braid the three fleece tie strands, leaving about an inch at the top. Cut the extra length and create tassels by cutting each strand in half.
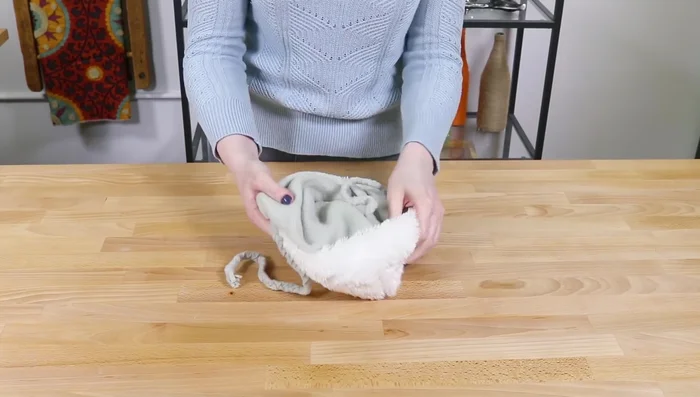
Make the Hat Ties Attach Lining and Finish
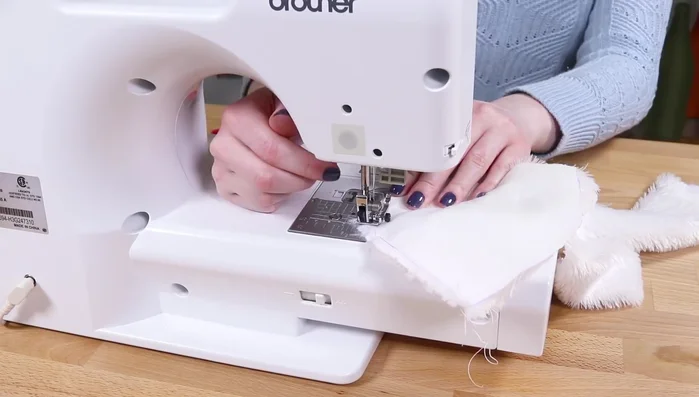
- Pin the fleece and lining together (right sides facing), aligning seams. Sew around the entire hat, leaving a 3-inch gap.
- Turn the hat right side out through the gap. Fold in the edges of the opening and hand sew with an invisible stitch.
Attach Lining and Finish

Read more: DIY Stretchy Fingerless Gloves: Easy Sewing Tutorial
Tips
- Use short snips when cutting faux fur to avoid cutting the pile too much.
- Pin as you go when sewing faux fur, as it can be slippery.
- If the fur gets caught in the seam, use a pin to pull it out.
- This hat is very warm, suitable for outdoor use only.