Fingerless gloves offer the perfect blend of warmth and dexterity, making them ideal for everything from typing on a chilly day to crafting intricate details. But finding the perfect pair that fits your style and needs can be a frustrating search. Why settle for off-the-shelf when you can create custom-fit fingerless gloves tailored precisely to your preferences? This guide empowers you to design and craft your own unique pair, from concept to completion, allowing for complete control over the look, feel, and functionality. You'll discover the joy of transforming simple materials into a wearable work of art.
This tutorial walks you through the entire process of designing your own fingerless glove pattern from scratch, eliminating the need to rely on pre-made templates. We’ll cover everything from measuring your hand to selecting your yarn, guiding you through each step with clear instructions and helpful illustrations. Ready to knit or crochet your dream fingerless gloves? Let's dive into the step-by-step process.
Preparation and Safety Guidelines
- Paper
- Pencil
- Ruler
- Tracing paper
- Cardboard
- Scissors
- Weights (optional)
- Awl or sharp object
- Use sharp scissors carefully to avoid cuts. Always point the scissors away from your body when cutting.
- If using needles, take extra care to avoid pricking yourself. Consider using a thimble for added protection.
- Choose yarn appropriate for your skill level and the intended use of the gloves. Consider the weight and fiber content for comfort and durability.
Step-by-Step Instructions
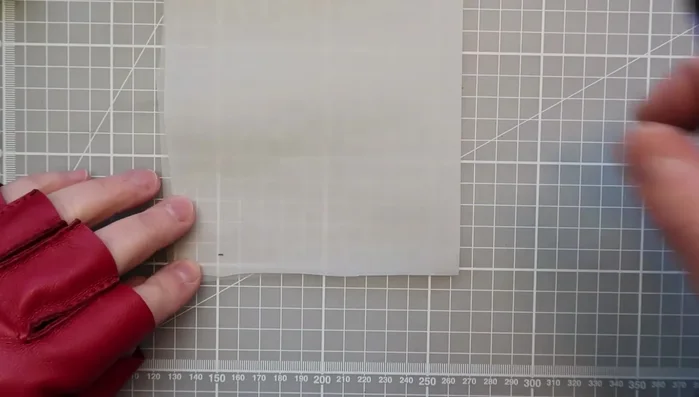
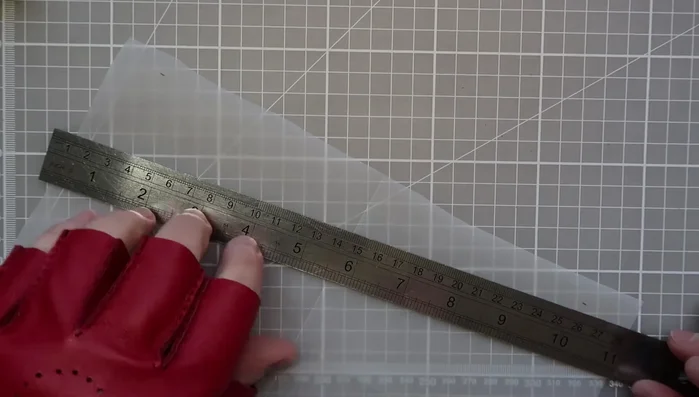
Prepare Base Pattern
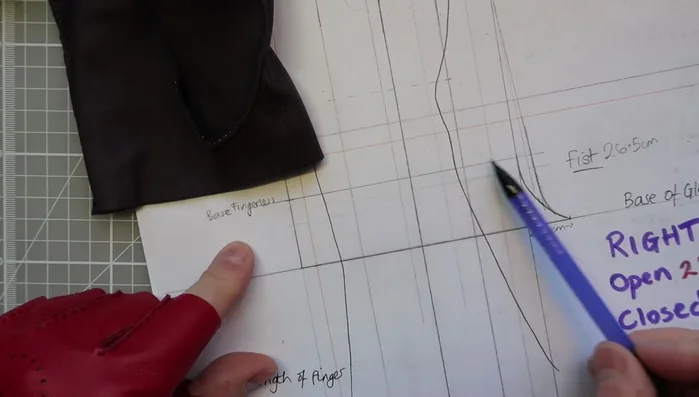
- Fold tracing paper in half, mark the base of the glove, and trace the mark on the other side to ensure symmetry.
- Open the tracing paper and align the marks, ensuring right angles. Draw the baseline.
- Align the base of your fingers and the glove base with the horizontal line drawn on the tracing paper, and transfer the lines onto your template.

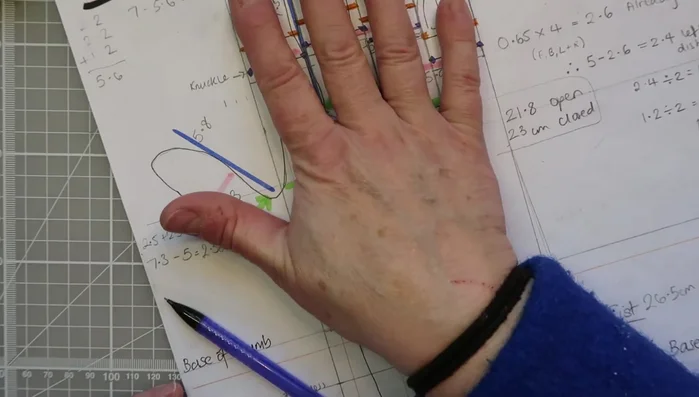
Prepare Base Pattern Mark Finger Openings and Glove Length
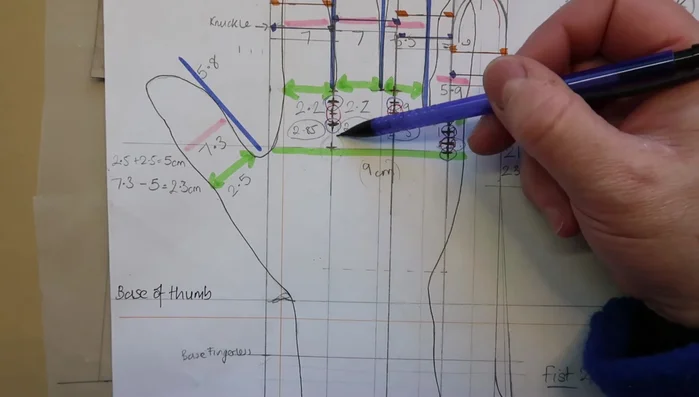
- Position your hand on your base glove pattern and mark the knuckle positions.
- Draw a line 0.5 cm below the knuckle marks to create the finger opening.
- Draw another line to shorten the glove to your desired length.
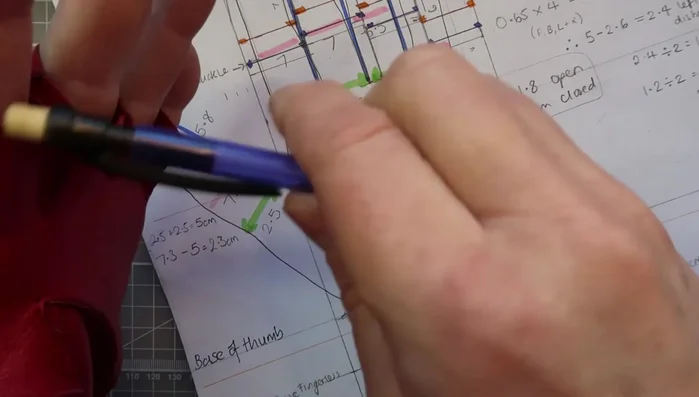
Mark Finger Openings and Glove Length Transfer and Refine Outline
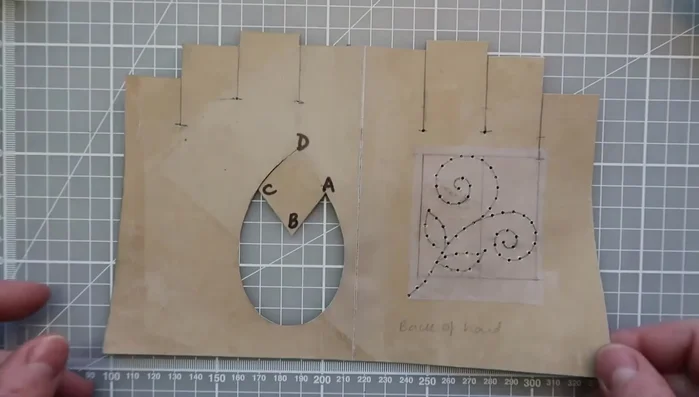
- Transfer the modified outline onto a new piece of paper.
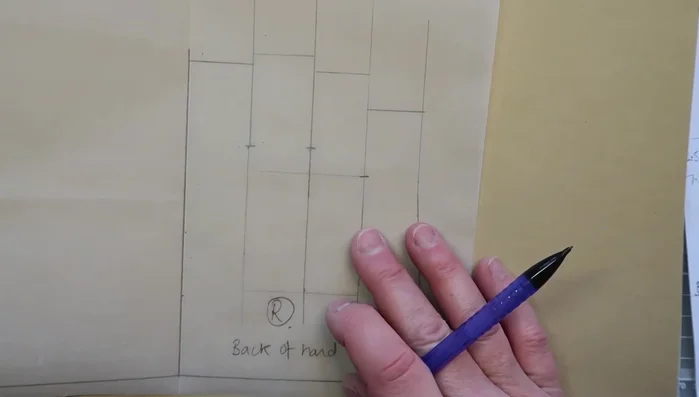
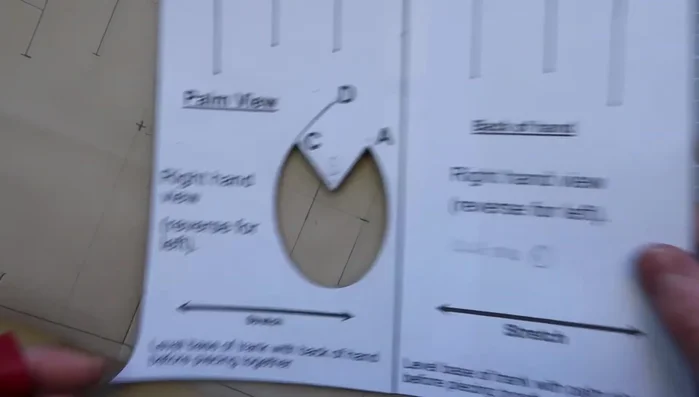
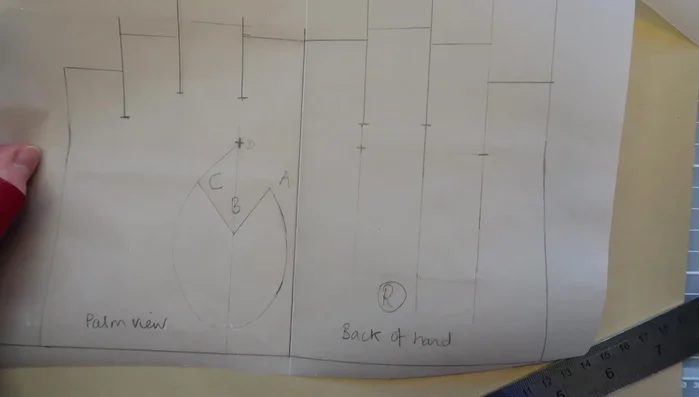
- Draw the outline of the glove, including finger base lines, adjusting the finger base lines 1 cm lower on the back of the hand.
- Fold the pattern to ensure symmetry and draw the back of the hand.
Transfer and Refine Outline Create Thumb Pattern
- Mark point D (base of the thumb knuckle) and extend the line from the index finger to align with point B on the glove pattern.
- Use your existing thumb template, aligning it with point D and the extended line, to draw the thumb onto the pattern.
- Create the thumb piece by drawing a horizontal line across the pattern from point B at right angles.
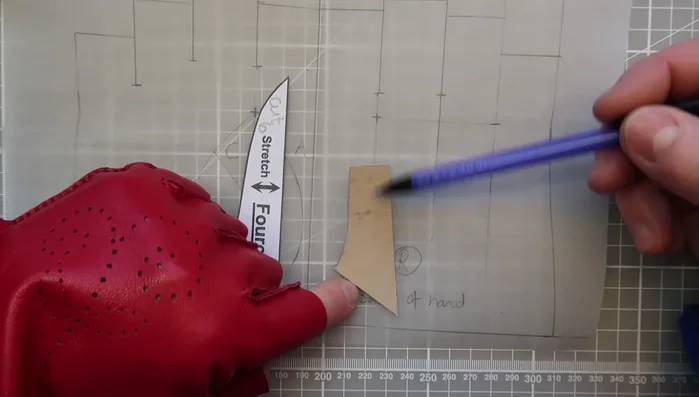
Create Thumb Pattern Finalize and Cut Pattern
- Glue the pattern to cardboard and cut it out.
- Cut out your four finger pieces, making them slightly longer than needed, so you can trim them to fit later.
Finalize and Cut Pattern


Read more: DIY Stretchy Fingerless Gloves: Easy Sewing Tutorial
Tips
- Use weights to hold your paper in place while tracing.
- Always work from point D to ensure accurate thumb placement.
- Make your finger pieces slightly longer than needed for trimming to fit.