The fedora, a timeless symbol of elegance and mystery, has captivated fashion enthusiasts for generations. Its distinctive silhouette, characterized by the pinched crown and soft brim, lends itself to countless styles, from classic Hollywood glamour to modern streetwear chic. While ready-made fedoras are readily available, crafting your own offers a unique opportunity for personalization and creative expression. Choosing your fabrics, colors, and embellishments allows you to design a hat that perfectly reflects your individual style, a truly rewarding experience. The process, while detailed, is surprisingly manageable even for novice crafters.
This guide provides a comprehensive, step-by-step approach to making your own fedora hat from scratch. We'll walk you through each stage of the process, from selecting the right materials and measuring your head to shaping the crown and finishing the brim, ensuring a professionally finished product you can be proud of. So grab your fabric, tools, and let’s begin!
Preparation and Safety Guidelines
- Fabric
- Hat block
- Steamer
- Water spray bottle
- Plastic bag
- Pins
- Needle and thread
- Ribbon
- Decorative embellishments
- Sewing machine
- Always use sharp scissors and a cutting mat to prevent injury. Handle needles and pins with care.
- When working with hot glue, be cautious of burns. Use a glue gun designed for crafting and allow glue to cool slightly before handling.
- If using fabric dyes or paints, ensure adequate ventilation and wear appropriate protective gear (gloves and mask) to avoid inhalation or skin irritation.
Step-by-Step Instructions
Material Preparation
- Select your material (fabric).
- Dampen the fabric with water using a spray bottle.
- Steam the fabric to make it pliable using a steamer and a plastic bag.
Shaping the Crown
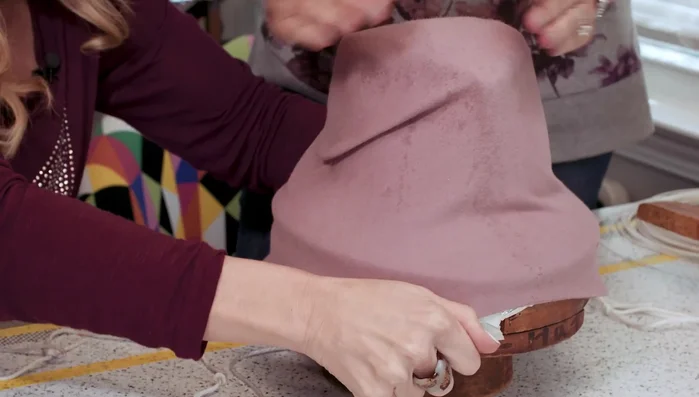
- Stretch and mold the fabric over the hat block.
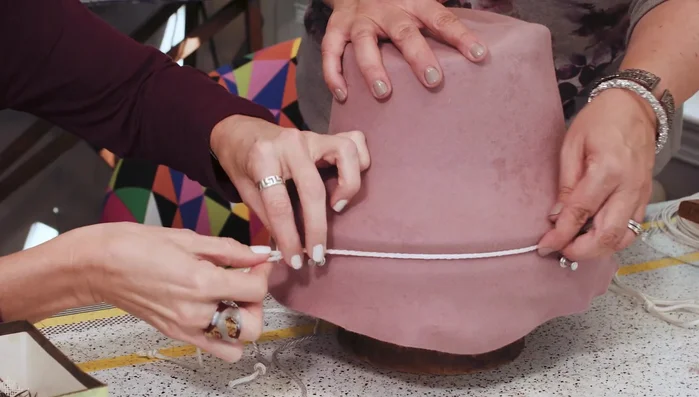
- Secure the fabric tightly around the hat block using a cord, cinching it like a belt.
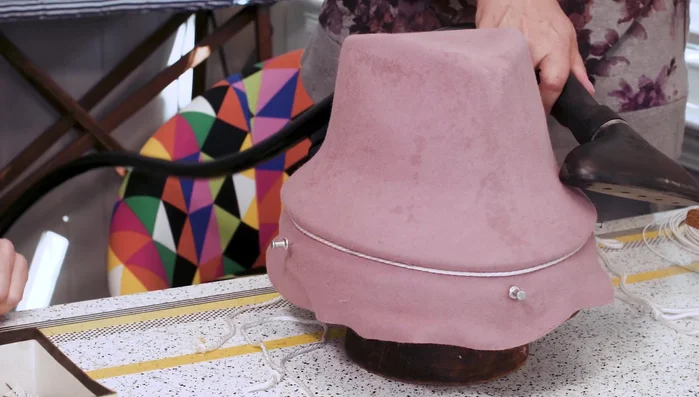
- Steam again to set the shape.
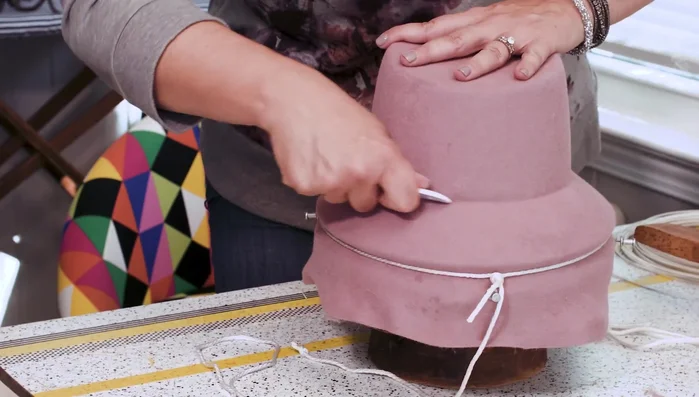
- Use a pointed tool to define the crown-brim juncture.

Shaping the Crown - Brush away loose fibers.
Shaping the Crown Final Shaping and Setting
- Add another cord to secure and steam again.
- Remove the hat from the block and let it dry completely (24 hours or more).
Final Shaping and Setting Brim Reinforcement
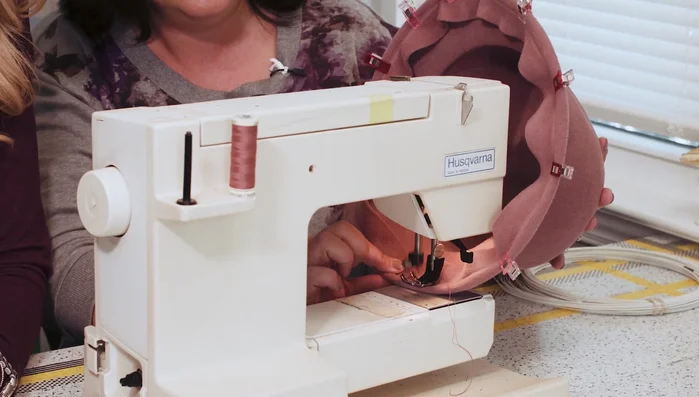
- Insert wire into the brim's edge.
- Sew the wire onto the brim using a sewing machine (slow and carefully).
Brim Reinforcement Finishing Touches
- Add a head-sizing ribbon.
- Decorate and embellish the hat. (Trimming)
Finishing Touches


Read more: DIY Stretchy Fingerless Gloves: Easy Sewing Tutorial
Tips
- Let the materials guide your hat design.
- Don't be afraid to experiment with different techniques and embellishments.
- Take your time and be patient—hat-making is a precise process.