Tired of the same old belts? Yearning for a unique accessory that perfectly complements your style and wardrobe? Then look no further! This tutorial will guide you through creating your own stunning, customized fabric belt in a surprisingly short amount of time. Forget expensive, mass-produced options – embrace the creativity and cost-effectiveness of a DIY project that lets you express your individuality. You'll be amazed at how simple it is to transform a piece of fabric into a stylish and functional belt that's entirely your own.
Whether you're a seasoned crafter or a complete beginner, this project is perfect for you. We’ll cover everything from choosing the right fabric and measuring your waist to securing the ends and adding your own personal touches. Ready to get started on your own one-of-a-kind accessory? Let's dive into the step-by-step process!
Preparation and Safety Guidelines
- Fabric (100% cotton quilt fabric recommended)
- Heavyweight fusible interfacing (or sew-on, depending on fabric)
- All-purpose thread
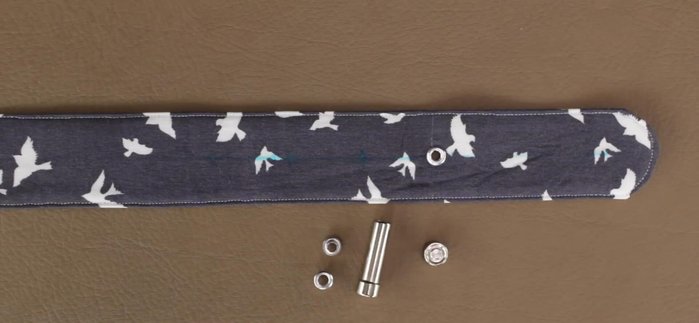
- Eyelets (5/32" size)
- Eyelet setting kit
- Hammer
- Hole puncher (or scissors)
- Tape measure
- Buckle (5/8" width recommended)
- Scissors
- Sewing gauge
- Fabric marker
- Pins
- Needle
- Rotary mat, cutter, and ruler (optional)
- Always use sharp scissors or a rotary cutter to prevent frayed edges and ensure clean cuts. Dull blades can lead to injury.
- If using a sewing machine, be mindful of your fingers and keep them away from the needle at all times. Use a seam ripper carefully to avoid pricking yourself.
- When working with fabric dyes or paints, ensure adequate ventilation and wear appropriate protective gear like gloves and a mask to avoid skin or respiratory irritation.
Step-by-Step Instructions
Measure and Cut Fabric
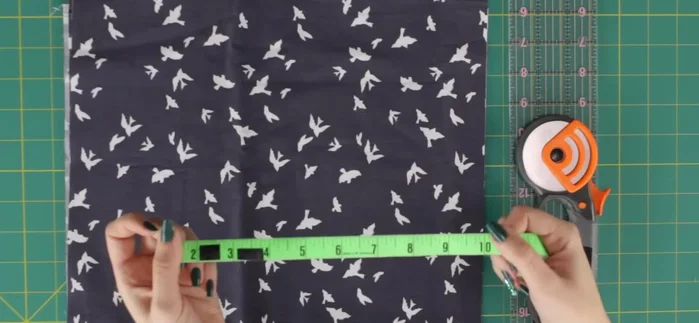
- Measure your waist and add 11.5 inches for overlap.
- Determine fabric width based on buckle and desired belt width; add 1 inch for seam allowance. Cut fabric and interfacing to the calculated dimensions.

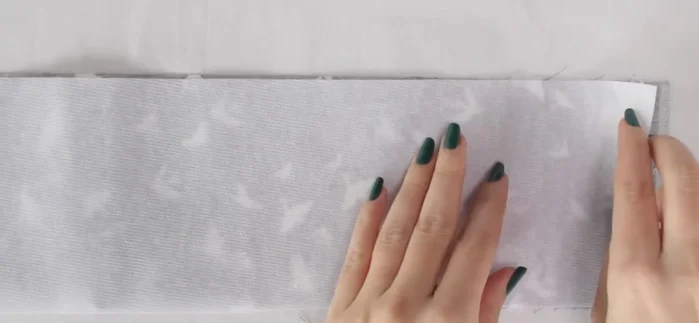
Measure and Cut Fabric Fuse Interfacing
- Fuse interfacing to the wrong side of the fabric using a press cloth and iron.
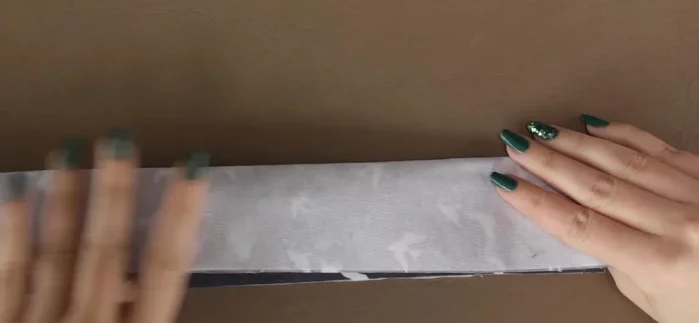
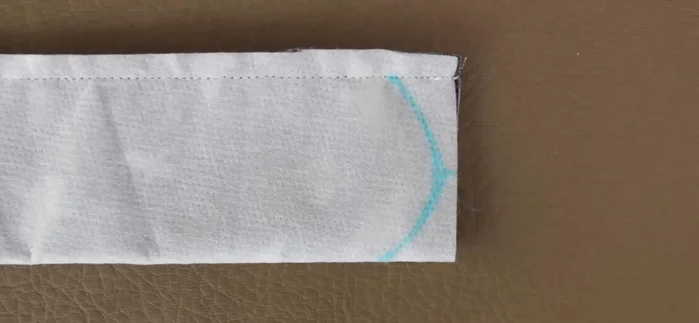
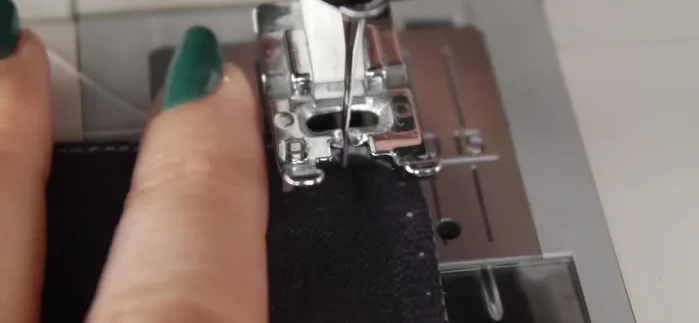
Fuse Interfacing Sew and Shape the Belt
- Fold fabric in half lengthwise, right sides together, and sew along the long edge with a ½-inch seam allowance.
- Trim seam allowance, leaving ¼ inch. Draw desired shape on one end and stitch along the line.
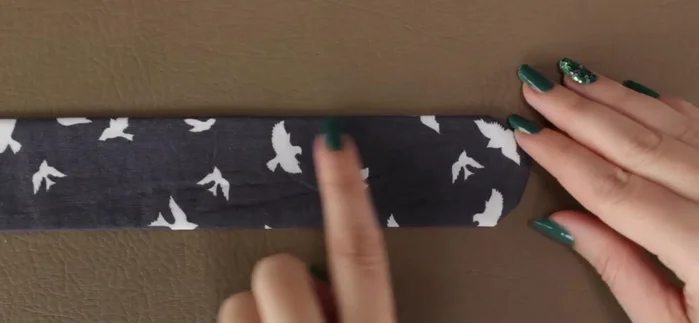
Sew and Shape the Belt Turn and Topstitch
- Turn the belt right-side out using a tool like a paintbrush or knitting needle.
- Press the belt flat and topstitch around the perimeter (except the open end) using a contrasting thread.
Turn and Topstitch Prepare for Buckle
- Baste across the open end at ¼-inch mark. Mark a fold line 1.5 inches from the edge.
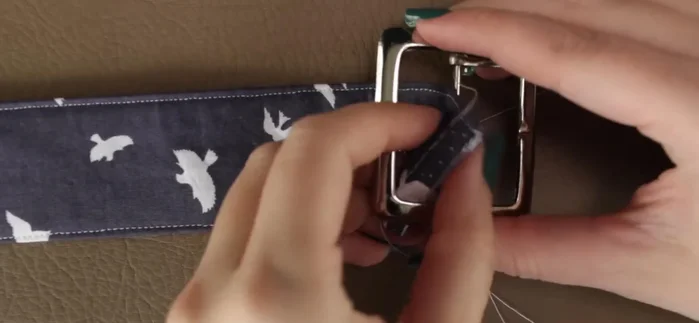
Prepare for Buckle Attach Buckle
- Place an eyelet at the center of the fold line, using a hole puncher or seam ripper to create a hole. Set the eyelet using the eyelet setting kit and hammer.
- Slip the fabric through the buckle, then fold and hand-sew the raw edge onto the fold line.
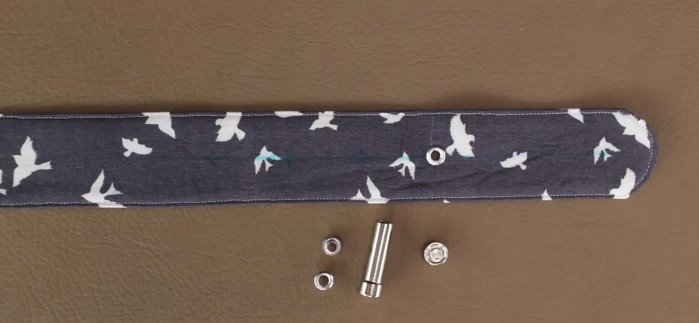
Attach Buckle Add Additional Eyelets
- Mark and add additional eyelets to the other end of the belt, spaced approximately 1 ¼ inches apart, using the same method as before.
Add Additional Eyelets Finishing Touches
- Remove basting stitches and enjoy your new belt!
Finishing Touches


Read more: DIY Stretchy Fingerless Gloves: Easy Sewing Tutorial
Tips
- Use heavyweight fusible interfacing for lightweight fabrics to add stability.
- A contrasting topstitch will make the belt look more finished.
- Cut notches into curvy seams to prevent bunching.
- Use a hole puncher or seam ripper to create the holes for the eyelets.