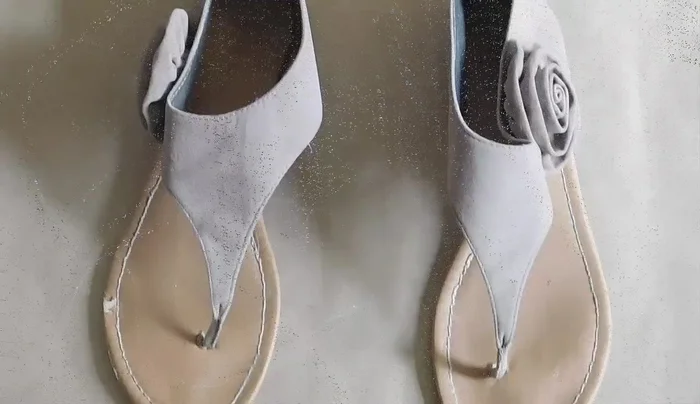
Summer's here, and while your favorite sandals might be showing some wear, don't banish them to the back of your closet just yet! A little creativity and some simple crafting supplies can transform those tired-looking shoes into stylish, personalized summer staples. This DIY project will guide you through a fun and easy beaded and tasselled sandal upgrade, breathing new life into your beloved footwear and adding a touch of bohemian chic to your wardrobe. Imagine the possibilities: vibrant colours, playful textures, and a unique design all tailored to your personal style.
Forget expensive new shoes – with just a few beads, some colourful tassel making cord and a little patience, you can achieve a stunning makeover. This inexpensive and rewarding project is perfect for crafting enthusiasts of all skill levels. Ready to elevate your summer sandal game? Let's dive into the step-by-step instructions and get crafting!
Preparation and Safety Guidelines
- Sandals
- Disinfecting wipes
- Textile paper (optional)
- Textile paint (optional)
- Sharpie or other fabric marker (optional)
- Fabric or other covering (optional)
- Trim (two colors)
- Hot glue gun
- Hot glue sticks
- Measuring tape
- Scissors
- Copper beads
- Needle
- Thread
- Thimble
- Baker's twine
- Embellishments (optional)
- Use strong, high-quality beads and cord that won't easily break or fray. Cheap materials can lead to the embellishments falling off and potentially causing injury.
- Avoid using sharp or pointy beads that could poke or scratch your skin, especially on areas that will come into contact with your feet.
- Ensure all knots are secure to prevent beads or tassels from detaching and becoming a choking hazard or tripping hazard.
Step-by-Step Instructions
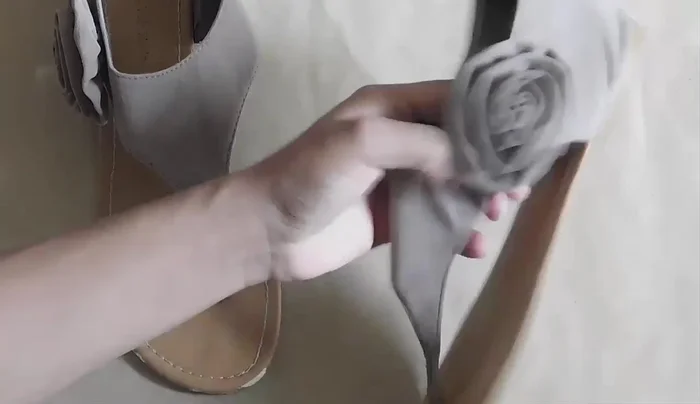
Clean and Prepare Sandals
- Clean sandals.
- Prepare sandals (remove extra residue, loose threads).

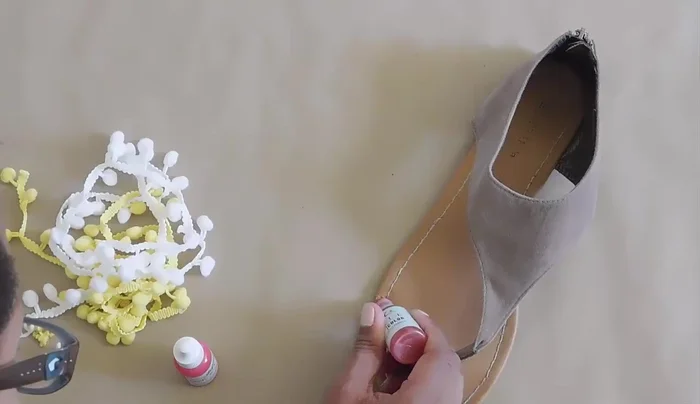
Clean and Prepare Sandals Optional: Enhance Sandal Color
- Add textile paper or paint to enhance sandal color.
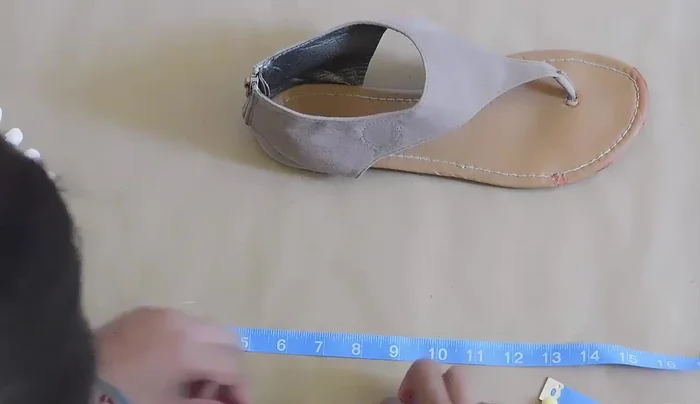
Optional: Enhance Sandal Color Measure and Cut Trim
- Measure the top of the sandal to determine trim length.
- Cut trim, adding extra length to prevent fraying.
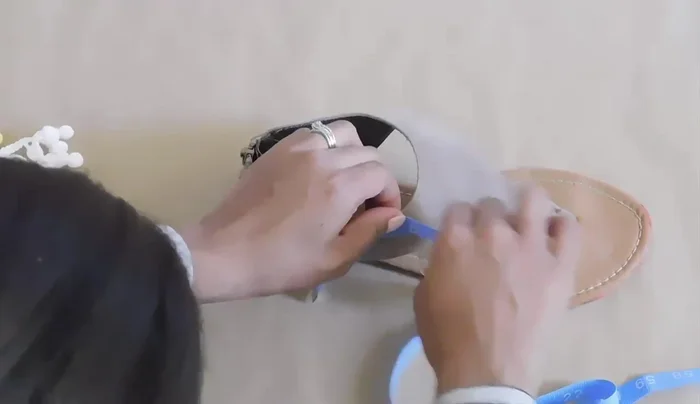
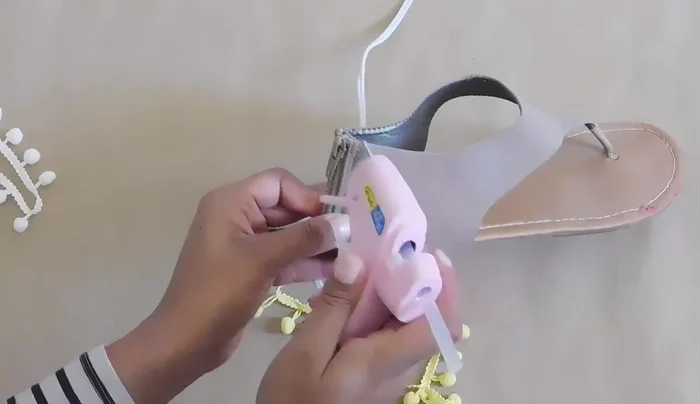
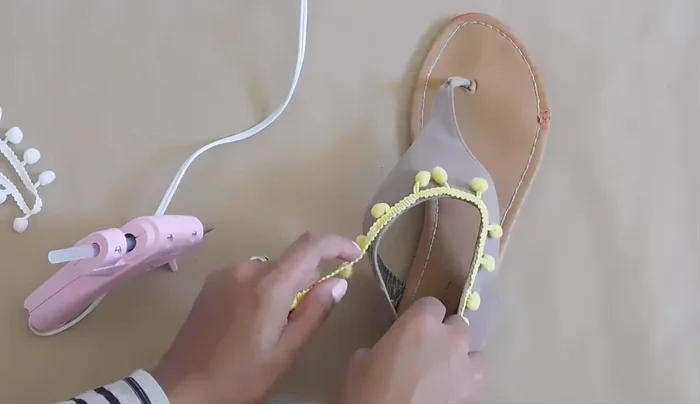
Measure and Cut Trim Apply Trim to Sandals
- Apply hot glue to the sandal and attach trim, working in sections.
- Attach a second color of trim underneath the first.
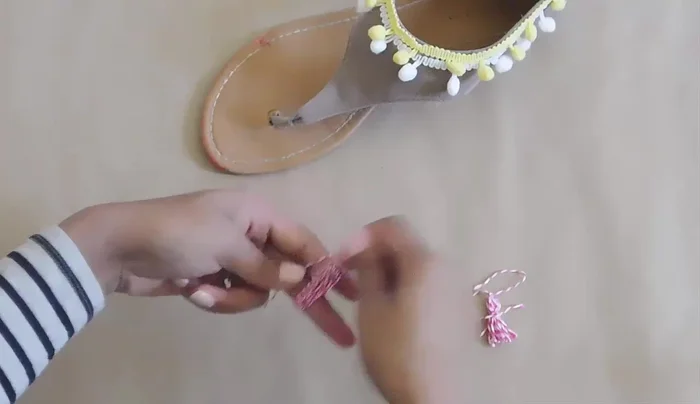
Apply Trim to Sandals Make Tassels
- Make tassels from Baker's twine.
Make Tassels Attach Tassels
- Arrange tassels and glue them to the sandal.
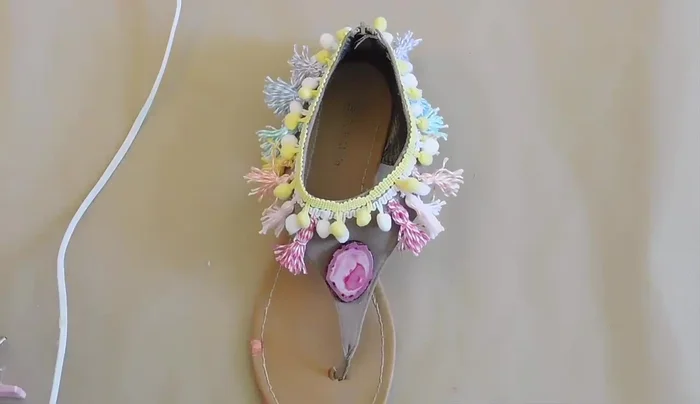
Attach Tassels Add Embellishments
- Add copper beads and other embellishments as desired.
Add Embellishments Secure Heavy Embellishments
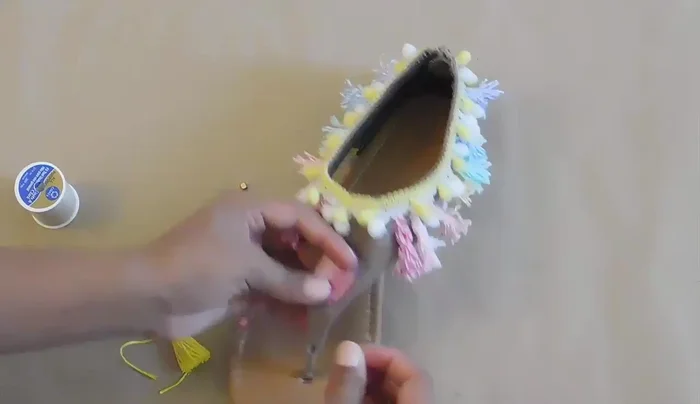
- Sew on heavier embellishments for extra security.
Secure Heavy Embellishments

Read more: DIY Reversible Baby Slippers: Easy Sewing Tutorial
Tips
- Work in sections with hot glue to prevent drying.
- Use a binder clip or your hands to hold trim in place while gluing.
- Plan tassel placement before gluing.
- Be careful when working with hot glue to avoid burns.
- Secure heavier embellishments with thread for extra durability.