Summer sandals offer breezy comfort, but the flimsy soles often leave feet aching after a long day. This year, ditch the disappointing soles and embrace the satisfying craft of DIY crochet! Creating your own crochet sandal soles is surprisingly easy, offering a personalized touch and a level of comfort store-bought sandals simply can’t match. You'll be amazed at how simple it is to transform inexpensive flip-flops or existing sandals into custom-made, supremely comfortable footwear perfectly tailored to your feet. The possibilities are endless, from playful colors and textures to intricate patterns that showcase your unique style.
Imagine the feeling of soft, customized soles cradling your feet all summer long. This project is perfect for crafters of all skill levels, requiring minimal materials and offering a rewarding sense of accomplishment. Ready to get started on this fun and functional summer project? Let's dive into the step-by-step process of creating your own comfortable and stylish crochet sandal soles.
Preparation and Safety Guidelines
- size 6.5 mm crochet hook
- worsted white yarn (two strands)
- shoelaces or chain cord
- flip-flop soles (optional)
- Use a sturdy yarn specifically designed for crocheting items that will bear weight. Avoid lightweight or delicate yarns as they may break or wear quickly.
- Ensure your stitches are tight and consistent to create a strong and durable sole. Loose stitches can lead to holes and discomfort.
- Before wearing your finished sandals, carefully check for any loose ends or areas that might snag or cause discomfort. Trim any excess yarn and reinforce weak points if needed.
Step-by-Step Instructions
Create the Sole Template
- Trace your foot onto paper to create a template for the sole size.

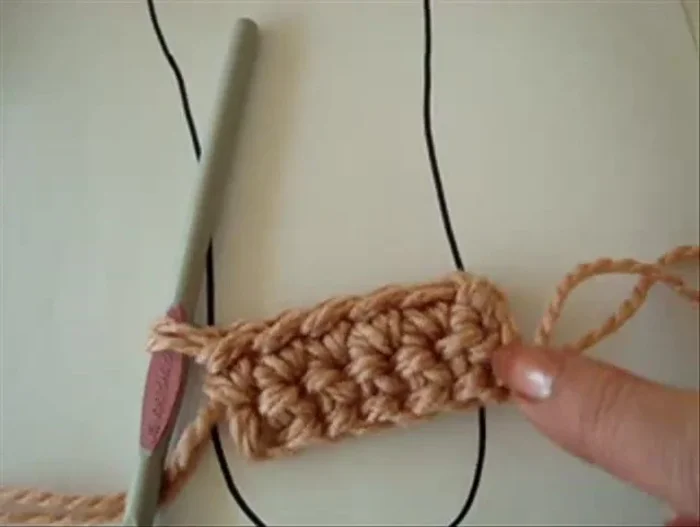
Create the Sole Template Initial Crochet Rectangle
- Create a foundation chain as wide as your traced foot.
- Single crochet in each stitch of the chain to create a rectangle.
- For wider feet, add one stitch on each end of the row (two single crochets in the first and last stitch).
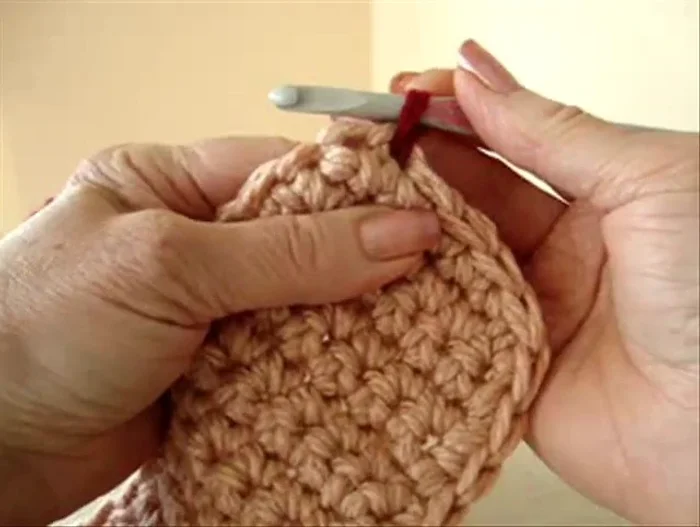
- Continue single crocheting until the rectangle is approximately the length of your foot sole.
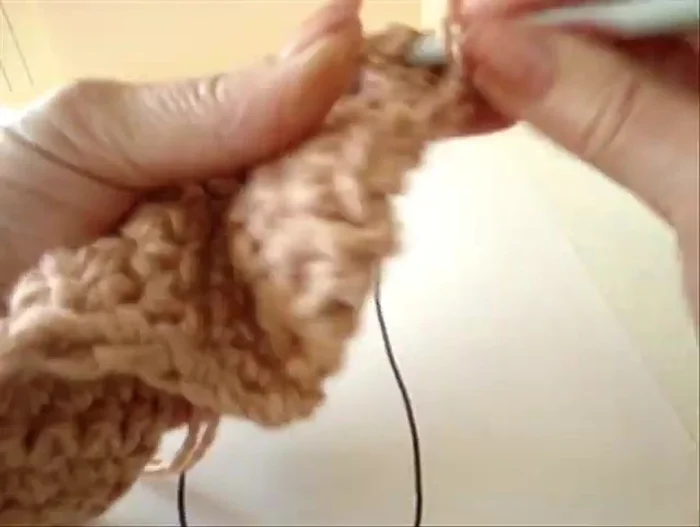
Initial Crochet Rectangle Round the Edges
- Single crochet all the way around the rectangle, skipping corner stitches to create a rounded edge.
- Slip stitch to join at the end of the round.
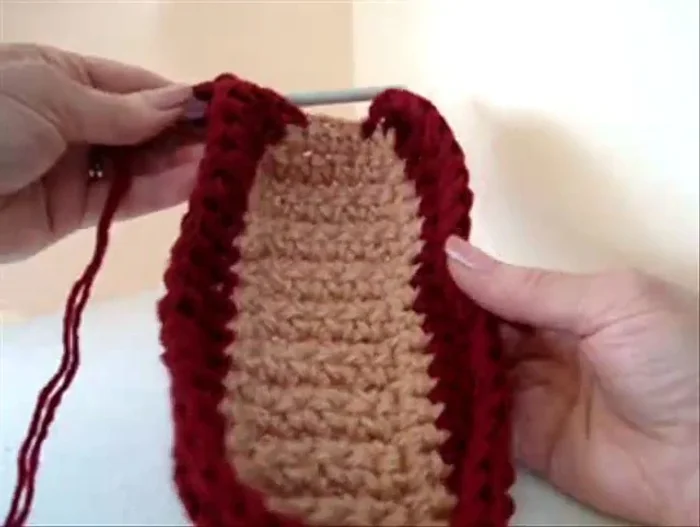
Round the Edges Reinforce and Shape the Edge
- Attach yarn and single crochet around the edge of the sole, leaving two stitches unworked at the heel.
- Create several rows of single crochet around the edge, skipping a stitch at each corner to round it.
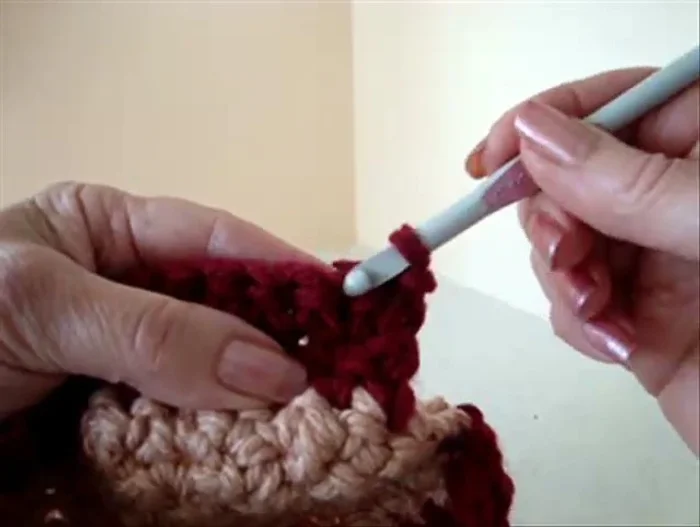
- For the last row, skip a stitch at the beginning and end, slip stitch to join, and fasten off.
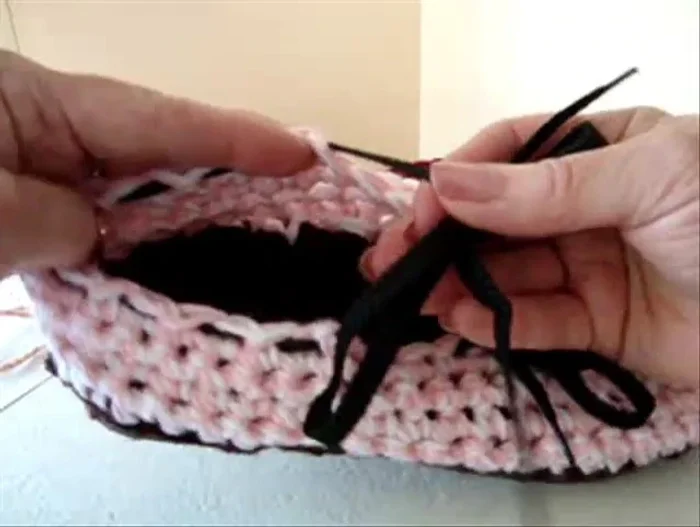
Reinforce and Shape the Edge Attach Fastening
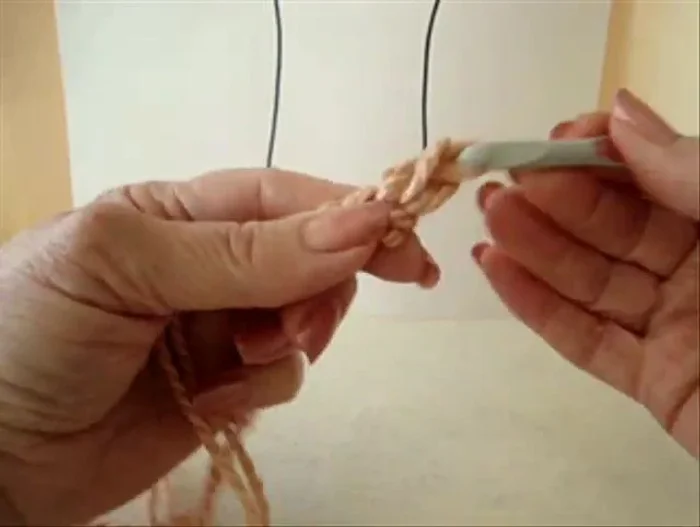
- Thread shoelaces or a chain cord through the holes for fastening.
Attach Fastening


Read more: DIY Reversible Baby Slippers: Easy Sewing Tutorial
Tips
- Don't worry if your rectangle is a bit smaller than your sole; you'll crochet around the edges.
- For longer-lasting sandals, consider using durable flip-flop soles instead of crocheting directly onto foam.